Connexion Pointe® Online Help
Pointe Profile® User’s Guide
Video Quickstart Guide
These videos will help you get up and running with Pointe Profile® fast. If you need more detailed information just scroll down to the easy-to-navigate user guide and search by keyword. Connexion Pointe® Univerity videos are HERE.

Minimum System Requirements
Connexion Pointe® is designed to be user-friendly and deliver a similar experience for Mac® and Windows® users. This article details the minimum operating system and web browser requirements for Mac® and Windows®.
These requirements are subject to change without notice.
1. Mac

Operating System: OSX Yosemite version 10.5 or newer recommended.
Recommended Browser: Google Chrome – Version 60 or newer, other browsers may experience technical difficulties.
Webcam & Microphone – built-in microphone and webcam strongly recommended, but most external webcams and microphones should be OK.
Internet Connection – Video files are large! Wired high-speed internet connections yield the best results, but Connexion Pointe® has been tested to work well with strong wireless high-speed internet connections. Public wifi is not recommended, and weak internet connections may result in technical difficulties.
Known Issues – Having multiple webcams and microphones connected and active has been shown to cause intermittent problems while recording video interviews on Connexion Pointe®. We strongly recommended that additional devices of this type be disabled while taking interviews on Connexion Pointe®.
Chat and online meeting software such as (but not limited to) Go To Meeting, WebEx, JoinMe, and AnyMeeting are all known to cause intermittent problems while recording video interviews with Connexion Pointe®. We strongly recommended that such programs be disabled while taking interviews on Connexion Pointe®.
1.1 Webcam

If your computer has a built-in webcam, we strongly recommend that you use it. If your computer doesn’t have a webcam, you’ll need to go to a machine that does, or you’ll need to purchase a compatible webcam. Video interviewing is here to stay and gaining popularity by the day, so your investment in a quality webcam will be well worth the trouble. Most USB web cameras should be fine, but you’ll want to test to be sure. Portable camera’s like Flip, Zoom Q2N and GoPro are not supported or recommended for use with Connexion Pointe®. Next, you’ll need a microphone and headphones.
1.2 Apple® EarPods with Microphone

Headphones are required to record the best audio with Connexion Pointe® and avoid audio feedback. Apple® EarPods*** with the built-in microphone are highly recommended for this purpose but not required. Several headphones and microphones were tested, Apple® EarPods*** are widely available, work well on Mac® and Windows® operating systems and consistently delivered the best results. Be sure to test your headphone/microphone set of choice before taking important interviews on Connexion Pointe®.
***Apple®, EarPods, Mac® and Windows® are trademarks of their respective owners. All Rights Reserved. Connexion Pointe® is not affiliated with these brands in any way.
2. Windows
Operating System: Windows 8.1 or newer. Windows 10 has not been tested and is not supported for use with Connexion Pointe® applications at this time.
Recommended Browsers: Google Chrome – Version 52.0.2743.116m (64-bit) or newer. Using other browsers with Connexion Pointe® may result in technical difficulties.
Webcam & Microphone – built-in microphone and webcam strongly recommended, but most external webcams and microphones should be fine.
Internet Connection – Video files are large! Wired high-speed internet connections yield the best results, but Connexion Pointe® has been tested to work well with strong wireless high-speed internet connections. Public wifi is not recommended, and weak internet connections may result in technical difficulties.
Known Issues – Having multiple webcams and microphones connected and active has been shown to cause intermittent problems while recording video interviews on Connexion Pointe®. It is strongly recommended that additional devices of this type be disabled while recording interviews on Connexion Pointe®.
Chat and online meeting software such as (but not limited to) Go To Meeting, WebEx, JoinMe, and AnyMeeting are known to cause intermittent problems while recording video interviews with Connexion Pointe®. It is strongly recommended that these or similar applications be disabled while recording interviews on Connexion Pointe®.
2.1 Webcam.

If your computer has a built-in webcam, we strongly recommend that you use it. If your computer doesn’t have a webcam, you’ll need to use a computer that does, or you’ll need to purchase a compatible webcam. Video interviewing is here to stay and gaining popularity by the day, so your investment in a quality webcam will be well worth the trouble. Most USB web cameras should be fine, but you’ll want to test to be sure. Portable camera’s like Flip, Zoom Q2N and GoPro are not supported and not recommended for use with Pointe Profile®. Next, you’ll need a microphone and headphones.
2.2 Headphones and Microphone

Headphones are required to record the best audio with Connexion Pointe® and avoid feedback. Apple® EarPods*** with the built-in microphone are highly recommended for this purpose but not required. While several headphones and microphones were tested, Apple® EarPods*** are widely available, work well on Mac® and Windows® operating systems and consistently delivered the best results. Be sure to test your headphone/microphone set of choice before taking important interviews on Connexion Pointe®.
***Apple®, EarPods, Mac® and Windows® are trademarks of their respective owners. All Rights Reserved. Connexion Pointe® is not associated with these brands in any way.
What is Connexion Pointe®
Question: Why should candidates use Connexion Pointe®?
Answer: To provide recruiters with everything they need to know to make an educated decision about you at first contact. With our Pointe Profile® application you can present your resume, an excellent video interview and supporting video content. This speeds up the screening process for everyone!
1. What is Connexion Pointe®?

Connexion Pointe® is a cloud-based, self-service video interviewing tool for candidates video that also features screening tools for recruiters. Our platform has two coordinated applications: Pointe Savant® is for recruiters, and Pointe Profile® is for candidates.
Experts suggest that 70-85% of positions conclude through networking, which is why both of our applications feature a tool for creating and sharing asynchronous video interviews. Recruiters or candidates can initiate the screening process, recruiters can follow up, and everyone can get to a decision quickly.
1.1 Pointe Profile® is for candidates.

Pointe Profile® is our candidate application. In addition to creating and sharing asynchronous video interviews, Pointe Profile® features tools for candidate self-development with an emphasis on behavioral and video interviewing, delivering other screening-related video content to Pointe Savant® users, and responding to their follow-up questions. Pointe Profile® provides candidates the best solution for automated Applicant Tracking Systems – networking and connecting with decision makers!
Pointe Profile® has a $1 sign-up fee and is otherwise free for life. The $1 fee is waived when candidates are invited to take an interview created by a Pointe Savant® user.
1.2 Pointe Savant® is for recruiters, businesses, and organizations.

Pointe Savant® is our recruiter/organizational application. In addition to creating and sharing asynchronous video interviews, Pointe Savant® features tools for managing online screening events, candidate evaluation, asking follow-up questions, and a robust database for managing video interviews submitted by Pointe Profile® users.
Pointe Savant® requires a monthly subscription for access to the service. An additional per-interview charge can be mitigated by allowing candidates to create and submit their own interviews.
Note: Pointe Savant® is not an automated-candidate-selection device! It does not contain a resume parser or technology to rank candidates via keyword-search or algorithm automatically, and it is not a replacement for real recruiters and hiring managers! Instead, Pointe Savant® is explicitly designed to help them maximize their valuable experience to screen a lot more candidates quickly.
1.3 Meet our virtual characters.
Our platform features multi-lingual virtual interviewers that are available 24/7/365 to simulate face-to-face interviews, keeping decision makers free to focus on evaluating excellent candidate content.
1.4 How does it work?

Our system generates a link for each screening interview created. The link can be shared via email, resume or even posted on a job board. Recruiter or candidate functionality is activated depending on the application used to create the interview.
2. Why should candidates use it?

With Pointe Profile®, candidates no longer have to wait for recruiters to start the screening process. Candidates can begin the screening process by interviewing themselves, sharing their interview with targeted recruiters users and providing a clear pathway for verifying the screening content presented. This creates a unique opportunity to stand out by lowering recruiters’ workload and costs without sacrificing quality. This also creates a strong incentive for recruiters to take a look.
3. Why should recruiters use it?

Until now, the screening process was a one-way street that began with organizational outreach or recruiters screening for talent. Organizations paid most of the costs associated with screening and faced the logistical challenges of online candidate pools growing exponentially. With Pointe Savant®, recruiters can deploy asynchronous video interviews using our virtual army of multi-lingual interviewers capable of screening hundreds of candidates per hour and delivering the content to an easy-to-use online interface designed to help hiring teams make decisions quickly. Furthermore, inbound candidates can present themselves with excellent video screening interviews already done, efficiently leveraging their ambition to lower recruiters’ workload and screening costs.
As previously stated, Pointe savant® requires a monthly subscription for access to the service, and there is an additional per-interview charge. Mitigating the per-interview cost is easy because Pointe Savant® features the ability to accept candidate generated interviews and information.
3.1 What do you mean by “accept candidate generated interviews”?
Candidate generated interviews are interviews created by candidates in the Pointe Profile® application. The interviews are designed at candidates’ discretion and not subject to the vagaries of recruiters. The candidate chooses the questions and can support the interview with additional video-based content.
4. How can Pointe Profile® interviews be useful if recruiters are not selecting the questions?
An excellent question!
The key is in how the interviews are created. The 800+ job titles in our Pointe Savant® Screening Event Builder™ and Pointe Profile® Interview Builder™ applications are based on the United States Standard Occupational Code. We’ve created recommendations for soft skills for many of these job titles (and we’re building more as you read this).
This is important for a few reasons:
1. It gives everyone a similar starting point for building screening interviews,
2. It standardizes an organizationally acceptable format for the exchange of screening information,
3. It provides an easy-to-use automated framework for expanding your candidate pool to include similar job titles.
4.1 Competency-Based Interviews
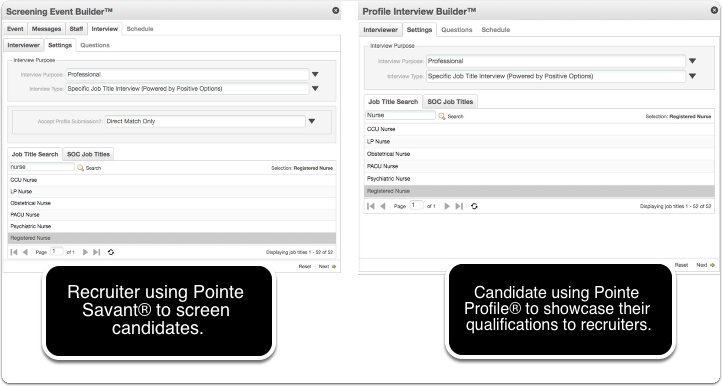
For this example, let’s use the job title of Registered Nurse. In the photo above, the Pointe Savant® user (on the left) is a hospital/recruiter looking to hire a Registered Nurse. The Pointe Profile® user (on the right) is a Registered Nurse looking for a position. They both log in to their respective applications and begin creating a screening interview for the Registered Nurse position.
4.2 Same starting point: everyone answers the same introductory questions.

The first two questions of the interview are the same, regardless of which application created the interview. These questions cannot be re-ordered, removed, revised or replaced. Each question offers every candidate this equal 2-minute opportunity to introduce themselves and lay claim to their desired position while giving hiring managers complete control over how much of the interview they review.
4.3 Standardized format: Competency-based behavioral interview questions
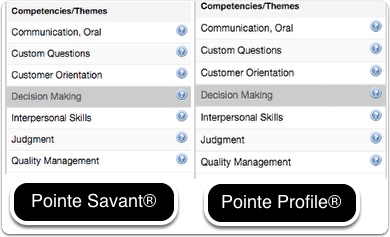
After selecting a job title, both of our interview builders present the same list of Competencies/Themes to each user.
4.4 Competency/Themes Definitions
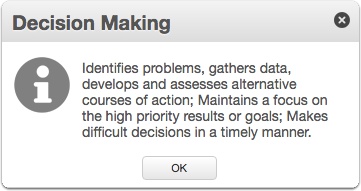
Each of these Competencies/Themes defines a job-relevant “soft-skill” for the position. Let’s use “Decision Making” for our example.
4.5 Question selections.

Even if the Pointe Savant® user chooses question #2 in this category, but the Pointe Profile® opts for question #1, both questions are job-related and directly relevant to an essential soft skill (Decision Making) for the position. The Pointe Savant® users’ time is not wasted, and they can still ask their preferred question as a follow-up using Pointe AskMe™.
4.6 An easy-to-use automated framework for expanding your candidate pool.
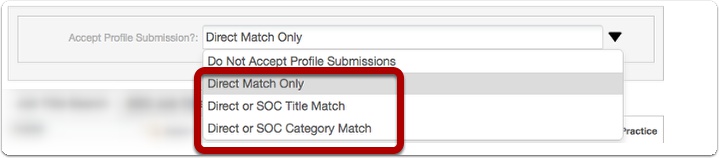
In addition to matching Competency/Themes, Pointe Savant® Screening Event Builder™ features an easy-to-use tool that allows recruiters to expand the candidate pool by accepting similar job titles from other SOC categories. (Using this feature is easy, and there is a full step-by-step tutorial in our help guide).
4.7 Different job titles may have similar competencies/themes.
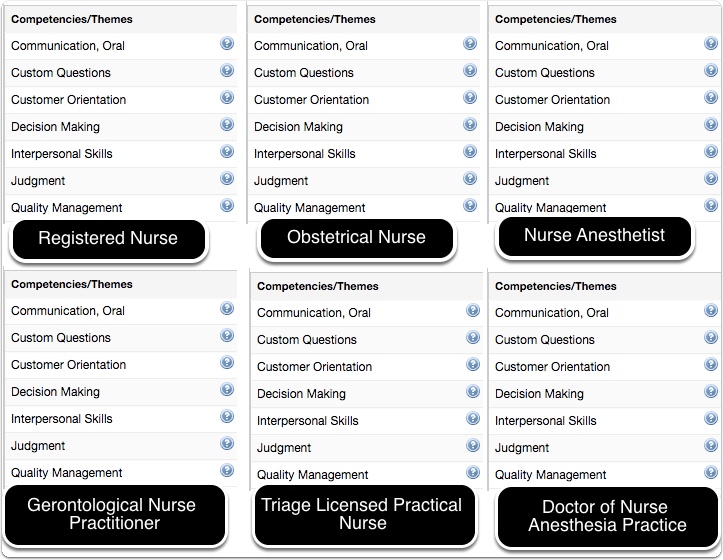
Even though some Pointe Profile® users in the expanded candidate pool will have different job titles, the overall Competencies/Themes for screening are remarkably similar. This gives Pointe Profile® users the ability to be considered for multiple positions with the same interview while hiring managers can increase their candidate pool without changing the essential focus of their screening event.
For many recruiters, screening questions become more organizationally specific as candidates advance through screening processes. Connexion Pointe® platforms natively support this practice. Everybody is on the same page before the first contact happens.
I’ll show you how the system works now 🙂
Activate Your Account.
Here’s how you get started.
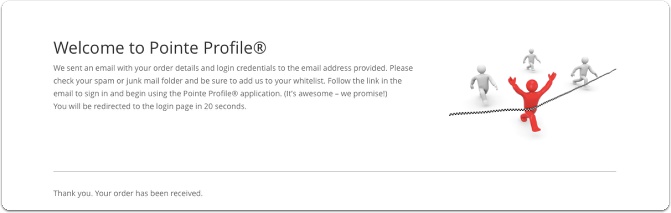
Welcome to Connexion Pointe®! This information will guide you through the necessary steps to get your Pointe Profile® ready to use.
1. Activate your account.
After signing up for Pointe Profile®, we’ll immediately send you three emails.
1.1 Activate your account.

Check your email. You should receive 3 or 4 emails as pictured.
1.2 Activate your account.

1. an activation email that serves to verify that you’re not a robot and that you have access to the email used to sign up for the account. The account must be activated before you can use it! Your username and password will not be accepted until the account is activated.
2. an email with your username and password.
3. a receipt showing that you signed up and that your account is free.
1.3 Activate your account.
After 20 seconds you’ll be redirected to the sign in page. Activation is a requirement for logging in to your account.
1.4 No link?
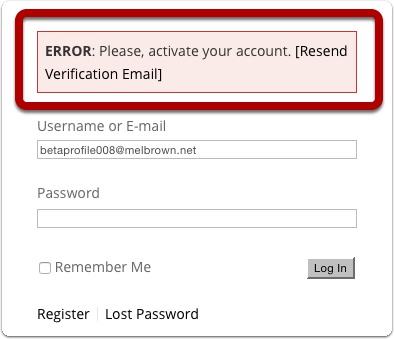
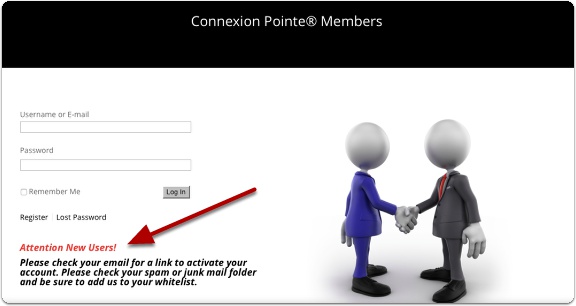
If you did not receive the activation email, enter your email address and password on the login page. Then click the “[Resend Verification Email].” Be sure to check your spam and junk mail folders.
Note: You must use the email address provided to gain access to another link. If you entered your email address incorrectly, you’d need to re-register for a new account with the correct email address.
Creating and Uploading Resume and Photos
You’ll need to upload a copy of your RESUME and a PHOTO.
Here’s some addiditional info in case you need help creating these files.
Your resume must be in PDF format (other formats are not accepted) with a file size not exceeding 1mb.
How to Create a PDF File
Here’s how WhatIs.com defines PDF documents:
PDF (Portable Document Format) is a file format that has captured all the elements of a printed document as an electronic image that you can view, navigate, print, or forward to someone else. PDF files are created using Adobe Acrobat, Acrobat Capture, or similar products.
There are several ways to create PDF documents. Most of the time, documents are converted from other formats like Word, Pages, PowerPoint, Keynote, etc. to PDF format. If your resume is in one of these formats, this guide should help you get it converted over to PDF and ready to use on ConnexionPointe®.
Before following the instructions below, we invite you to try our PDF resume template HERE.
1. Microsoft Word 2007 or newer (Windows)
Note: First, you need to download a free plug-in from the Microsoft site
(if you haven’t already done so):
1.1 Microsoft Word 2007 or newer (Windows)
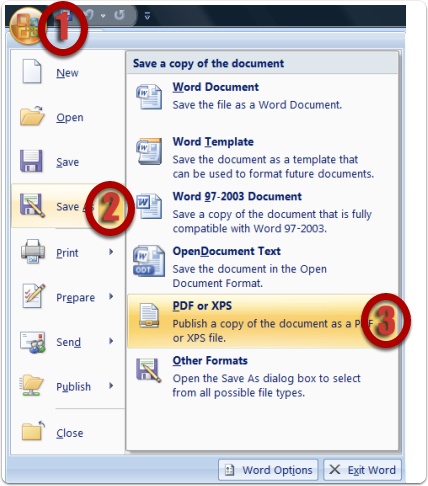
1. From the top left of the screen, click on the Microsoft Office logo.
2. From the drop-down menu, select Save As.
3. Select PDF or XPS.
4. Save the file.
2. Mac OS X
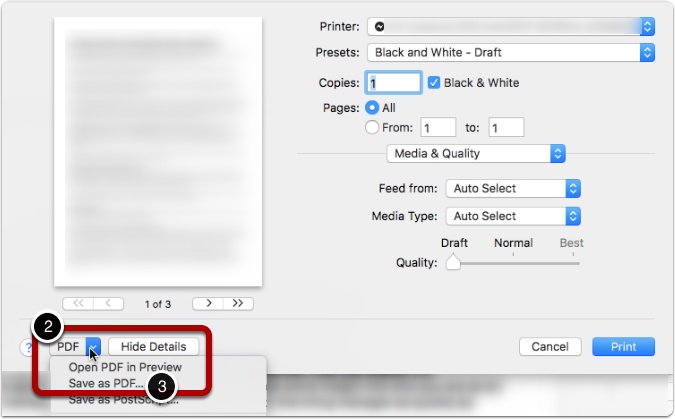
Macs can create PDF documents natively (you don’t need to install any additional software). These steps will be similar to Microsoft Office for Mac, iWork suite, Preview, Pages, Keynote, etc.
1. With your document open, choose the File menu and select Print.
2. In the Print dialog box, from the bottom left, click on PDF. A drop-down menu will appear.
3. From the drop-down menu, select “Save as PDF.”
4. Save the file.
3. Open Office (Windows, Mac, and Linux)

If you use Open Office, the steps are the same on Windows, Mac, and Linux computers:
1. Open your document.
2. Click on the pdf icon (indicated by the red arrow).
3. Save the file.
The photo must be in .jpg or .jpeg format, not larger than 180 x 180 with a file size not exceeding 200kb. We highly recommend using professional headshots.
If you do not have a photo that fits these dimensions, you may resize your photo at one of these free websites:
Note: These links are provided as a courtesy and are not endorsed by or affiliated with Connexion Pointe® in any way. Use them at your own risk.
You may want to locate your resume and photo files and move them to your desktop. so they’re easy to find. Let’s upload them now!
Uploading your resume and photo.
Your contact information, resume, and a photo are required to use Pointe Profile®.
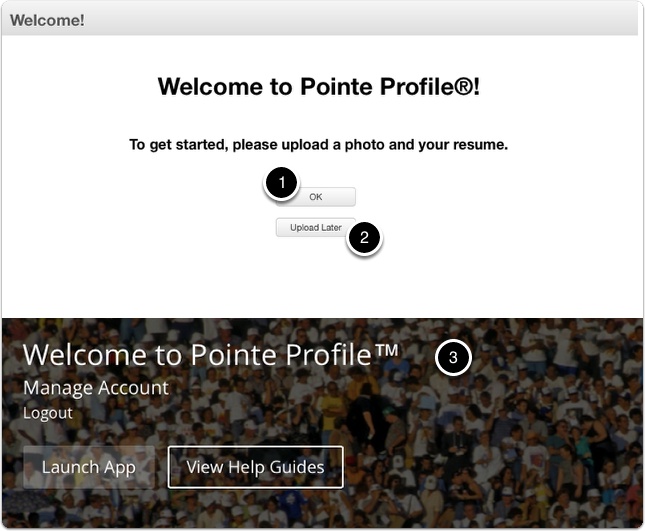
When you click the activation link to activate your Pointe Profile®, you’ll be logged directly into the Pointe Profile dashboard, where you’ll be prompted to upload your resume and photo.
1. Uploading these items is easy! If you have these files ready, click “OK.”
2. If you do not have these files ready, click “Upload Later.” Clicking “Upload Later” will log you out. Clicking “Upload Later” results in redirection to this page where you can log out, view your receipt, return to the app or access the Help Guides. (Opening the Help Guide in a new tab or window is an excellent idea if you’d like to follow the guide while getting your Pointe Profile® ready).
2.1 Uploading your resume and photo.
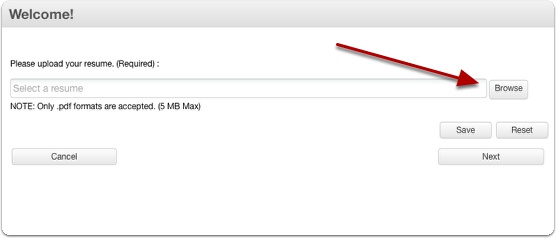
The system will prompt you to upload your resume first. To locate your resume click the “Browse” button.
2.2 Uploading your resume and photo.
Your resume must be in PDF format and can be no larger than 5mb.
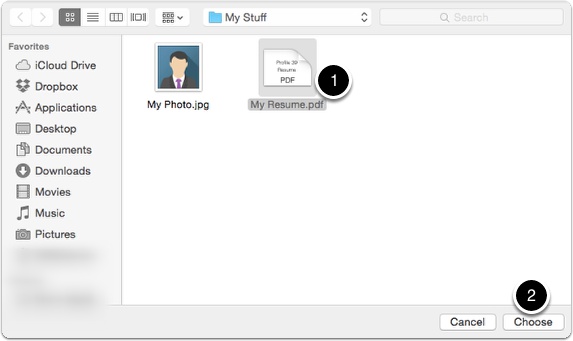
1. Navigate to the correct file, select it
2.3 Uploading your resume and photo.
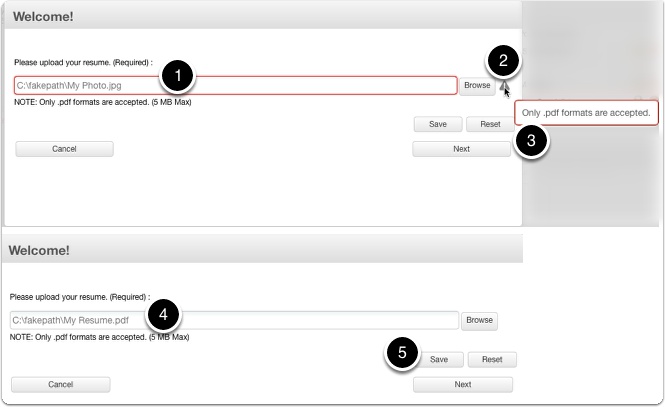
1. The file you select will appear here. If the file type is incorrect, the field will show a red outline.
2. To review the problem with your file, just hover your mouse over the exclamation mark, and the problem will be displayed.
3. To choose another file click the “Reset” button, then click “Browse” to start over.
4. When the correct file is selected,
5. click “Save” to upload the file.
2.4 Uploading your resume and photo.
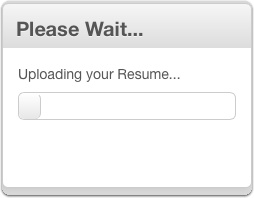
The system will show a progress bar while your file uploads.
2.5 Uploading your resume and photo.
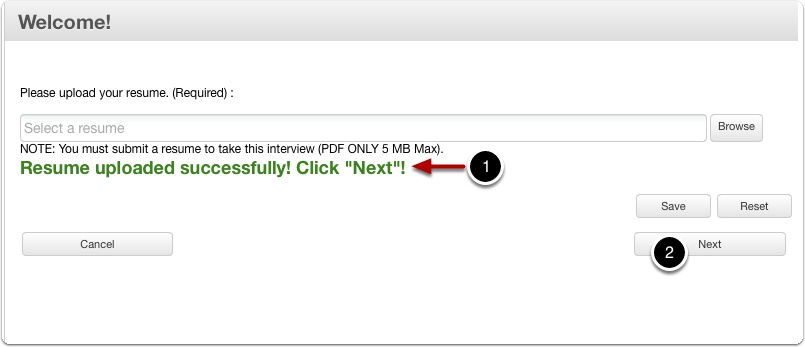
1. When your file is successfully uploaded, the system will let you know.
2. Click “Next” to upload your photo.
2.6 Uploading your resume and photo.
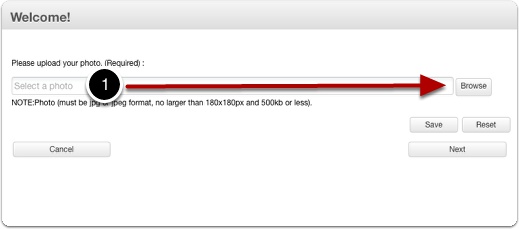
1. Uploading your photo is exactly like uploading your resume. To select a photo from your hard drive, start by clicking the “Browse” button.
2.7 Uploading your resume and photo.
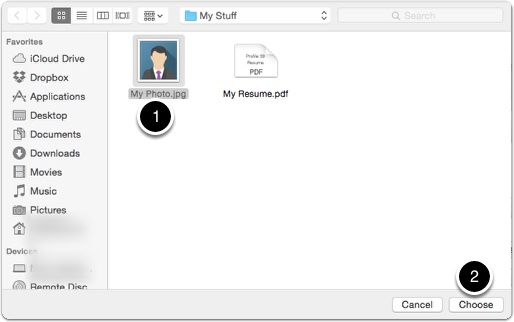
Your photo must be in JPG or JPEG format, 180 pixels X 180 pixels and no larger than 500kb.
1. Navigate to the correct file and select it
2.8 Uploading your resume and photo.
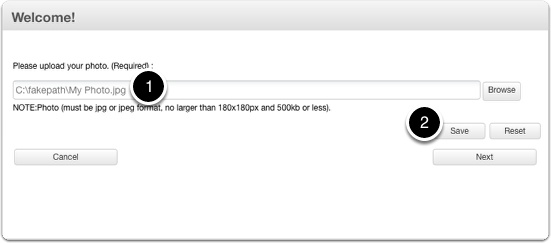
1. The file you selected will appear here.
2. Click “Save” to upload the file.
2.9 Uploading your resume and photo.
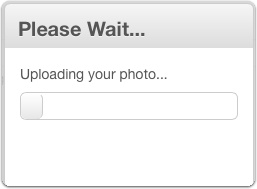
The system will show a progress bar while your file uploads.
2.10 Uploading your resume and photo.
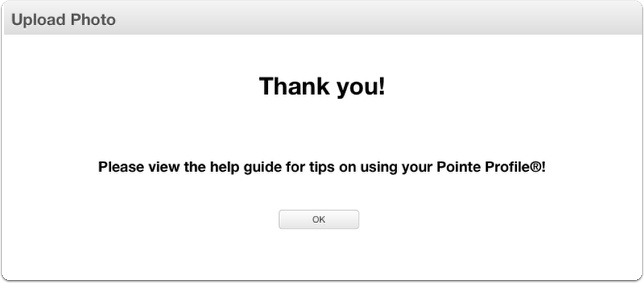
When your file is successfully uploaded, the system will let you know. Click “OK” to close the window.
Profile Dashboard
3. Pointe Profile® Dashboard.
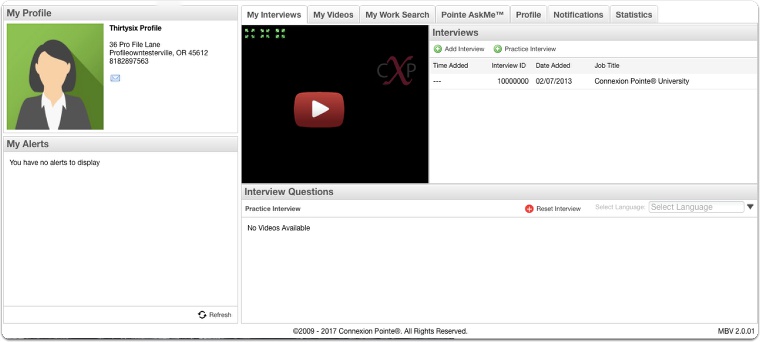
After uploading your files, you’ll have access to the Pointe Profile® dashboard. Your screen should look similar to the photo above. (Your contact information should be visible. If you don’t see it or if you’d like to edit the info, we’ll take care of that here.) Creating your own interview and taking video interviews by invitation requires complete necessary information, a resume in PDF format, and a photo in JPEG format. Sharing your Pointe Profile® with organizations requires you to have at least one complete video interview.
4. Automatic Log Out.
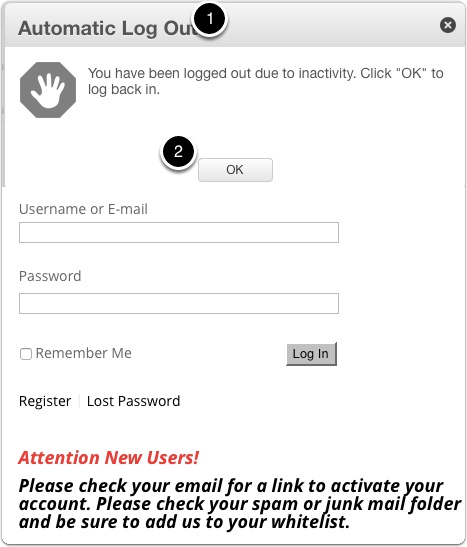
1. During long periods of inactivity, the system will automatically log you out.
2. If you see this alert, click “OK.”
3. The system will bring you back to the login page. To log back into the application, just enter your username and password.
4.1 Pointe Profile® Welcome Page
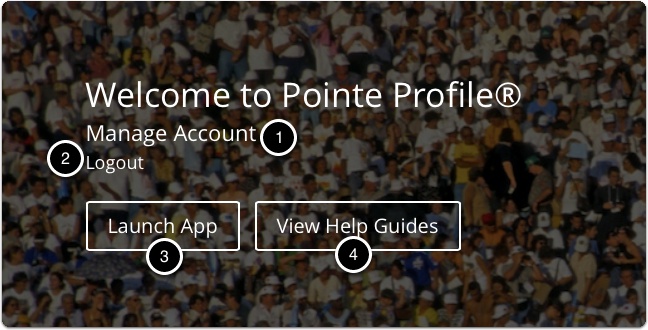
Next – just choose the appropriate link and click.
1 – Click the “Manage Account’ link to view your account subscription details and purchase receipts.
2 – Click the “Logout” link to exit the application.
3 – Click the “Launch App” button to return to the Pointe Profile® application.
4 – Click the “View Help Guides” button to navigate to the Pointe Profile® Help Guide.
5. Logging out.
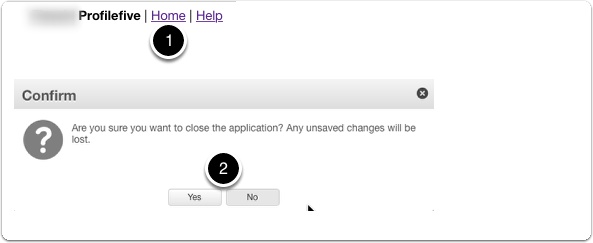
Before we get started, take a look in the top right corner.
1. When you’re done using your Pointe Profile® you can click the “Home” link to log out.
2. The system will ask you to confirm your decision to exit, just answer accordingly.
6. Getting help.
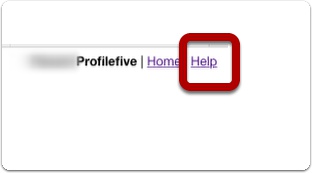
If you have questions about any aspect of using your Pointe Profile®, click the “Help” link. A new tab or window will open, so be sure that your browser is set to support multiple tabs or windows being open.
7. Edit contact information and selecting a theme.
![]()
Updating your Pointe Profile® contact information is easy. To get started, choose the “Profile” tab.
7.1 Edit contact information and selecting a theme.
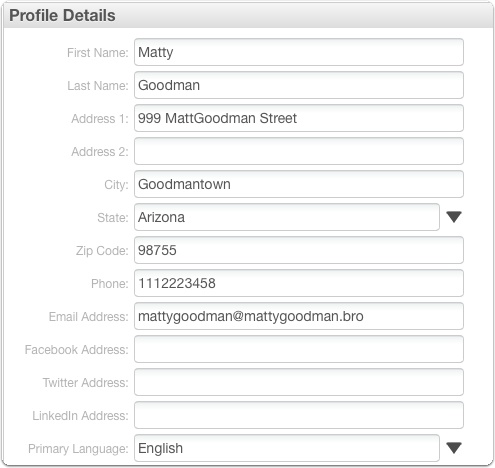
If your contact information is not present, you can add or edit it here. Locate the field labeled “First Name.” Click on it to add your name. Then add your last name and address information. You can use the “tab” key to move quickly through each field.
7.2 Edit contact information and selecting a theme.
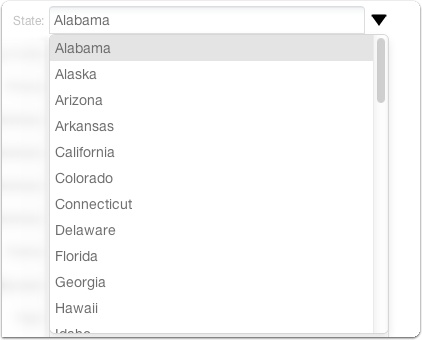
Choose your state from the drop-down menu, then add your zip code and a phone number.
7.3 Edit contact information and selecting a theme.
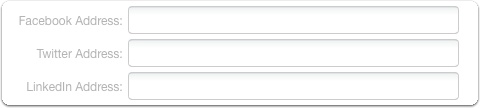
If you have a Facebook, Twitter or LinkedIn account and would like to share that information, add them to the appropriate fields.
NOTE – Social media addresses are OPTIONAL. They are NOT REQUIRED to use Pointe Profile®. We do NOT recommend sharing social media passwords with potential employers or organizations!
7.4 Edit contact information and selecting a theme.
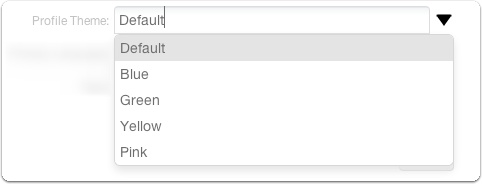
Select a theme color for your dashboard by clicking the Profile Theme drop-down menu and making a selection. This theme is only for your personal view of the Pointe Profile® dashboard. It does not affect how your information displays to others.
7.5 Edit contact information and selecting a theme.
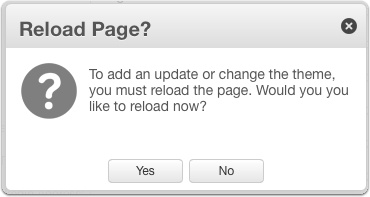
Click “Yes” to reload the page and see the new theme color. Click “No” if you don’t want to change the theme color.
8. Choose your primary language.

Choose your primary language.
Note: This function is not currently being used in the application yet, and it’s not required.
9. Be found. Be seen. Be visible. Add search tags.
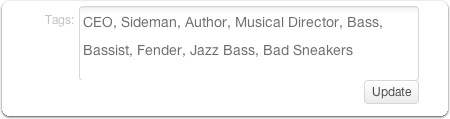
Add tags to your Pointe Profile® so that Pointe Savant® users can find you in their database searches*. Click “Update” to add the information.
Note: This function is not being used in the application yet, and it’s not required. In the very near future, (after you’ve shared your Pointe Profile®), your tags may help your consideration for other positions.
10. So far so good! View your “My Profile” box.
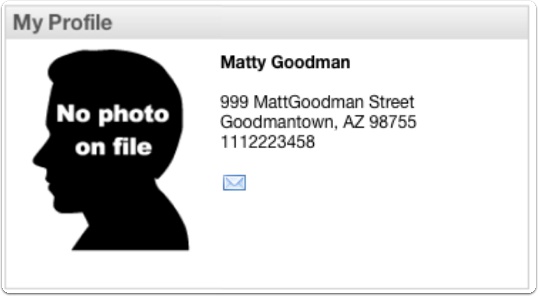
You should see all of your information and photo in the top-left corner of the “My Profile” section. In the unlikely event that you don’t (and your “My Profile” pane looks like the one pictured above), updating the resume and photo in your Pointe Profile® is easy, so let’s take a look at how to do that here.
Note: The social media icons should display below the email address. If you did not add Facebook, Twitter or LinkedIn addresses, those icons would not appear here.
10.1 Social Media Links
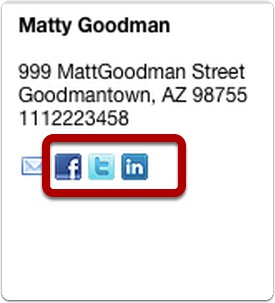
Note: The social media icons should display below the email address. If you did NOT add Facebook, Twitter or Linked addresses, their respective icons would NOT appear here.
11. Managing your PDF resume files.
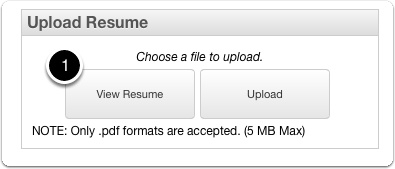
Updating your PDF resume is managed in the “Upload Resume” pane.
1. To view the currently uploaded resume, click the “View Resume” button. The resume will open in a new tab or browser window.
NOTE – Later, after you’ve recorded your own video interview, you’ll want to include a link to it on your resume. We recommend our excellent resume template to create a great looking PDF resume and cover letter that has a dedicated space for your interview link.
11.1 Managing your PDF resume files.
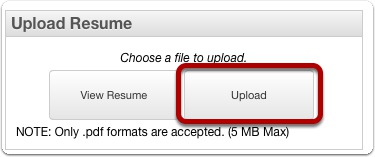
To upload your resume in PDF format, locate the “Upload Resume” pane. It’s on the right side near the top. Click the “Upload” button to find your PDF resume file on your hard drive.
11.2 Managing your PDF resume files.
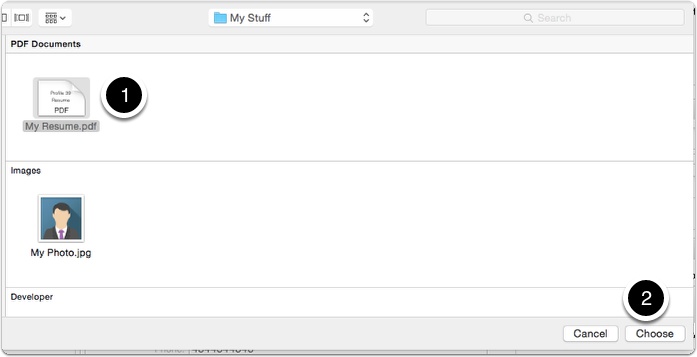
1. Navigate to your PDF resume file on your hard drive. The File MUST be SMALLER than 5MB. Files larger than 5MB will be rejected.
11.3 Managing your PDF resume files.
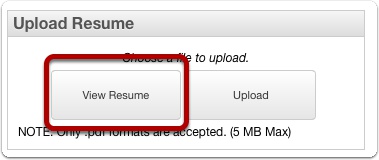
To view the uploaded resume, click “View Resume.”
12. My Profile Window Complete!
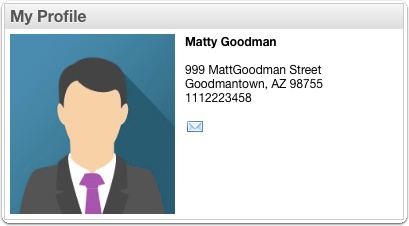
Your “My Profile” window should look like the one above (with your own details of course).
Note that Matty Goodman elected not to display his social media links.
At this Pointe (sorry – a bad joke – I couldn’t help myself) Pointe Savant® users (employers or organizations engaged in screening) can invite you to take their video interviews by emailing you a link. They may post links to their interviews on their favorite job boards too. Either way, you’re almost ready to respond immediately.
Before you can take any interviews or build your own, you need to make sure your mic and webcam are working correctly first.
Connexion Pointe® University
The Connexion Pointe® University (CXPU) videos have a lot of great information designed to help you improve your interviewing skills on video and in-person. It’s free, and we’ll continuously be adding to it, so please take a look!
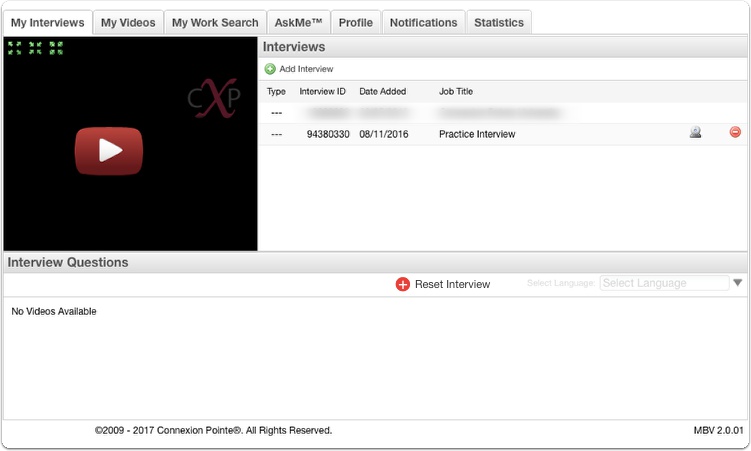
1. My Interviews tab.
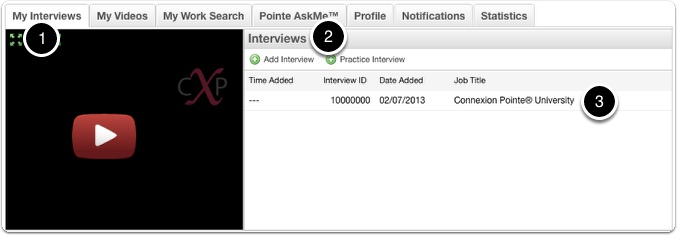
While logged in to your Pointe Profile®,
1. select the “My Interviews” tab.
2. Just to the right of the video player, you’ll see a pane labeled “Interviews.”
3. Connexion Pointe® University is in the Interviews pane. Let’s take a look at it up close.
1.1 Interviews pane.
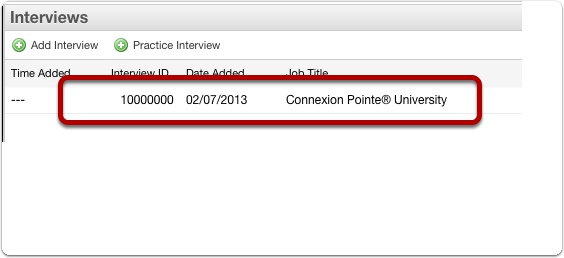
CXPU can be selected, but it can’t be edited or deleted. Go ahead and click on CXPU now.
1.2 Interview loads.

1.3 Connexion Pointe® University videos.
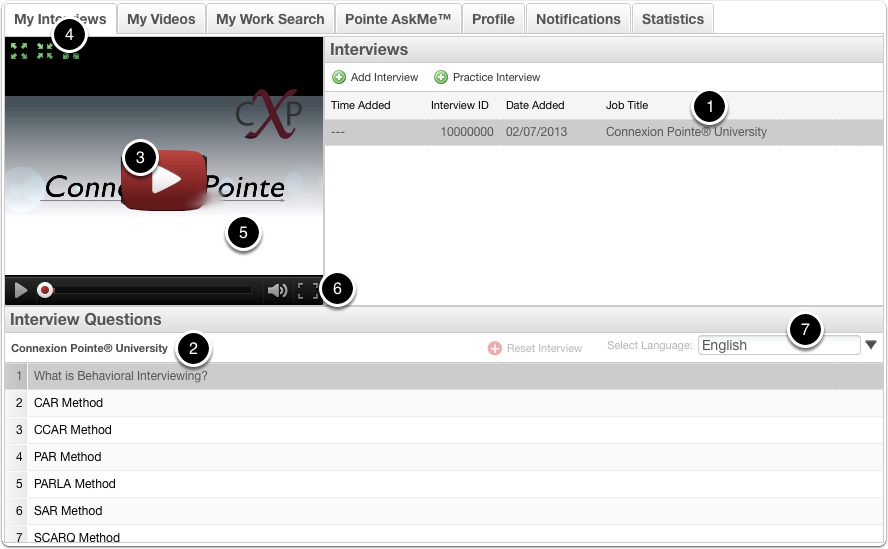
1. When you click on “Connexion Pointe® University,”
2. a list of videos appears. Select a video and click it to view it in
3. the video player window.
4. You can make the video larger or smaller here.
5. You can control the volume here.
6. To watch the full-screen video click here.
7. The Connexion Pointe® University videos are currently available in English and Spanish. Click the drop-down menu to select one of the possible languages.
1.4 Meet Catherine, your CXPU instructor.

At Connexion Pointe®, interviewing, networking and self-promotion with multimedia are considered must-have skills. We want to help you master these skills in the shortest amount of time possible. That’s why we offer CXPU at a price that we know fits your budget – $1! (Not $1 per month or $1 per year – just $1 to sign up and use for the rest of your professional career). Our virtual trainer Catherine (pictured above) and her staff will guide you to everything you’ll need to know to tell your story your way. After you “graduate” from CXPU, you’ll be ready to hone your skills further with our practice interview.
Let’s take a look at how the practice interview works now!
Check Your Gear
Video interviewing is here to stay. It’s a safe bet that as time goes on an increasing number of candidates will be screened via video interview. That said, now is an excellent time to prepare yourself to use the required gear for virtually every “video interviewing process.” Much of the information here should also help you with video interviews not originating at Connexion Pointe®.
1. Connect your external webcam.

Built-in webcams are preferred but not required. If applicable, connect your external webcam to your computer and verify operability per the manufacturer’s instructions.
2. Connect your microphone and earphones.

The earphones and microphones will ensure that you hear the questions (without causing feedback) while recording your responses. While we were building Connexion Pointe,® we often tested with the Apple® EarPods (earbuds/mic) that come standard with iPhones. As stated in the minimum requirements section, they’re simple, they sound good, and the mic works great. Similar products will probably work fine too, but we advise that you test them before using them for a real interview.
Connect your earbuds & mic and let’s get started.
2.1 Set Microphone Level – Mac
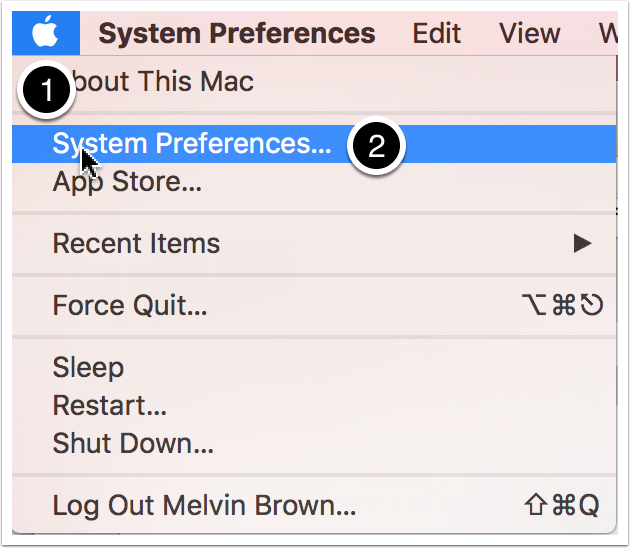
Setting the microphone level is easy on a Mac.
1. In the top left corner of your screen, click the Apple® logo.
2. Select “System Preferences.”
2.2 Set Microphone Level – Mac
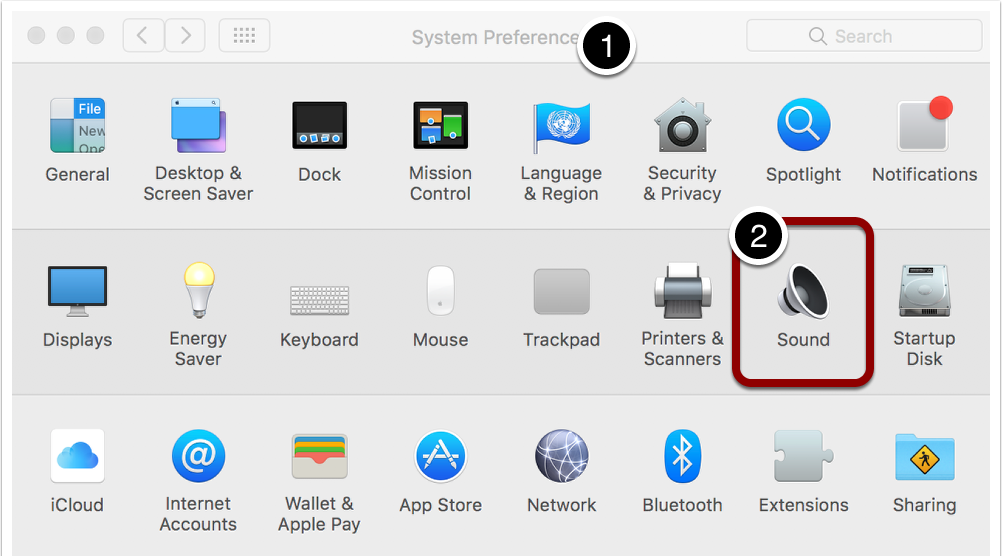
1. The “System Preferences” window opens.
2.3 Set Microphone Level – Mac
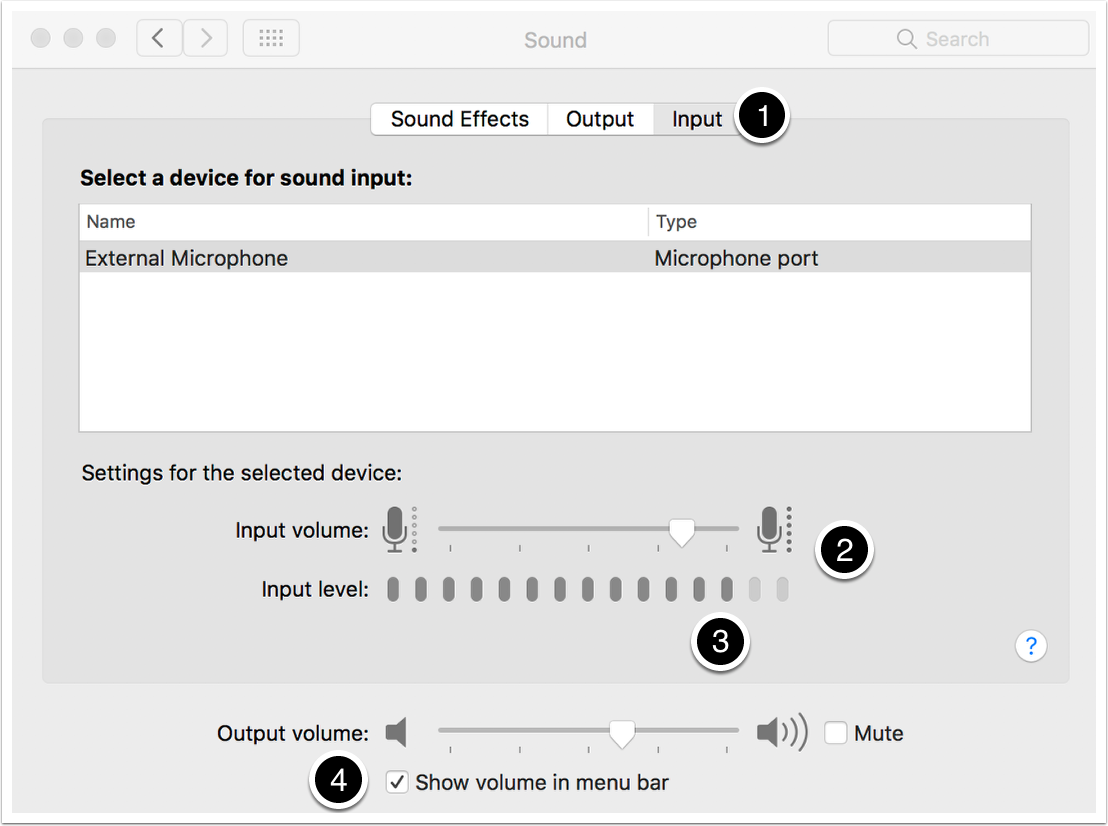
1. Select the “Input” tab.
2. Set the level by speaking in your normal tone of voice. While speaking, adjust the input level using the slider.
3. Most (but not all) of the “Input level” indicators should illuminate when you speak.
4. Checking the “Show volume in menu bar” checkbox will save you some steps in adjusting the volume in your earbuds or headphones.
2.4 Set Microphone Level – Mac
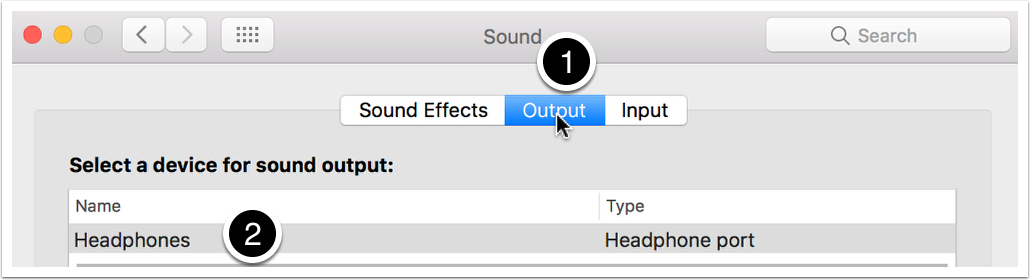
1. Select the “Output” tab.
2. Verify that “Headphones” appears under the device output name. If it does not, verify that you’ve connected the headphones correctly by removing and plugging them in again. Refer to the user’s guide for your computer for more troubleshooting information.
3. Test your equipment.
Once you’ve connected your device(s), you’ll want to make sure they work correctly with the required Google Chrome web browser.
Testing your equipment should be quick and easy.
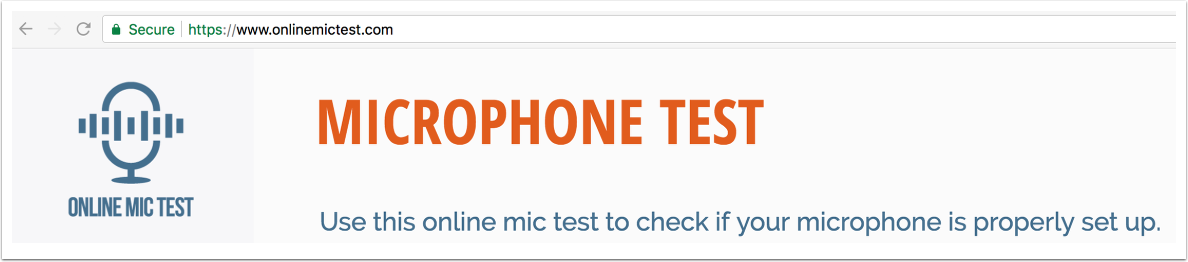
Open Google Chrome and navigate to this website and use this free test:
http://www.onlinemictest.com/webcam-test
You’ll see a page similar to the photo above.
3.1 Technical guides for troubleshooting and help.

This testing website also has a lot of excellent troubleshooting advice for Macs and PCs (older and newer) if you have problems. To access the troubleshooting information:
1. Select “Technical Guides” on the main menu
2. Choose the data appropriate for your operating system.
The good news is that most modern computers expect to record video and narration so this should go smoothly.
Once everything is working correctly, we recommend that you save your settings.
4. Microphone Test
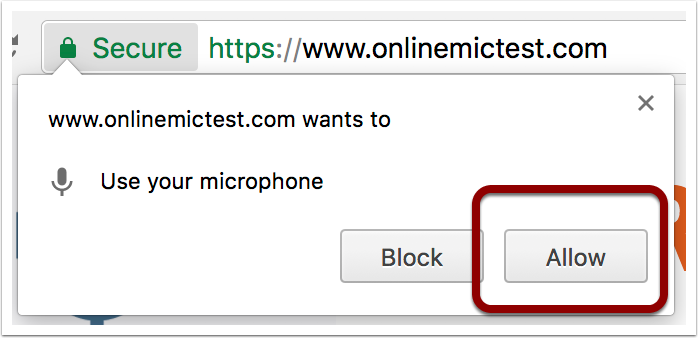
Google Chrome requires user permission to access your microphone. If this permission is not active, the box pictured above will appear in the upper-left corner. Click “Allow” inside the box on the right.
4.1 Microphone Test
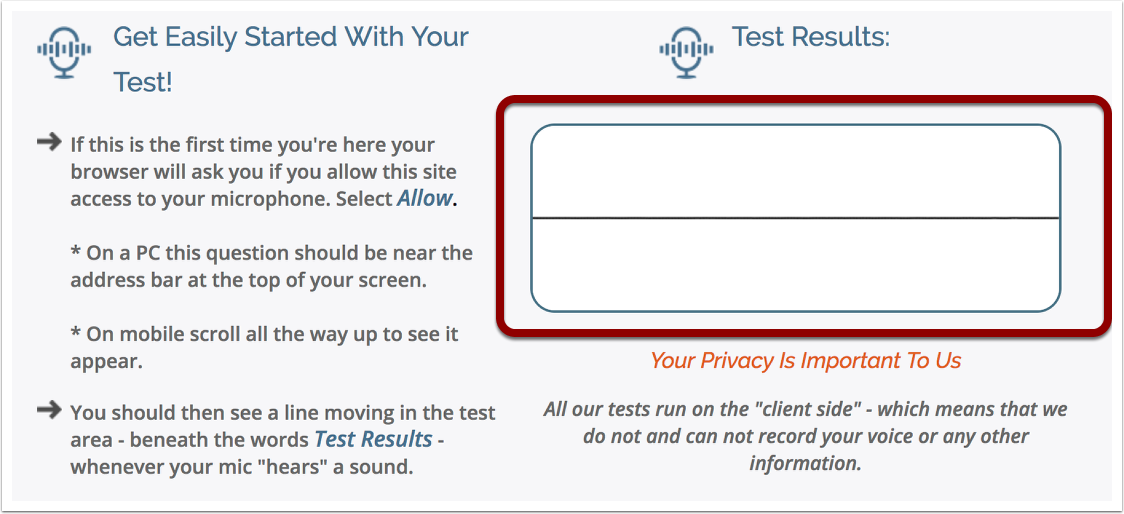
After you click “Allow,” take a look at this window on the page with a thin line in the middle.
4.2 Microphone Test
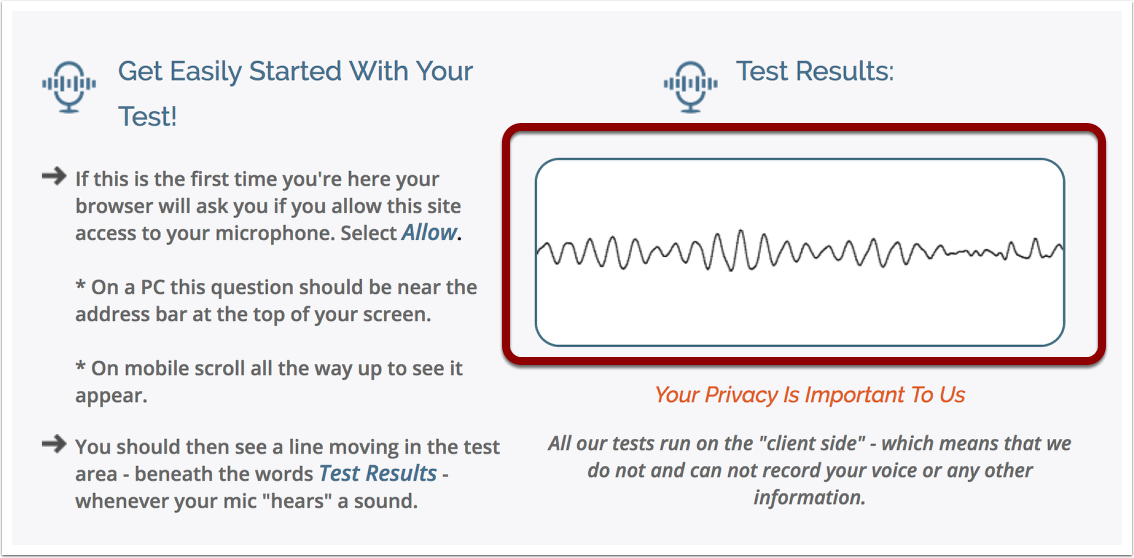
The line should react when you speak into your microphone. If this doesn’t happen, navigate to the technical guides as previously described for troubleshooting information.
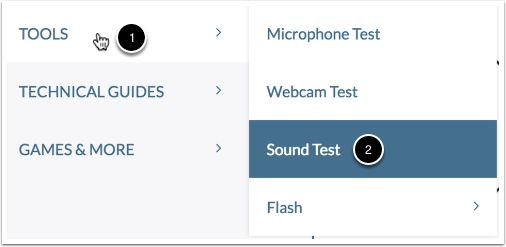
5. Sound Test
Now let’s move to a sound test, where we’ll make sure we can hear sounds coming from the computer loud and clear.
1. On the main menu, select “Tools.”
2. When the first submenu opens, select “Sound Test.”
5.1 Sound Test

You’ll know you’re on the correct page when you see these words at the top of the page.
5.2 Sound Test
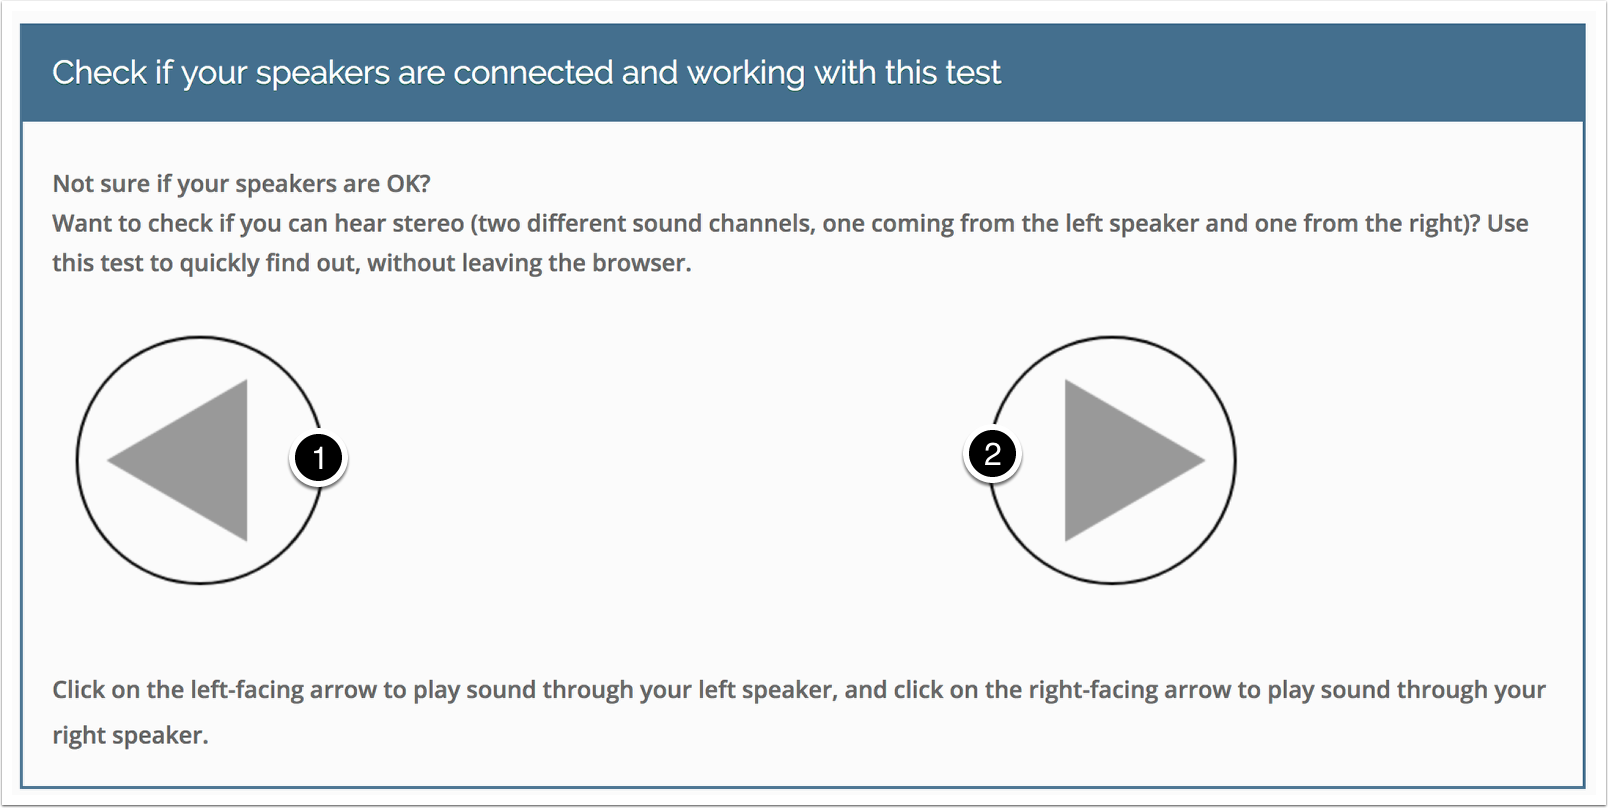
Follow the simple on-screen instructions.
1. Click on the left-facing arrow to play sound through your left speaker.
2. Click on the right-facing arrow to play audio through your right speaker.
You should hear sound when you click these buttons. If you don’t detect anything, adjust the volume to an appropriate level. If this doesn’t correct the problem, navigate to the technical guides as previously described for troubleshooting information.
6. Webcam Test
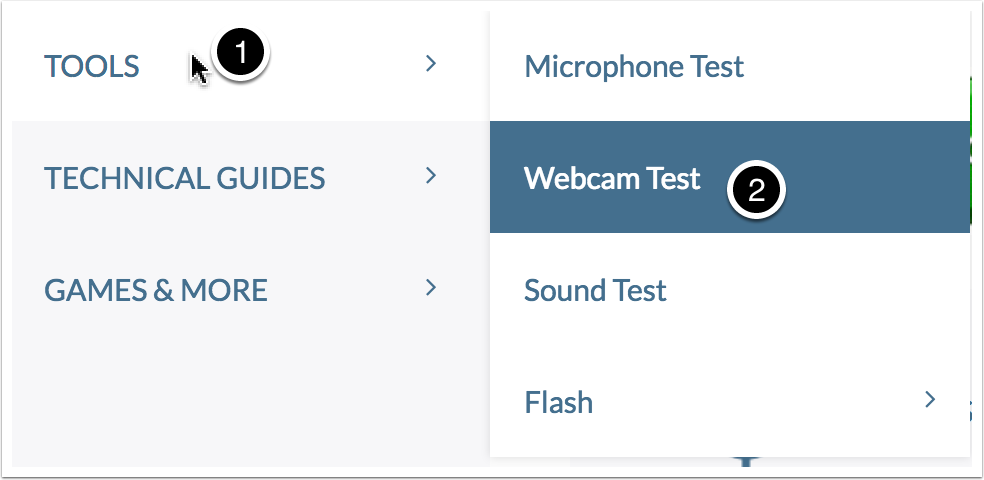
Now let’s move to a webcam test, where we’ll make sure we can record video on your computer.
1. On the main menu, select “Tools.”
2. When the first submenu opens, select “Webcam Test.”
6.1 Webcam Test

You’ll know you’re on the correct page when you see these words at the top of the page.
6.2 Webcam Test
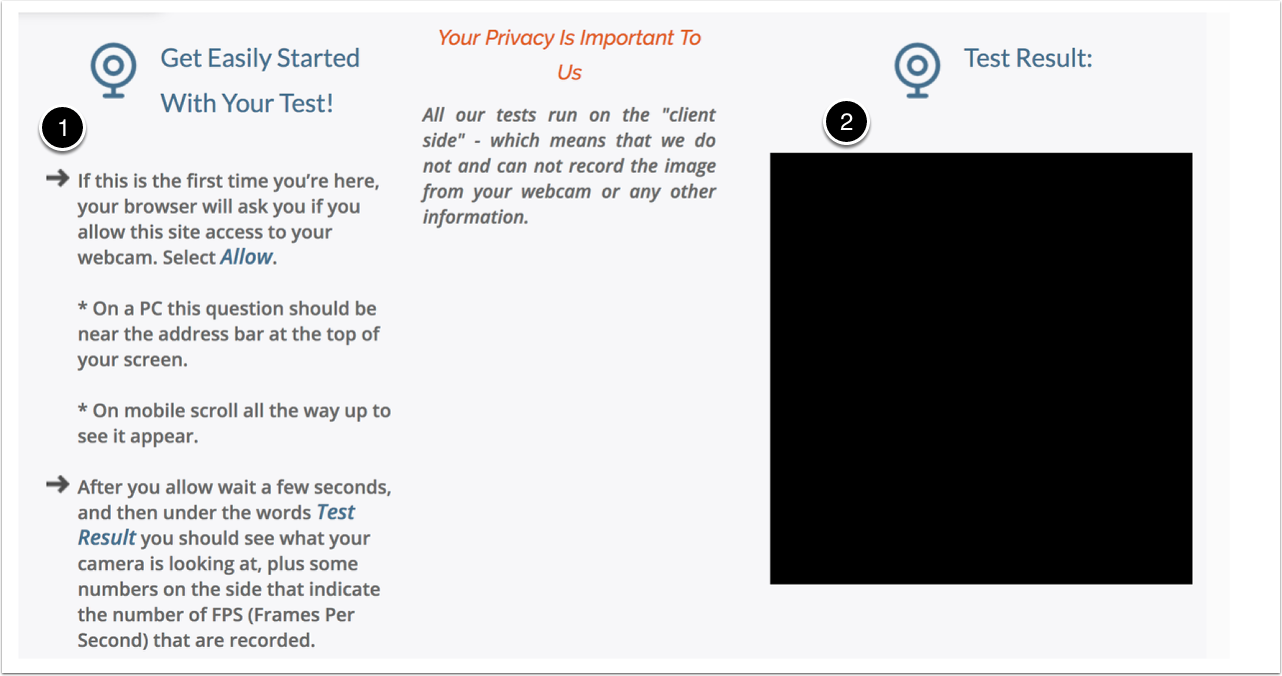
1. Follow the simple on-screen instructions.
2. Note the black box on the right. Google Chrome requires user permission to access your webcam. If this permission has never been granted, the box will appear black.
6.3 Webcam Test

Click “Allow” inside the box on the right.
6.4 Webcam Test
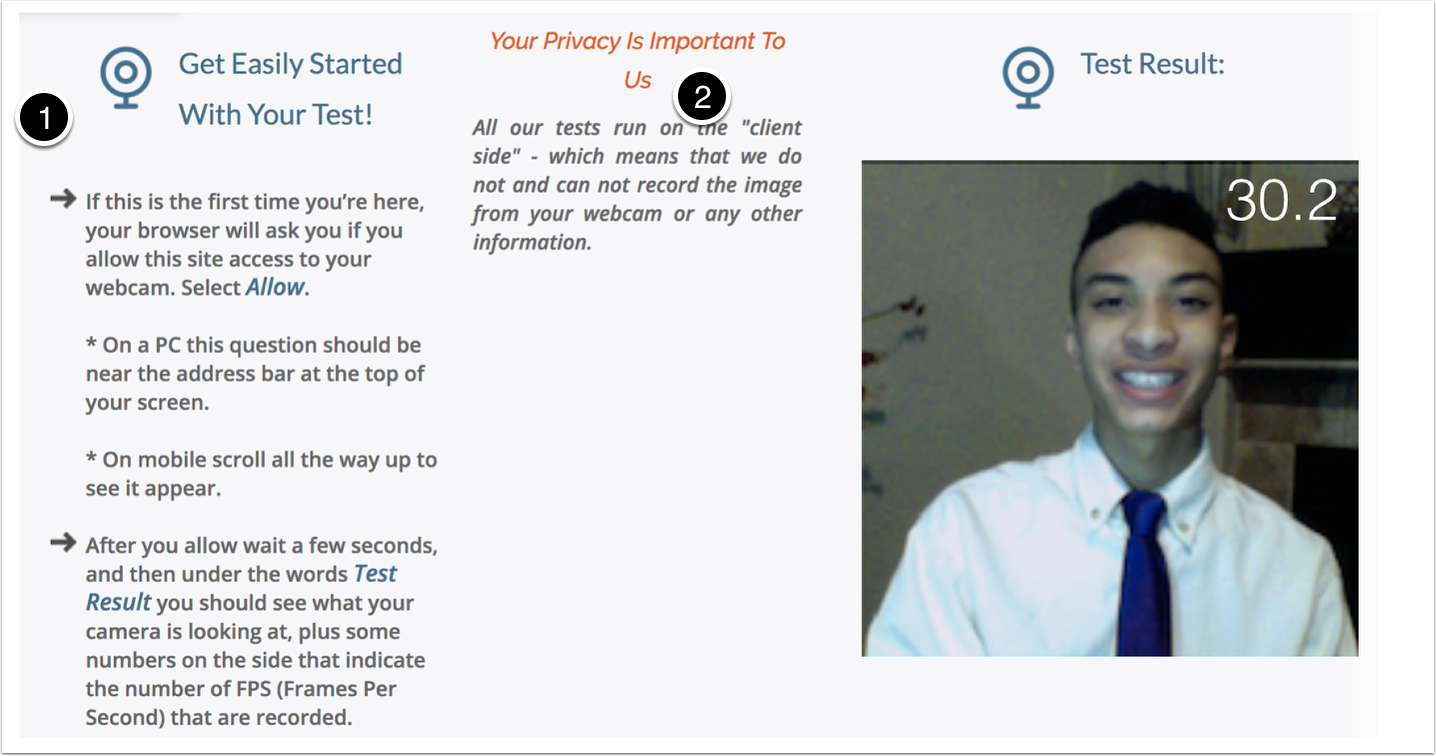
After clicking “Allow,” you should see your image in the box. If the box is still black, navigate to the technical guides as previously described for troubleshooting information.
7. My gear works! Now what?

Your gear is all set, and you’re ready to go. But how are your video interviewing skills? Pointe Profile® can help you prepare for video, in-person and live online interviews too. Connexion Pointe® University is an excellent collection of free videos in your Pointe Profile® account created for you to learn more about interviewing techniques!
Take the Practice Interview
Your Pointe Profile® account has a free practice interview that you can use to hone your on-camera and in-person interviewing skills. Seeing yourself on video reveals how you appear to an interviewer, which is key to mastering these crucial skills. Setting up the practice interview, reviewing your performance and revising your answers is easy!
NOTE – The practice interview is pre-formatted in English only. The questions and language cannot be edited or changed.
1. Locate the “My Interviews” tab.

Select the ‘My Interviews” tab.
1.1 The Practice Interview button.
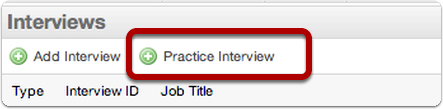
In the “Interviews” pane, locate and click the “Practice Interview” button.
1.2 Loading Interviews.
The first time you click on an interview, it loads. Click the same interview again to view your available recorded responses or to start the interview application for recording.
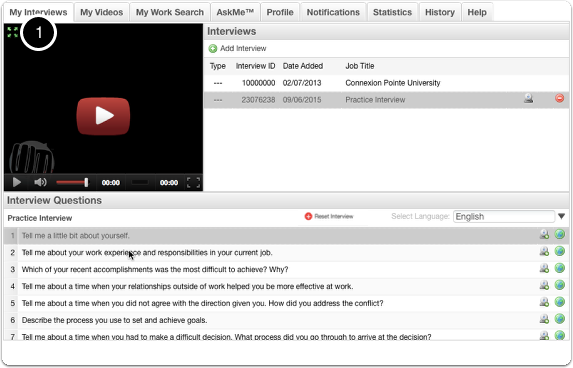
1.3 Practice Interview added.
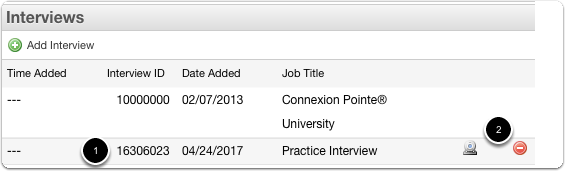
1.The Practice Interview appears in the list below Connexion Pointe® University.
2. The Practice Interview also displays two icons.
2. Deleting the Practice interview.

On the far right is the “Delete Practice Interview” icon. After you’ve taken the practice interview, you may want to clear out all of your responses and try again. To delete all of your video recorded responses and reset the Practice Interview, click the red icon.
2.1 Confirm delete.
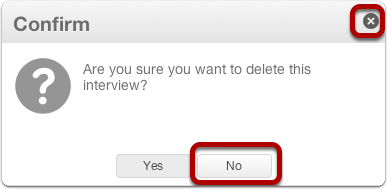
A dialog box appears asking you to confirm deleting the Practice Interview. Building an interview takes time, and we don’t want you to accidentally delete an interview – even if the interview was just for practice. This is why eliminating any interview requires confirmation in the “Confirm” dialog box above. Click “Yes” to confirm the deletion. Click the “x,” or the “No” button to cancel the deletion and close the dialogue box.
3. No webcam?

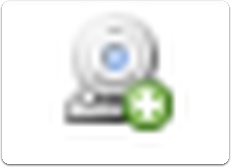
Clicking the camera icon prompts the system to load the Pointe Profile® interview application. If you don’t have a webcam, this is what you’ll need to know.
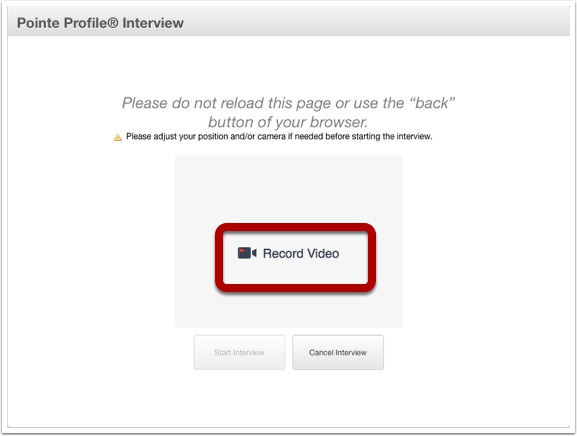
3.1 No webcam?
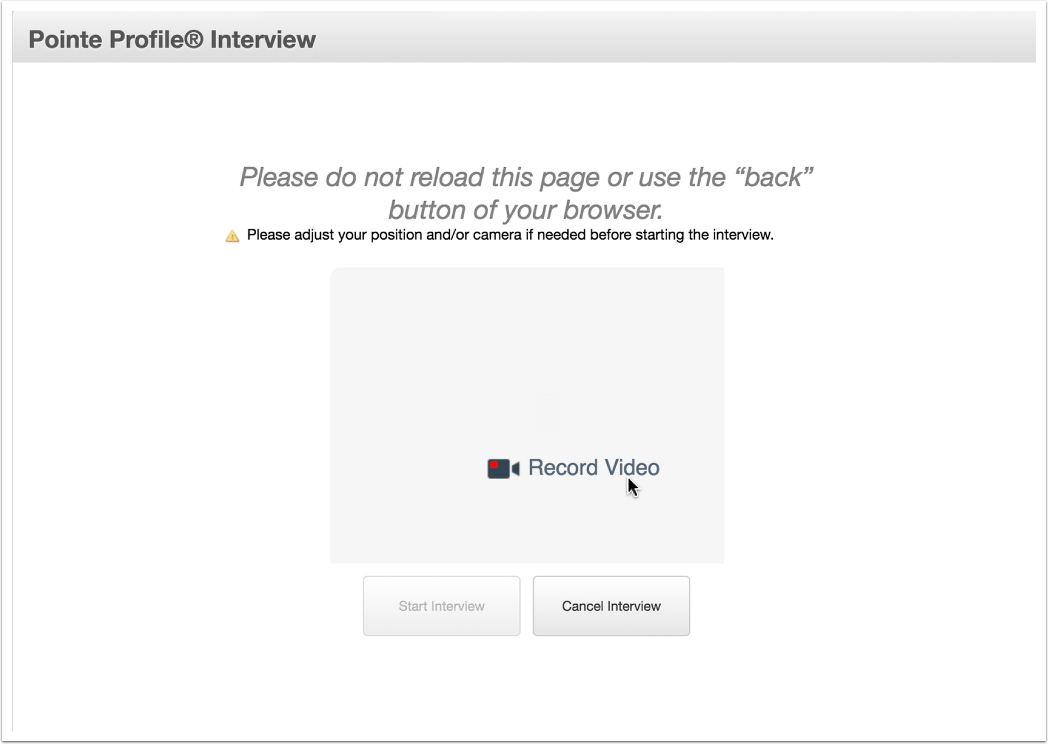
When the Pointe Profile® interview application starts, you should see the window above. Click the words “Record Video” to begin recording.
3.2 No webcam?
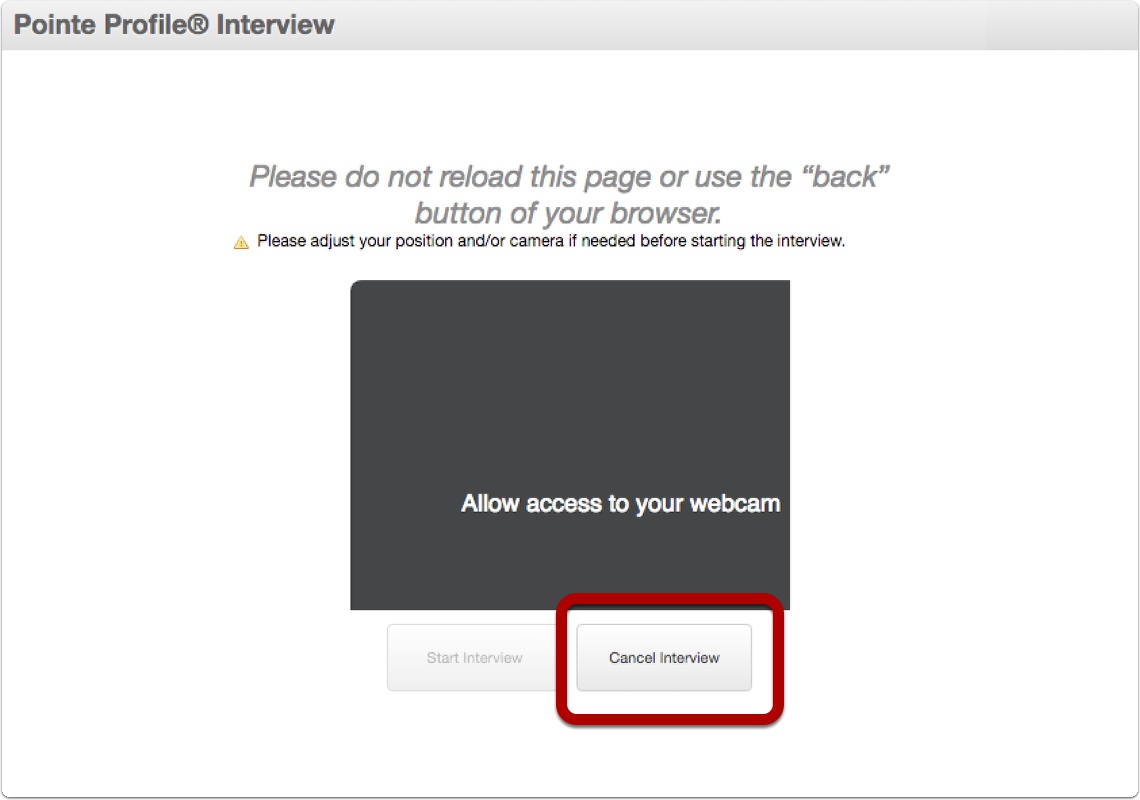
A webcam is required to take a video interview. If your computer does not have an adequate webcam, the Pointe Profile® Interview application will give you the warning window above. Pointe Profile® does not create “audio only” interviews, and you can not proceed without a webcam. Click “Cancel” to close. It’s strongly recommended to review “Set up & Check Your Gear” before proceeding.
Some of the following steps reiterate material covered in the setup.
4. Suitable Webcam, Mic, and Headphones? Let’s go!

Click the camera icon starts the Pointe Profile® Interview application.
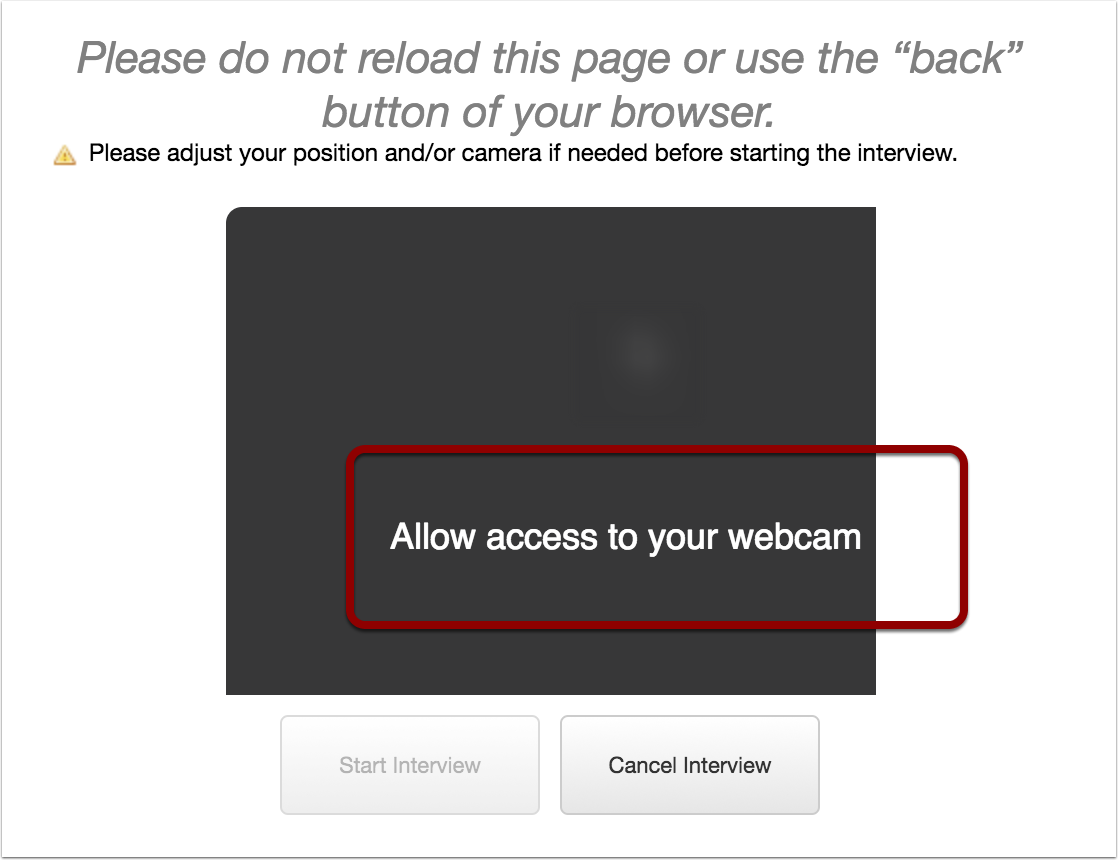
4.1 Grant Permission to Access

If you did not save your settings when you checked your gear, the interview application would ask you to grant access to your webcam and microphone.
4.2 Grant Permission to Access

The Google Chrome browser will request access to your microphone and webcam too. While you were checking your gear, these permissions were granted separately, but here they can be allowed in a single step. When the permission request appears in the top left corner, It will ask you to grant permission for your camera and microphone.
Click the “Allow” button to grant access.
4.3 Webcam ready.
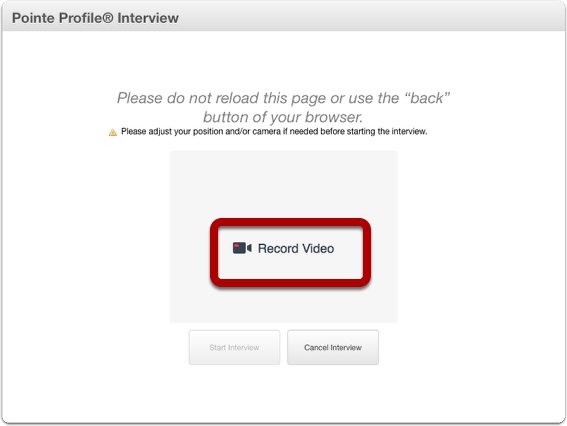
If you have a suitable microphone and web camera connected to your computer, the dialogue box above will appear.
Click on the words “Record Video.”
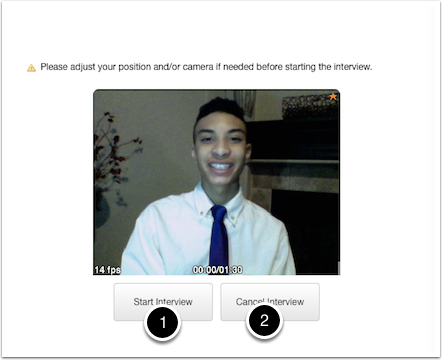
4.4 Adjust the camera.
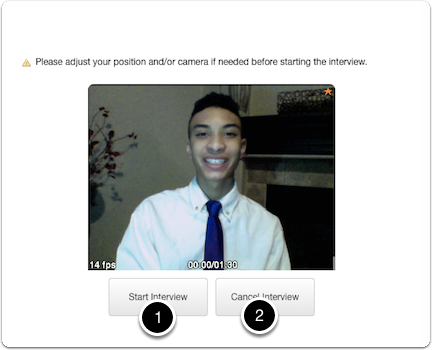
After granting permission, your screen should be similar to the photo above. Adjust your camera angle as necessary. Notice the ideal position is identical to sitting across the desk from an actual interviewer.
NOTE: you will not be able to see your face while you interview! Be sure to maintain your position until the interview concludes!
1. When you’re ready, click start interview.
2. To cancel the practice interview click “Cancel.”
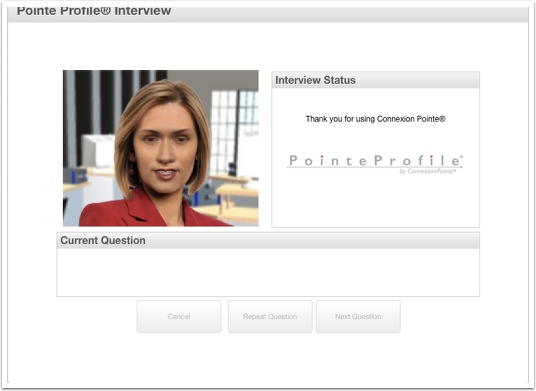
4.5 Start the practice interview.
The Profile Interview™ application has several virtual interviewers. The system uses the interviewer pictured above for the practice interview. The interviewer greets and thanks you for using Connexion Pointe®.
5. The first question.

1. The interviewer asks you the first question, which
2. also appears as text in the “Current Question” pane.
3. A 5-second countdown begins, giving you a little time to collect your thoughts. This process repeats for every interview question.
Notice the three buttons at the bottom are unavailable while the question is presenting. These buttons become available after the 5-second countdown.
5.1 Time indicator (green).
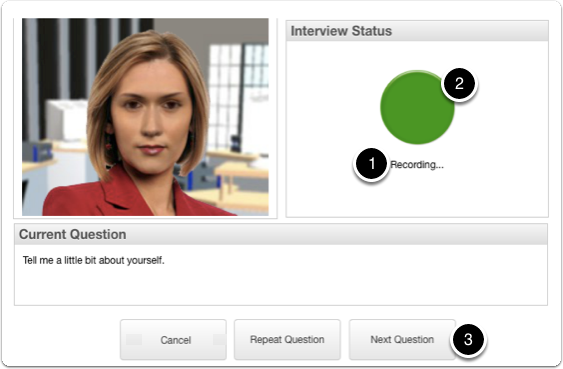
After the 5 second countdown,
1. the recording begins. You’ll have two minutes to answer each question.
2. For the first 40 seconds of your response, a green indicator displays in the “Interview Status” pane. If you finish responding before the allotted time expires, you can advance to the next question by clicking the
5.2 Interview controls – “Next Question” button and minimum responses.

Note: The minimum response for interview questions is 30 seconds if you click the “Next Question” button before 30 seconds has elapsed, you’ll see the warning dialog above. The recording does not stop! If you make a mistake, you can use the “Repeat Question” twice during an interview.
5.3 Time indicator (yellow).

As you respond to the question, the green indicator changes to yellow, indicating you are more than 40 seconds into your response.
5.4 Time indicator (red).

As you continue responding to the question, the yellow indicator changes to red, indicating you have 40 about seconds remaining to complete your response. These indicators are repeated for every interview question.
6. Interview controls – repeating a question.

If for some reason you don’t understand the first question or if you make a mistake you can
1. click the “Repeat Question” button
2. The recording is stopped, the system deletes your response, and the interviewer repeats the question.
**NOTE: The “Repeat Question” function can only be used TWICE during an interview. After two uses, the “Repeat Question” button is unavailable for the remainder of the interview.
7. interview controls – canceling the interview.
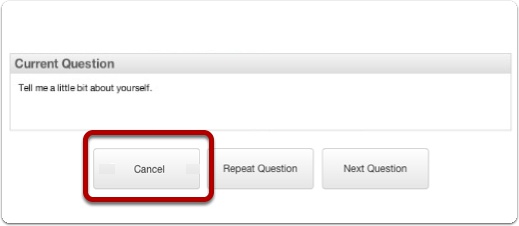
While using the Pointe Profile application, you may cancel the interview at any time.
Just click the “Cancel” button at the bottom of the Profile Interview window.
7.1 Confirm cancellation.
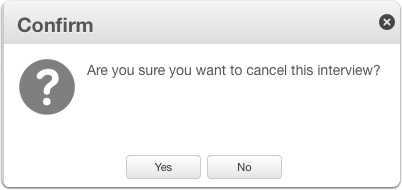
2 – A confirmation appears. To cancel the interview click “Yes.” To continue the interview click “No” or click the “X” in the top right corner of the dialog box.
Note: I’ll cover this later, but you should note that Connexion Pointe® platform also features an application for organizations called Pointe Savant®. Pointe Savant® users can create interviews and invite Pointe Profile® users (like yourself) to respond to them. At Connexion Pointe® we call these “screening events.” Canceling an interview during a screening event is quite different from canceling an interview created in the Pointe Profile® application. Please review the section called “Taking Savant Interviews” for more details.
8. Verifying Responses

After you respond to the final question, the system will check to verify that all of your responses were recorded correctly. If you experience network problems or lose your internet connection while performing the interview, some of your answers may not be adequately documented.
8.1 Errors during recording.
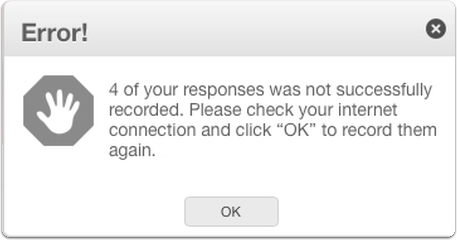
If one or more of your responses is not successfully recorded, the system will let you know with a dialog box similar to the photo above. To re-record and missing responses, check your internet connection and click “OK” to try again. The system will only ask you the missing questions in this scenario, and the process will continue until there is a response to all of the questions asked.
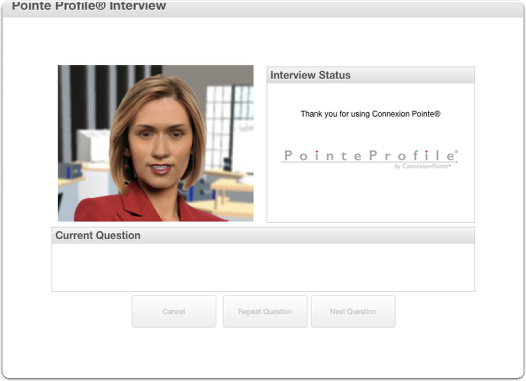
8.2 Interview Conclusion
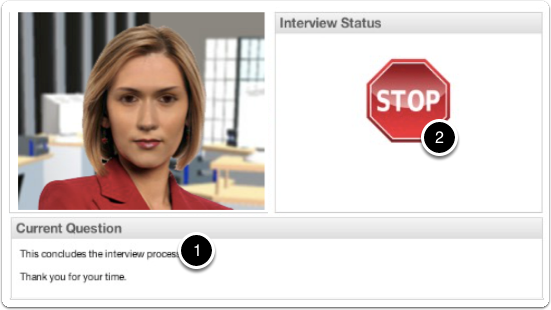
Once all of the questions have been answered,
1. the interviewer announces the conclusion of the interview and thanks you for your time.
9. Return to “My Interviews” tab.
After the interview process is complete,
1 – the Profile Interview™ application closes and returns you to the Pointe Profile® dashboard with the “My Interviews” tab selected.
Now let’s take a look at viewing and revising your responses.
10. Errors during recording.
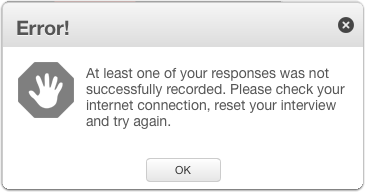
If you experience network problems or lose your internet connection while performing the interview, some of your responses may not be appropriately recorded. If one or more of your answers are not successfully registered, the system will let you know with the dialog box above. To reset the interview and try again click “OK.”
10.1 Reset interview.

To take the interview again, follow the “practice Interview ” instructions in this section of the help guide, or click the “Reset Interview” button above. All of your previous responses will be deleted, and the interview is ready to be retaken.
Note: Non-practice interviews cannot be reset after the interview link has been shared.
10.2 Restart interview.

Reload the page.
Check your internet connection to verify it’s working correctly and then restart your interview by clicking the camera icon. , (Repeat the process from step 5).
Once you’ve successfully recorded responses to all of the questions, you’ll want to take a look at viewing and revising your answers. It’s easy – I’ll show you how now.
View Your Practice Interview
Here’s how to view your practice interview.
You should note that if you start viewing your responses and don’t like what you see, and if you did not indulge in our excellent (and free) Connexion Pointe® University training videos, we highly recommend that you take a look. Connexion Pointe® University videos are a fantastic and free resource that can help you improve your on-camera and in-person interviews!
1. After the Pointe Profile® Interview application closes.
After the interview process is complete, The Pointe Profile® Interview application closes and returns you to your dashboard with the “My Interviews” tab selected. Viewing your responses is easy – the process is similar to viewing Connexion Pointe® University videos.
2. View the practice interview.
Viewing your performance and revising your responses is easy:
The questions you just answered should appear in the “Interview Questions” pane. If they do not automatically load, Refresh the page by clicking this icon:

and then click “Practice Interview”:

3. The practice interview loads.
The practice interview loads your responses.
4. Select questions to view your answers.
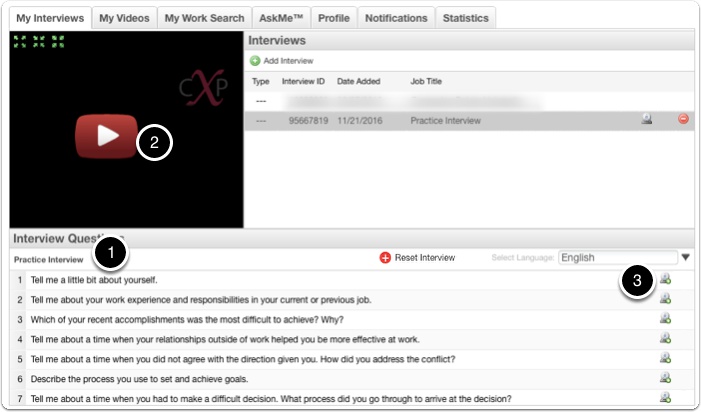
1. A list of the questions you answered will appear in the “Interview Questions” pane. Click any one of the questions to see your responses
2. in the video player window.
After review your responses, you may want to take another shot at answering one or more of the questions. Revising your responses is easy. I’ll show you how to do it now.
3. Notice that each question has an icon next to it.
5. Revising (re-recording) your responses.
Notice the camera icons in the “Interview Questions” window have a small “+” and are slightly different from the camera icons in the “Interviews” pane. These icons are buttons, and they’re used to select the question(s) you’d like to revise.
5.1 Add a question to the Recording Queue.
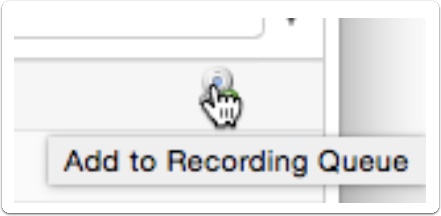
Hover your mouse over the camera icon to the right of the first question. The tooltip “Add to Recording Queue” is displayed.
5.2 Response selected for revision.

Click the icon and notice it changes to a green checkmark. This indicates you would like to add this question to the queue to be re-recorded. You can add as many questions from your practice interview to this queue as you want, but I strongly recommend revising your answers one at a time.
5.3 Un-select response for revision
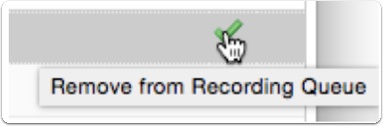
If you change your mind, questions can be removed from the queue at any time. Hover your mouse over the green check mark. The tooltip “Remove from Recording Queue” is displayed. If you click it, the camera icon will return. Choose the questions you’d like to revise and make sure they’re indicated by the green checkmark.
5.4 Revising (re-recording) interview questions.

After you’ve selected the questions for re-recording, all of the questions displaying a green check mark will be added to the queue, and you’ll be able to revise them. (For example, in the photo above there four questions selected, so there will be four questions asked in the revision interview.) The process for starting the interview and responding to the questions is the same as previously described.
5.5 Reload the Page.
Reload the page by clicking the icon in the photo above. Your selection of questions to be revised is preserved.
6. Start the revision.

In the “Interviews” window, click the camera icon to the right of “Practice Interview” to start the Profile Interview application.
6.1 Grant Permission to Access
If you did not save your settings when you checked your gear, the interview application would ask you to grant access to your webcam and microphone.
6.2 Grant Permission to Access

The Google Chrome browser will request access to your microphone and webcam too. While you were checking your gear, these permissions were granted separately, but here they can be issued in a single step. When the permission request appears in the top left corner, It will ask you to grant permission for your camera and microphone.
Click the “Allow” button to grant access.
6.3 Webcam ready.
If you have a suitable microphone and web camera connected to your computer, the dialogue box above will appear.
Click on the words “Record Video.”
6.4 Adjust the camera.
After granting permission, your screen should be similar to the photo above. Adjust your camera angle as necessary. Notice the ideal position is identical to sitting across the desk from an actual interviewer.
NOTE: you will not be able to see your face while you interview! Be sure to maintain your position until the interview concludes!
1. When you’re ready, click start interview.
2. To cancel the practice interview click “Cancel.”
6.5 Start the practice interview.
The Profile Interview™ application has several virtual interviewers. The system uses the interviewer pictured above for the practice interview. The interviewer greets and thanks you for using Connexion Pointe®.
7. Delete the practice interview.
![]()
When you’ve finished viewing and practicing your responses, you can delete the practice interview and start again from scratch. Just click the “Delete Interview” icon above. To use the practice interview again at any time, just follow the steps previously described in the “Take the Practice Interview” tutorial.
8. Managing videos during video processing.
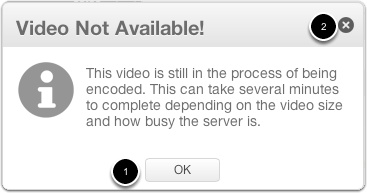
While taking an interview, Connexion Pointe® starts processing your video responses immediately after you record each response. If you complete your interview and try to view your answers before this processing finishes, the dialogue box above will appear.
1. Click “OK” or
2. click the “x” to close the dialogue box.
Wait a few minutes and try again.
Repeat the steps to view, select and re-record your responses as necessary.
8.1 Deleting videos during video processing.
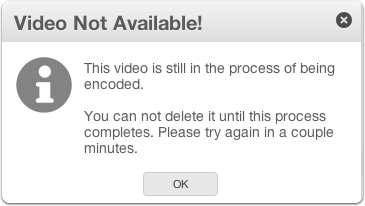
Likewise, if you complete your interview and try to delete any of your responses before this processing finishes, the dialogue box above will appear.
1. Click “OK” or
2. click the “x” to close the dialogue box.
Wait a few minutes and try again.
Repeat the steps to view, select and re-record your responses as necessary.
8.2 Are you a good fit For your chosen position?

When you’re satisfied with your practice, it’s time to decide what position you want to pursue and build your own interview. Pointe Profile® can help you create a great interview that asks all of the right questions.
Let’s go to the next section and take a look!
Interview Purpose & Types
Before choosing an interview type, let’s take a look at the various interview types available. Pointe Profile® can guide you in building a structured behavioral interview or custom interview for virtually any purpose or position.
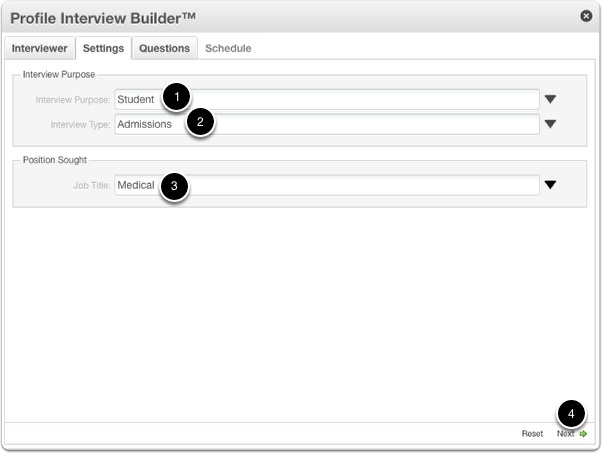
1. The Interview Purpose pane.
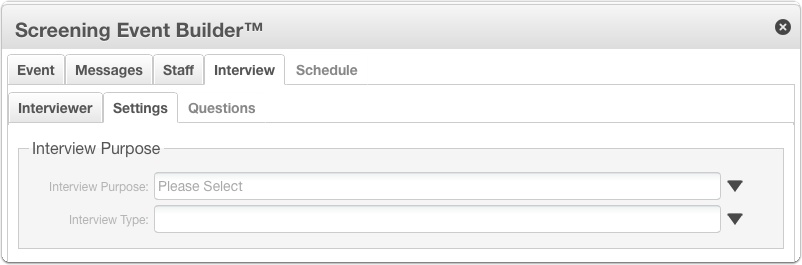
After selecting an interviewer and language(s) for your screening event, it’s time to choose and Interview Purpose and Interview Type.
1.1 The Interview Purpose pane.
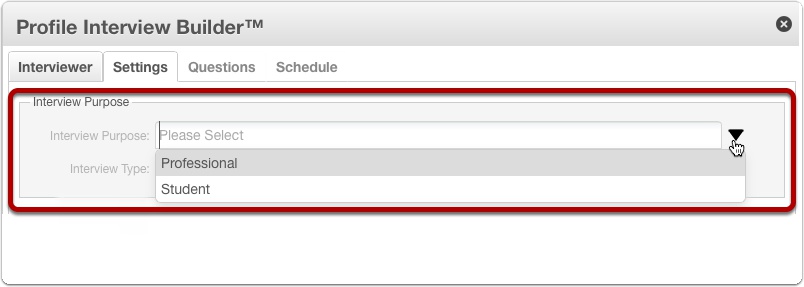
By definition, Pointe Profile® currently supports Professional and Student interviews, but the ability to add custom questions makes it ideal for virtually any situation where screening is appropriate. As the name suggests, professional interviews generally serve the purpose of connecting employers, candidates and other professionals. Student interviews are for students and educational institutions. If you are NOT a student presenting yourself as a candidate for admission to a school, select “Professional.” I’ll show you the Professional interviews first.
2. Professional interview types.
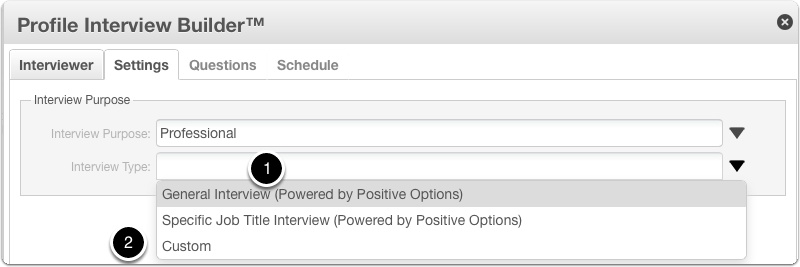
Selecting the appropriate questions for professional screening interviews can be challenging. The Interview Type setting in Profile Interview Builder™ can help you get started. There are three types of Professional interviews within Pointe Profile®. Each type represents a unique collection of competencies/themes with corresponding screening questions to choose from. You can add your custom questions to each group too! Our first collection is the “General Interview (Powered by Positive Options),” which represents surveyed CEO’s preferred competency skill-set for the majority of their candidates for many positions.
3. Professional Interviews – General Interview.
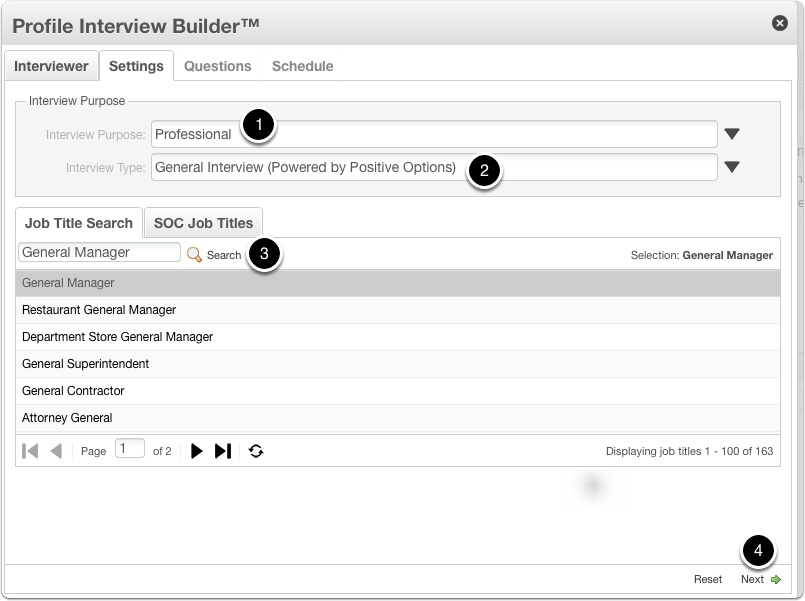
To view the competencies and questions in the General Interview (Powered by Positive Options) collection,
1. Select “Professional” as the Interview Purpose.”
2. Select “General Interview (Powered by Positive Options)” for the Interview Type.
3. Enter “General Manager” in the Job Title search field and click “Search.” When your list is populated, choose “General Manager.” (For this example we are using “General Manager” as the Job Title. To appreciate the differences between each competency/theme collection we recommend that you use the same job title to compare and contrast.)
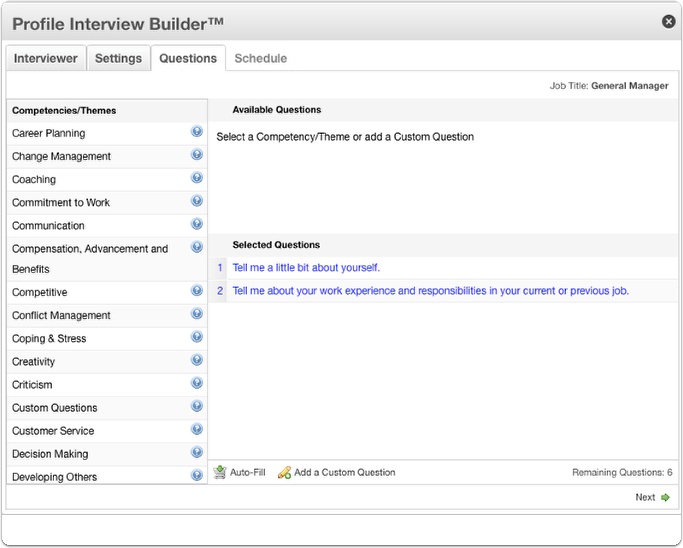
3.1 Professional Interviews – General Interview.
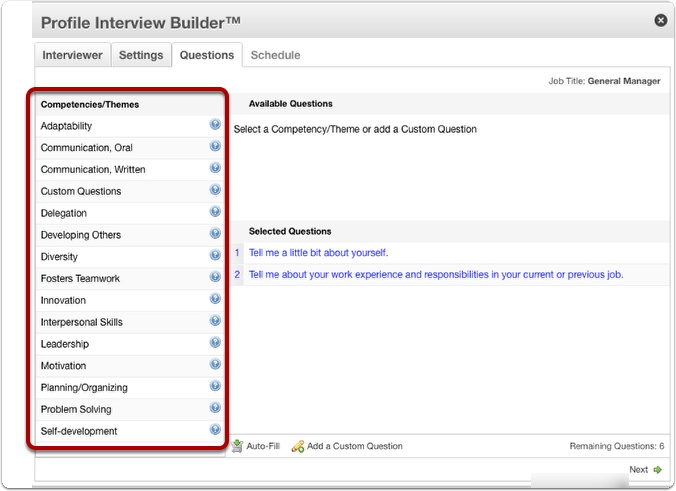
This will advance you to the “Questions” tab of Profile Interview Builder™, where the collection of surveyed CEO’s preferred competencies appears on the left side of the screen.
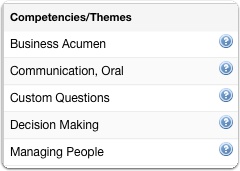
3.2 Professional Interviews – General Interview Competencies/Themes.
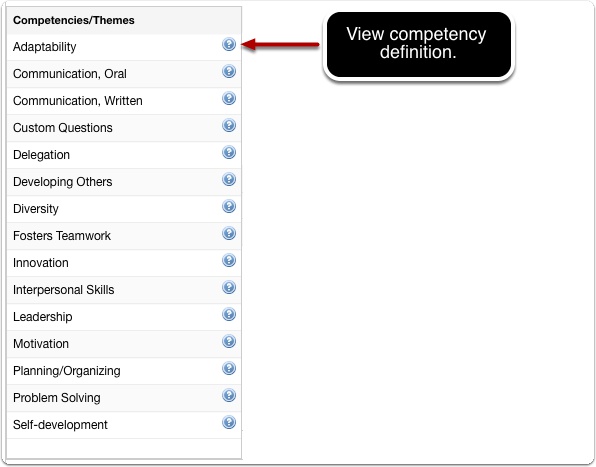
Here’s a look at the list of competencies up close. To see the definition of each competency, click the blue question mark next to it. Note: This collection is intended to be a suggestion of where to start in creating your screening interview, and not a definitive guide.
4. Professional Interviews – Specific Job Title Interview (Powered by Positive Options).
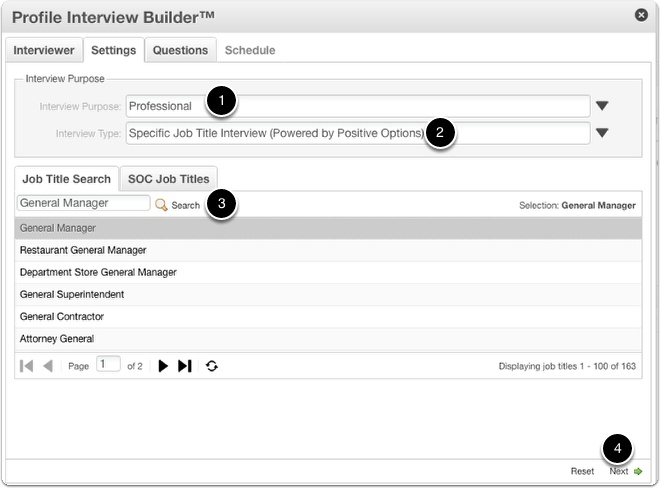
The next Interview Type is the “Specific Job Title Interview (Powered by Positive Options).” This interview presents questions that are relevant to specific positions as defined in the Standard Occupational Classification (SOC) system. When this type is selected, the job title directly drives the competencies/themes presented. Let’s use our General Manager job title again to see the difference.
To view the competencies and questions in the Specific Job Title Interview (Powered by Positive Options) collection,
1. Select “Professional” as the Interview Purpose.”
2. Select “Specific Job Title Interview (Powered by Positive Options)” for the Interview Type.
3. Enter “General Manager” in the Job Title search field and click “Search.” When your list is populated, choose “General Manager.” (For this example we are using “General Manager” as the Job Title. To appreciate the differences between each competency/theme collection we recommend that you use the same job title to compare and contrast.)
4. When the progress bar stops turning, click “Next.”
4.1 Professional Interviews – Specific Job Title Interview (Powered by Positive Options).
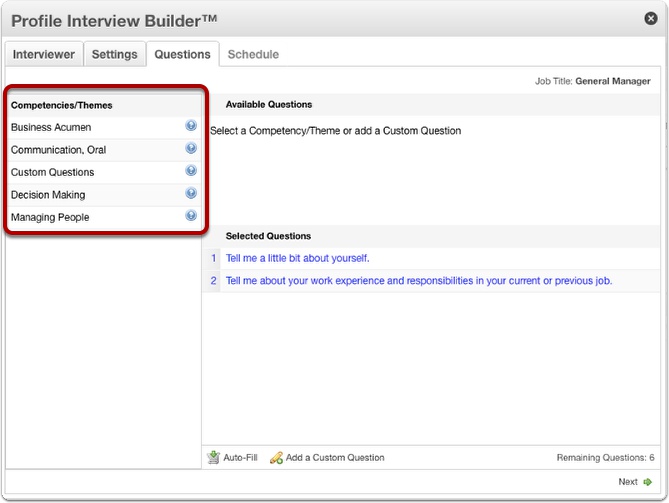
You’ll immediately notice that the list of competency/themes is smaller than the General Interview setting.
4.2 Professional Interviews – Specific Job Title Interview (Powered by Positive Options) Competencies/Themes.
As previously stated, selecting appropriate screening questions can be challenging. Using the Specific Job Title Interview (Powered by Positive Options) setting provides a way of “honing in” on a core set competency/themes that are directly related to the job title you selected. Again it’s important to note that this collection is intended to be a suggestion of where to start in creating your screening interview, and not a definitive guide. Note that your custom questions can be added here too.
5. Professional Interviews – Custom Interview.
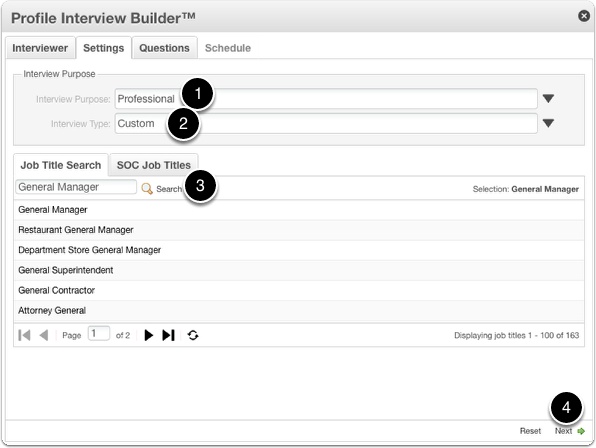
Now let’s take a look at the “Custom” interview type. To build a completely custom interview using our “Commonly Asked Screening Questions” database, choose “Custom.” With this setting, you can create your own interview entirely from scratch or use commonly asked screening questions from a variety of themes.
NOTE: Connexion Pointe® does not assume any liability or responsibility for the job-relatedness, or outcomes of any kind resulting from the use of custom interviews. Please refer to your end-user agreement for more information. Let’s use our General Manager job title again to see the difference.
To view the competencies and questions in the Custom interview collection,
1. Select “Professional” as the Interview Purpose.”
2. Select “Custom” for the Interview Type.
3. Enter “General Manager” in the Job Title search field and click “Search.” When your list is populated, choose “General Manager.” (For this example we are using “General Manager” as the Job Title. To appreciate the differences between each competency/theme collection we recommend that you use the same job title to compare and contrast.)
5.1 Professional Interviews – Custom Interview Competencies/Themes.
You’ll immediately notice that the competency/theme collection for this setting is the most extensive.
5.2 Professional Interviews – Custom Interview Competencies/Themes.
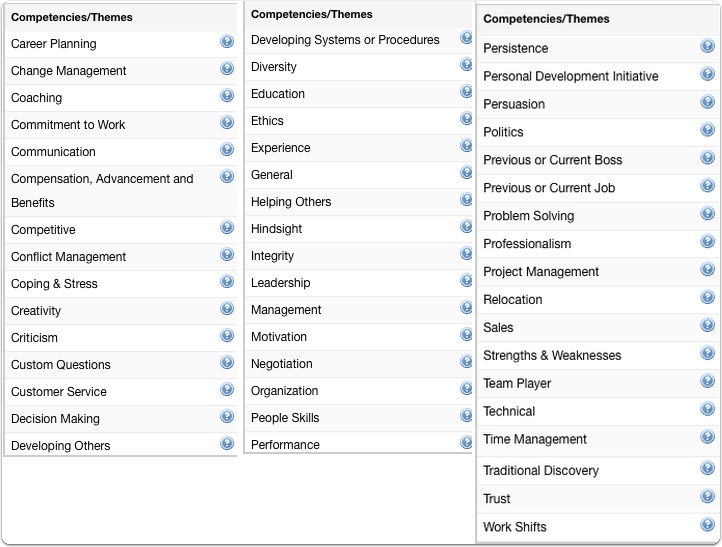
Here is the entire collection of competencies/themes for the Custom interview type. As with the other interview types, this collection is intended to offer suggestions of where to start in creating your screening interview, and not a definitive guide. Note that custom questions can be added here too!
6. Student Interviews.
Now let’s take a look at Student interviews. Like professional screening interviews, selecting the appropriate questions for screening students can be challenging. Profile Interview Builder™ can help. Each Interview Type represents a unique collection of competencies/themes and corresponding screening questions to choose from, and space is provided for your own custom questions. The first student interview type is Student Admissions.
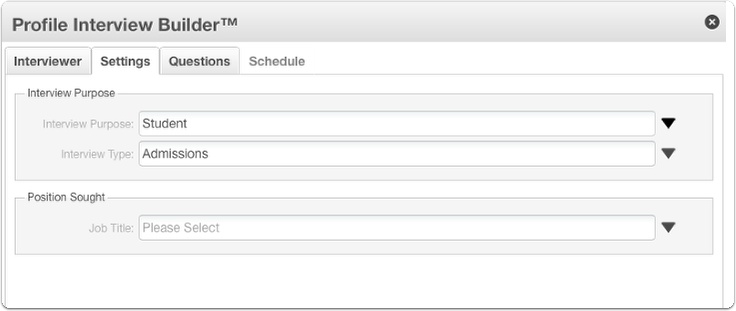
7. Student Interviews – Admissions.
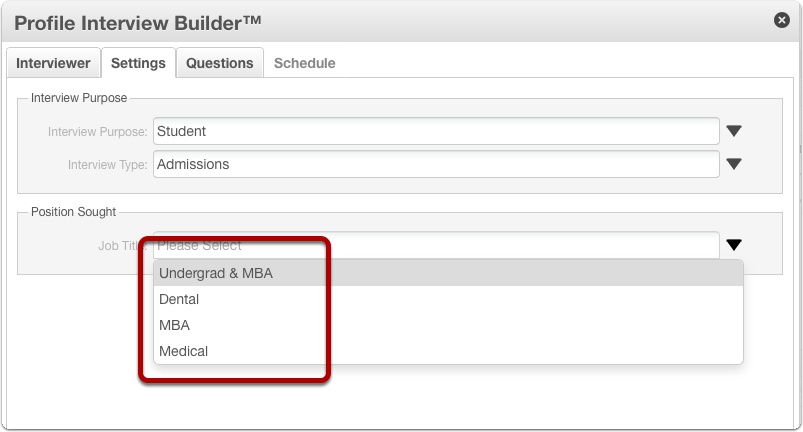
There are four collections of competency/themes related to student admissions: Undergrad & MBA, Dental, MBA, and Medical. Using this setting is required, and it provides a way of “honing in” on a core set competency/themes that are directly related to the level of study selected. Again it’s important to note that this collection is intended to be a suggestion of where to start in creating your screening interview, and not a definitive guide. It should also be noted there will be considerable overlap between the competencies/themes.
8. Student Interviews – Undergrad & MBA.
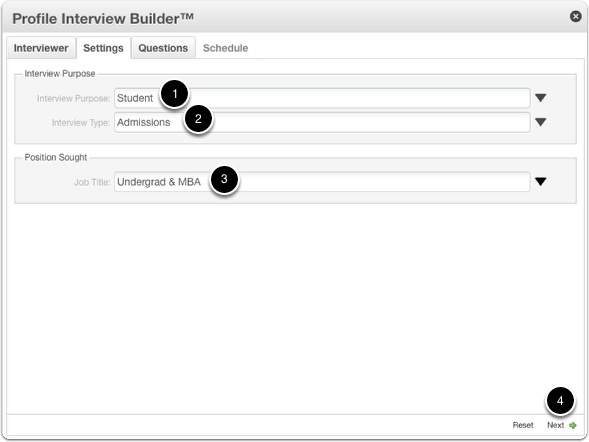
Let’s have a look at the Undergrad & MBA setting first.
1. Select “Student” for Interview Purpose,
2. Select “Admissions” for Interview Type, and then
3. select “Undergrad & MBA” in the Job Title Field.
4. Click “Next” button to advance to the competency/themes tab of Screening Interview Builder.
8.1 Student Interviews – Undergrad & MBA.
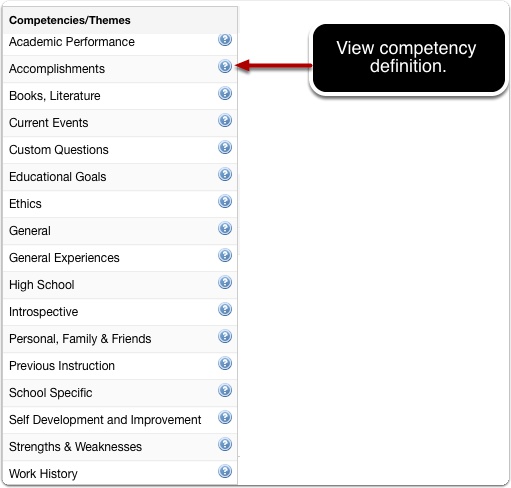
Here’s a look at the list of competencies up close. To see the definition of each competency, click the blue question mark next to it. Note that many of these competencies/themes are self-explanatory and no further definition is necessary.
9. Student Interviews – Dental Interviews.
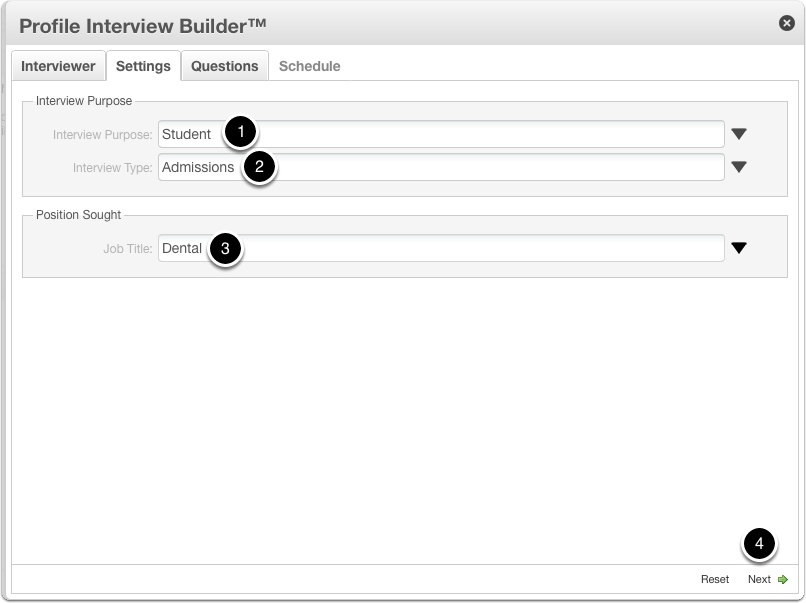
The next competency/theme collection is for Dental.
1. Select “Student” for Interview Purpose,
2. Select “Admissions” for Interview Type, and then
3. select “Dental” in the Job Title Field.
4. Click “Next” button to advance to the competency/themes tab of Screening Interview Builder.
9.1 Student Interviews – Dental Interviews.
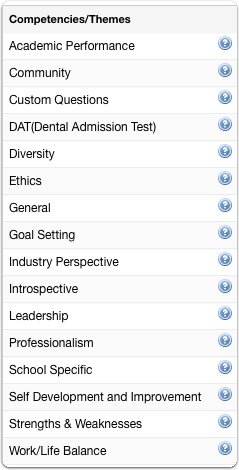
Here’s a look at the list of competencies up close. To see the definition of each competency, click the blue question mark next to it. Note that many of these competencies/themes are self-explanatory and no further definition is necessary.
10. Student Interviews – MBA Interview.
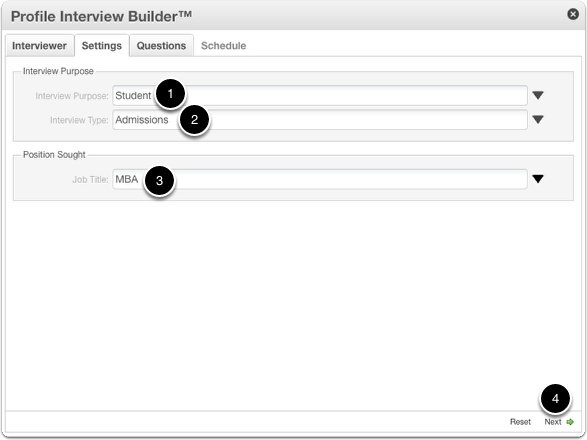
The next competency/theme collection is a great starting place for an MBA or similar graduate study.
1. Select “Student” for Interview Purpose,
2. Select “Admissions” for Interview Type, and then
3. select “MBA” in the Job Title Field.
4. Click “Next” button to advance to the competency/themes tab of Screening Interview Builder.
10.1 Student Interviews – MBA Interview.
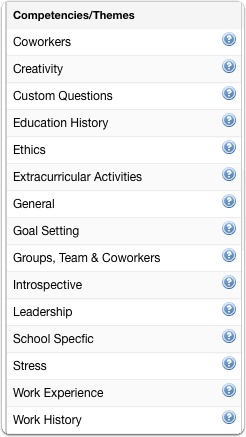
Here’s a look at the list of competencies up close. To see the definition of each competency, click the blue question mark next to it. Again, please note that many of these competencies/themes are self-explanatory and no further definition is necessary.
11. Student Interviews – Medical Interview.
The next competency/theme collection is a great starting place for pre-med or other similar study programs.
1 – Select “Student” for Interview Purpose,
2 – Select “Admissions” for Interview Type, and then
3 – select “Medical” in the Job Title Field.
4 – Click “Next” button to advance to the competency/themes tab of Screening Interview Builder.
11.1 Student Interviews – Medical Interview.
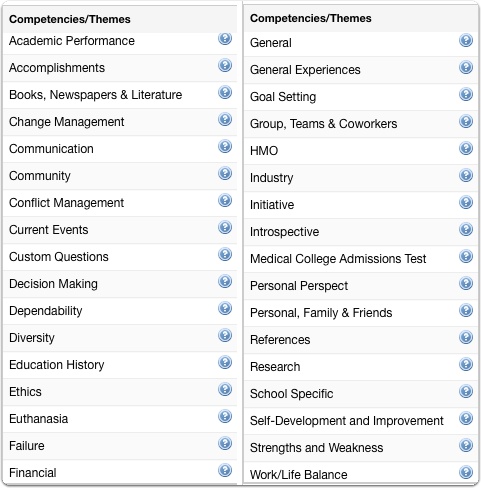
Here’s a look at the list of competencies up close. To see the definition of each competency, click the blue question mark next to it. Again, please note that many of these competencies/themes are self-explanatory and no further definition is necessary.
That’s it! Selecting an interview type is a great place to start choosing great screening questions for your interviews!
Creating and Recording Your Own Screening Interview
Pointe Profile® provides an opportunity and tools for you to present yourself excellently – at virtually no charge to you. With Pointe Profile®, you can interview yourself as well or better than many recruiters. Pointe Profile® supports a variety of interview topics natively, and more are planned for future releases. Your interview can be shared via a link in your resume, email, text, or on a business card forever at no additional charge to you. You can add other relevant information (in video format) to the handy Pointe Profile® playlists to make your interview stand out even more. We’ll discuss adding videos to your playlists in a later lesson. Right now, let’s get started on building your first Pointe Profile® interview.
1. Add an interview.
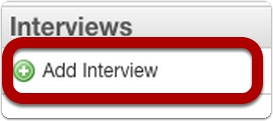
Click “Add Interview” to open the Profile Interview Builder™ window.
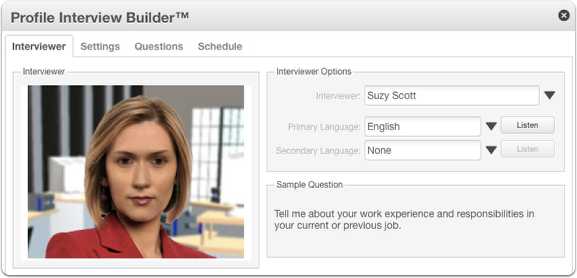
2. The Profile Interview Builder™ window opens.
You should see a window similar to the one above. Creating your screening interview with the Profile Interview Builder™ is easy. There are four steps: Choose Interviewer, Choose Settings, Choose Questions, and Schedule your interview. Let’s choose an interviewer now.
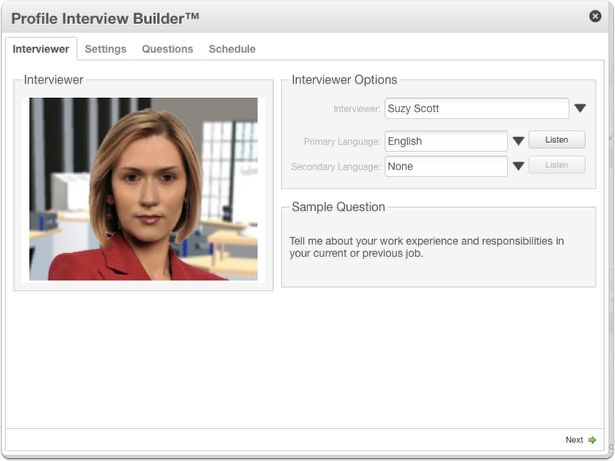
3. Choose your interviewer.
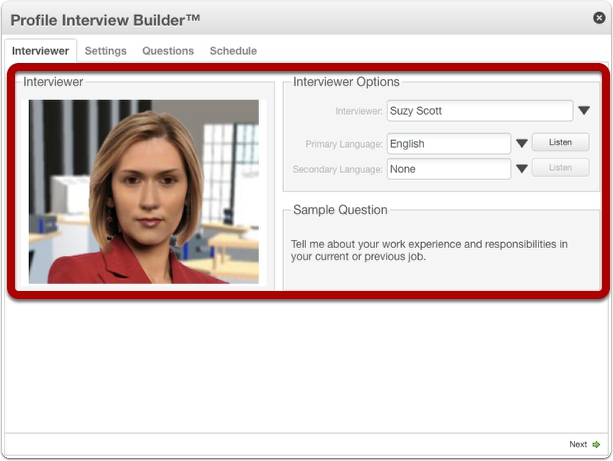
Meet Suzy Scott. Suzy Scott is the default interviewer shown above.
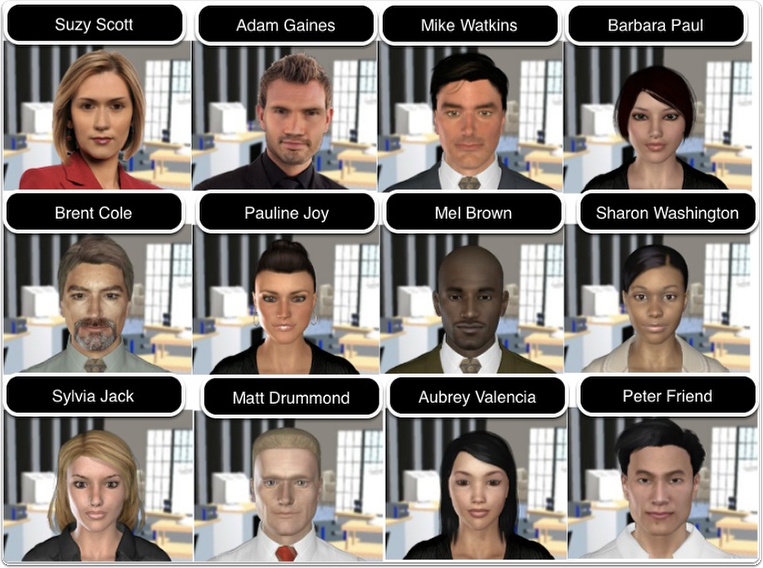
3.1 Meet the 12 Connexion Pointe® interviewers.
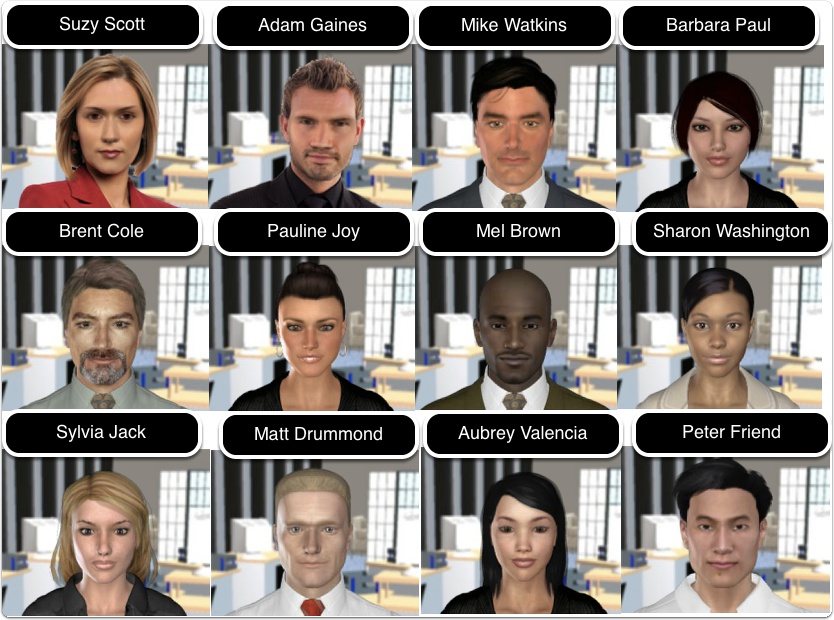
Pointe Profile® simulates a face-to-face interview, and you may choose from 12 multi-lingual interviewers. Choose an interviewer that you would feel comfortable talking to.
3.2 Choose different interviewer (Optional).
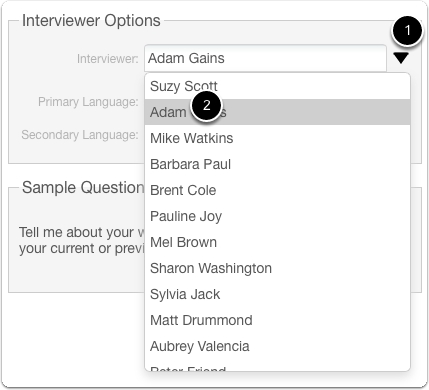
To select a new interviewer,
1. Click the drop-down menu with Suzy Scott’s name to see a list of available interviewers.
2. Select another interviewer.
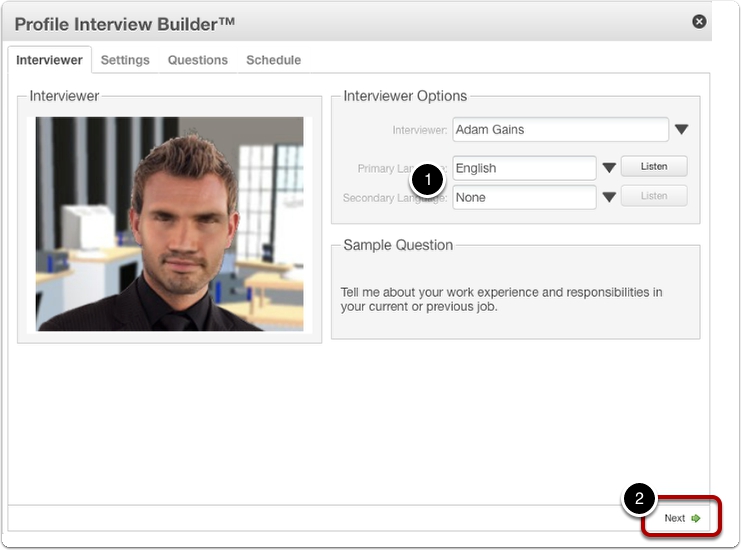
3.3 Choose your interviewer. Meet Adam Gaines.
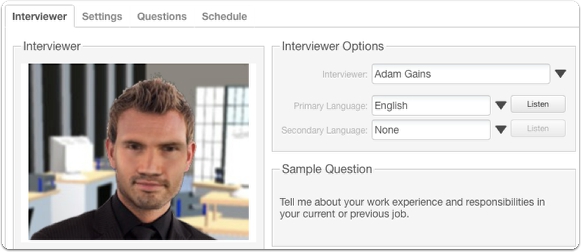
We like Adam Gaines, so we’re going have him ask the interview questions. Now let’s choose a language for our interview.
3.4 Choose your primary language.

1. The default primary language is English. All Pointe Profile® interviews must have an interview in English.
2. To hear a sample of Adam Gaines asking a question in English, click the “Listen” button.
3. The text of the sample question appears in the “Sample Question” pane.
3.5 Choose your secondary language.
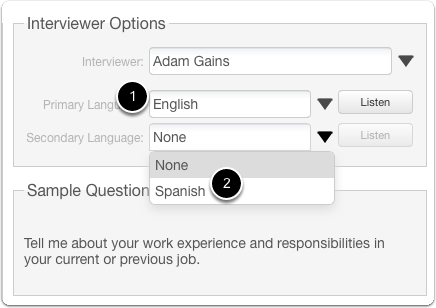
1. Pointe Profile® currently offers interviews in English and Spanish.
2. A Spanish language interview is not required to complete your Pointe Profile®, so “None” is the default selection in the secondary language drop-down menu. (If no secondary language is desired you can just leave “None” selected.) To add the same interview in Spanish, click the “Secondary Language” drop-down menu and select “Spanish.”
3.6 Adam Gaines speaks Spanish too.
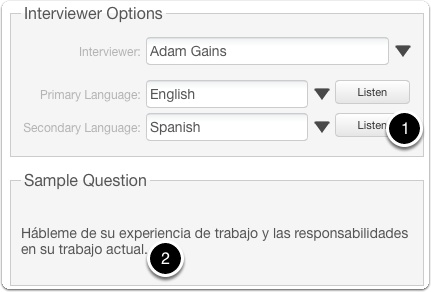
1. To hear a sample of Adam Gaines asking a question in your chosen language, click the “Listen” button.
2. The text of the Spanish sample question appears in the “Sample Question” box.
3.7 Interviewer and languages selected!
1 – For this example, we’ll take an interview in English, so we’ll choose “None” for our secondary language. Your display should look similar to the photo above.
4. Screening interview settings: select an Interview Purpose.

If you’re a job seeker, choose “Professional.” If you’re a student looking to introduce yourself to educational institutions, choose “Student.” This example will illustrate a PROFESSIONAL interview. Please note that the process of building interviews is identical for all types.
4.1 Select an interview type.
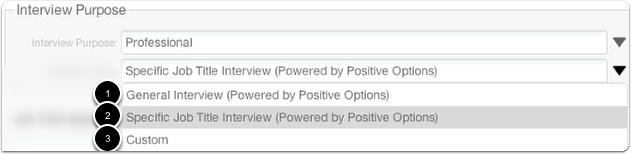
There are three types of screening interviews from which to choose.
1. For a general interview suitable for virtually any career pick “General Interview (Powered by Positive Options).” This interview is based on competencies sought after by many CEO’s regardless of the position. This may be a good choice if you don’t want to limit your consideration to just one job title. Organizations can consider what you have to offer and determine your fit for any number of available positions.
2. For an interview that targets a specific job title, choose “Specific Job Title Interview (Powered by Positive Options).” This interview presents a collection of behavioral questions relevant to specific positions as defined in the Standard Occupational Classification (SOC) system. This may be effective in encouraging organizations’ engaging you further to fill a particular job.
3. To build a completely custom interview using our “Commonly Asked Screening Questions” database, choose “Custom.” Here you can create your interview entirely from scratch or use commonly asked screening questions from a variety of competencies and themes.
Note: The process of selecting questions for an interview is the same regardless of the interview type.
In this example, we will choose “Specific Job Title Interview (Powered by Positive Options)” and build an interview that targets a specific job title. After selecting the “Specific Job Title Interview (Powered by Positive Options),” the “Job Title Search” window appears.
5. Job Title Search window.
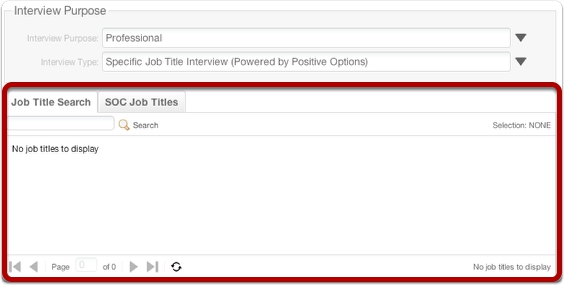
The Job Title Search window appears. To cover as many job titles as possible and to help you find the most suitable job title, searches are based on the Standard Occupational Classification (SOC) system. There are two options available to search for an appropriate job title:
Option 1 – Use the Job Title Search Tab, or
Option 2 – SOC Job Titles Tab.
5.1 Option 1 – Use the Job Title Search tab.
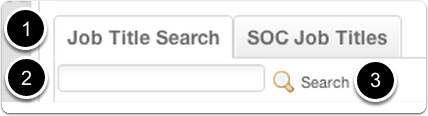
The first and simplest option is to use the automated Job Title Search feature.
1. Make sure the Job Title Search tab is selected.
2. Enter a job title in the text field. This field accepts text and numerical values.
3. Click “Search.” The list of available and similar titles displays below the search field.
For this example, we will use “resort clerk” as our job title.
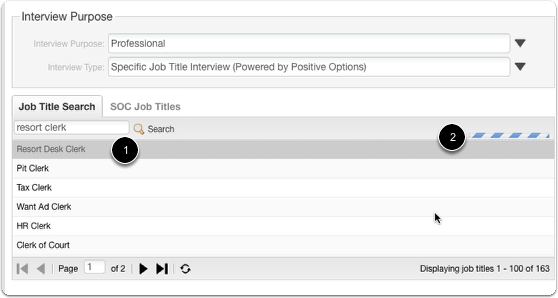
5.2 Option 1 – Use the Job Title Search tab.
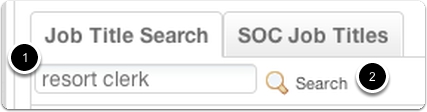
1.Type “resort clerk” in the search field.
5.3 Option 1 – Use the Job Title Search tab.
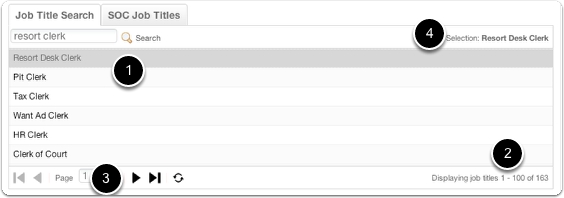
1. A list of comparable titles similar to or containing the words “resort clerk” appears.
2. The total number of available titles displays in the lower right corner.
3. You can navigate through multiple pages of search results if necessary.
4. Choose one of the titles in the list and click it. Your choice will be indicated in the top right corner.
If a suitable title is not in the list, then enter another title and click search. Repeat these steps as necessary until an appropriate job title is found.
For this example, we’ll select “Resort Desk Clerk.”
5.4 Option 1 – Use the Job Title Search tab.
1. Note that “Resort Desk Clerk” is highlighted.
2. A progress bar appears in the upper right corner indicating the system is aligning your selected title with an appropriate Competency/Theme Set. Our selection will be reported in the top right corner of the window. If it’s not showing, give it a few seconds and the system will catch up with you.
5.5 Option 1 – Use the Job Title Search tab.

After a few seconds, our selection is indicated in the upper right corner of the window. Mission accomplished!
5.6 Option 2 – SOC Job Titles tab.
![]()
The second option for selecting a job title involves using the SOC Job Titles tab to locate a suitable job title. I’ll show you how.
First, select the SOC Job Titles tab.
5.7 Option 2 – SOC Job Titles tab.
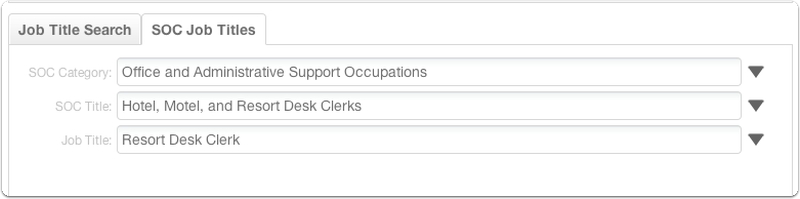
The window appears with three drop-down menus – “SOC Category,” “SOC Title,” and “Job Title.” Since we’ve already made a selection, it’s indicated in the “Job Title” field. You may change any of these fields as desired, but note that the choices available in each field are dependent on the selection made in the field above it. For example, the selections available in the “Job Title” field depend on the selection made in the “SOC Title” field, which is in turn dependent on the “SOC Category” field selection. The following will provide a step by step example of our “resort clerk” position using this method.
5.8 Option 2 – SOC Job Titles tab.
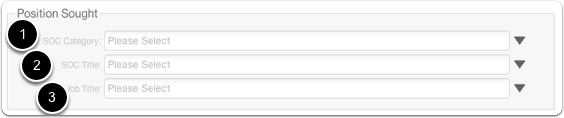
To cover as many job titles as possible and to help you find the most suitable job title, you may like this 3-step position selection process, which is also based on the SOC system too.
Step 1 – Choose a SOC Category (in the U.S. SOC Code, this would be called a “Major Category”).
Step 2 – Choose a SOC Title ( in the U.S. SOC Code this is similar “Minor Category” and “Broad Occupation”).
Step 3 – Choose the most accurate job title for your purpose (In the U.S. SOC code this would be called the “Detailed Occupation”).
Let’s do each of these steps now. For this interview, we will be looking to build an interview for a clerk at a resort.
5.9 Option 2 – SOC Job Titles tab.
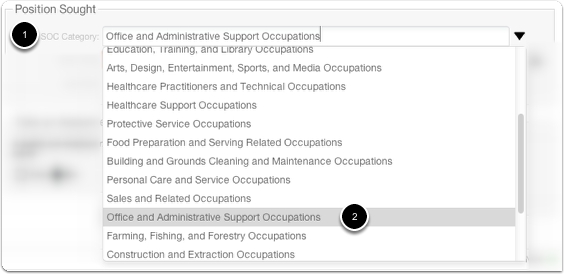
1. There are 23 categories in the SOC Category drop-down menu.
2. For our clerk position, select “Office and Administrative Support Occupations.”
5.10 Option 2 – SOC Job Titles tab.
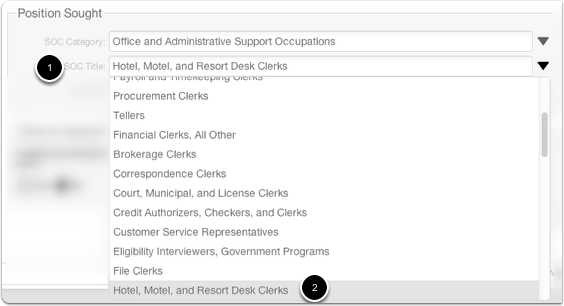
1. Next, we’ll move to the second drop-down menu labeled “SOC Title,”
2. and select “Hotel, Motel, and Resort Desk Clerks” from the list.
5.11 Option 2 – SOC Job Titles tab.
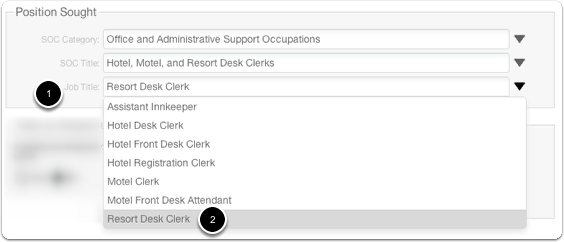
Finally, we drill down to a specific job title on the
1. “Job Title” drop-down menu. While any one of these would be suitable for our purpose, let’s be sure to choose the job title that most accurately reflects what we are looking for. Here we selected and clicked
5.12 Option 2 – SOC Job Titles tab.
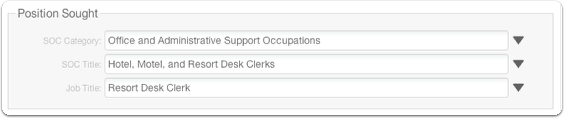
After your three selections, your Position Sought area should look similar to the photo above. If you don’t find a suitable job title for your interview, go back to the “SOC Category” drop-down menu and try another selection, then repeat the process. If you still don’t find a suitable job title, you might consider selecting a similar position, taking a General Interview Powered by Positive Options or building a Custom interview using our commonly asked question database.
5.13 Option 2 – SOC Job Titles tab.
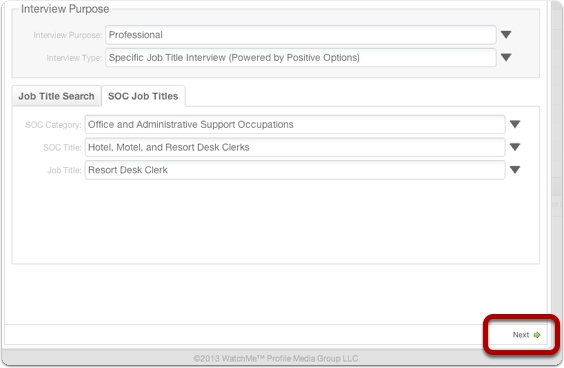
Review your choices and adjust as needed, then click “Next” in the lower right corner of the window.
6. Selecting Your Screening Interview Questions
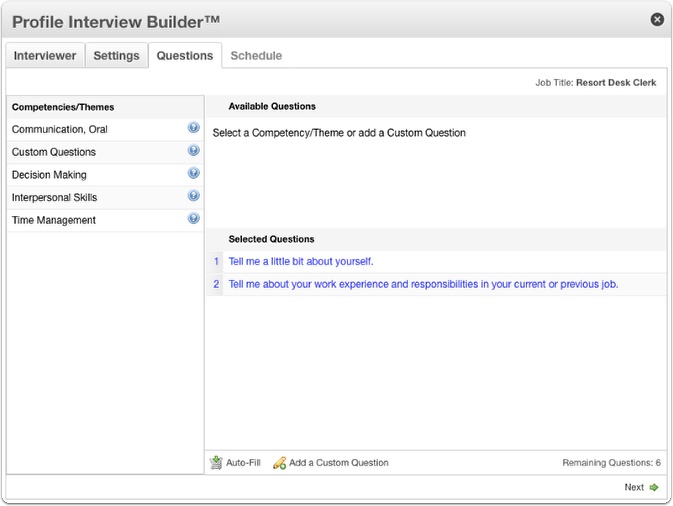
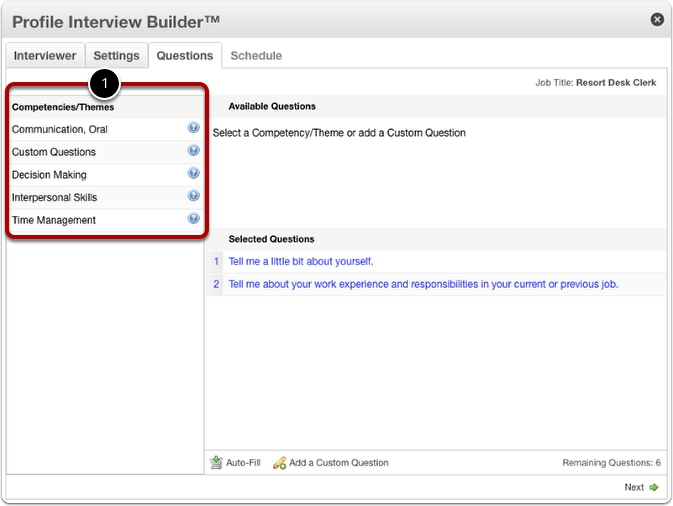
Clicking the “Next” button after selecting your position sought will bring you to the “Questions” tab.
Your display should be similar to photo above.
6.1 Selecting Your Screening Interview Questions: A Quick Overview
1. All of our screening interviews have these two mandatory questions at the beginning. These two questions cannot be edited, re-ordered, replaced or deleted from an interview. The Profile Interview Builder™ features behavioral-based interview questions in its General Interview (Powered by Positive Options) and Specific Job Title-Interview (Powered by Positive Options).
For a Specific Job Title-Interview (Powered by Positive Options), Profile Interview Builder™ presents a list of behavioral characteristics that you should respond to based on your job title selection; These characteristics are called competencies or soft skills. Your interview is composed of questions that give you an opportunity to display these competencies by describing your past experiences.
Note: For more information on behavioral interviewing, check out our free video “What Is Behavioral Interviewing.” It’s in the Connexion Pointe® University list!
There are three options for building your screening interview. Let’s look at them now!
6.2 Option 1: The Auto-Fill button.
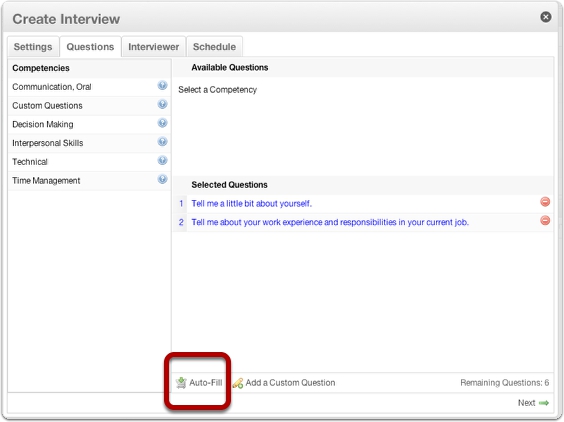
The first option for building a screening interview is to use the Auto-Fill function. We can quickly populate our question list by clicking the “Auto-Fill” button.
6.3 Option 1: The Auto-Fill button.
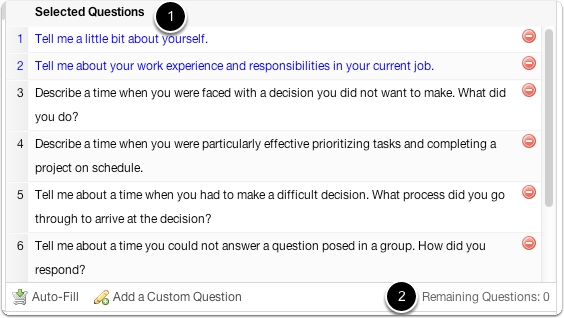
1. Auto-Fill selects the correct number of questions from the recommended competencies and completes the list.
2. Remaining questions is “0” so we can move on to the next step. (Note: Except for question #1 and #2, you can replace, re-order or delete all of the questions selected by Auto-Fill. Clicking the Auto-Fill button again will remove and replace any previously chosen questions.
NOTE – It’s rare, but the “Auto-Fill” function has been known to add duplicate questions. Be sure to check your questions and replace any duplicates added by the “Auto-Fill” function.
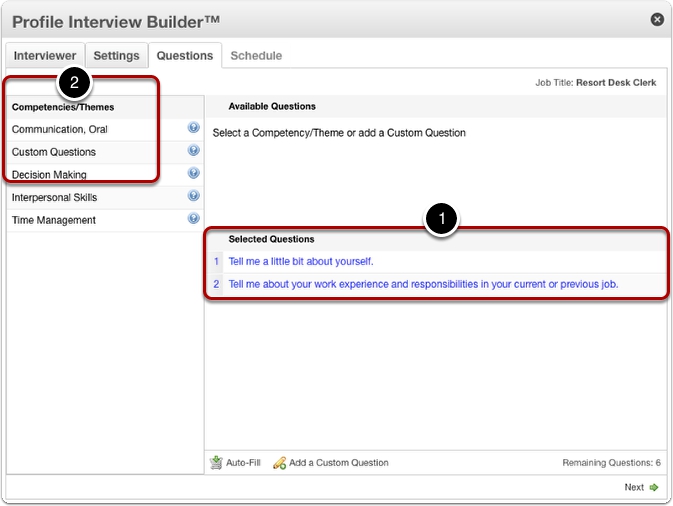
6.4 Option 2: Build it Yourself. Start by Viewing Recommended Competencies.
Let’s assume we’ve just arrived at the “Questions” tab and it looks like it did before we illustrated the “Auto-Fill” function.
1. For our Resort Desk Clerk example, the Profile Interview Builder™ recommends you answer questions about your Oral Communication, Decision Making, Interpersonal Skills, Technical Ability, and Time Management. It also allows you add custom questions if desired.
Now let’s look at some questions.
6.5 Option 2: Build it Yourself. Viewing Recommended Competency Descriptions
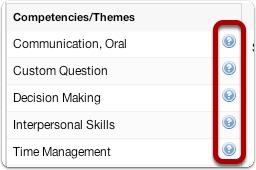
Notice there is a blue question mark button next to each competency. Click the button next to a competency to view a description of the skill.
Now let’s look at some questions.
6.6 Option 2: Build it Yourself. Viewing Recommended Competency Descriptions
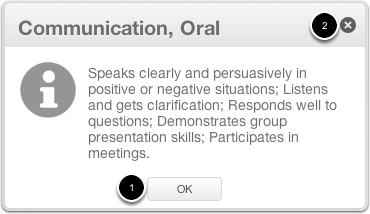
The description box above is for Oral Communication. When you’re done viewing the description, you can
1. click the “OK” button or
2. click the “X” in the upper right corner of the description box.
6.7 Option 2: Build it Yourself. Next, View Questions that accompany the Competencies.
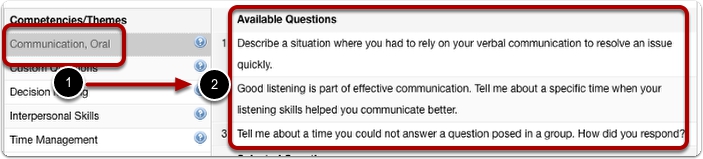
1. Select a competency from the “Competencies” pane. For example, we chose Oral Communication above.
2. The selection populates a list of questions examining Oral Communication in the “Available Questions” pane. Repeat this action on the other competencies to view questions for those competencies.
6.8 Option 2: Build it Yourself. Drag & Drop Selected Questions to Build your Screening Interview
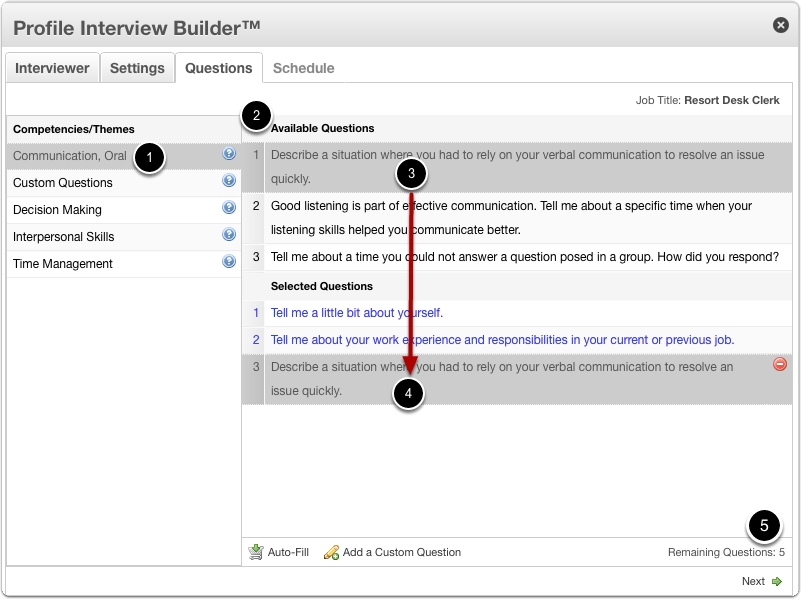
Now let’s add the final two steps to illustrate the question selection process:
1. Select a competency from the “Competencies” list. (we chose Oral Communication).
2. View a list of questions examining the competency in the “Available Questions” list.
3. Select a question, and
4. drag it down to the “Selected Questions” area, and drop it in the desired position. (Note: You can NOT drop your question before or between the two mandatory questions.)
5. Observe the number of remaining questions. Continue choosing questions until this number is “0”.
We recommend choosing a question from each Competency/Theme and then revisiting each to make a total of 6 selections.
6.9 Option 3: Add Your Custom Questions
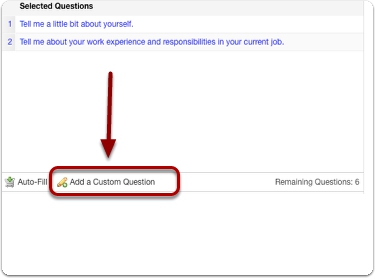
A third option to building your screening interview is to create your own questions. Adding a custom question to your interview is easy, and as long as there is at least 1 question remaining to be selected, you can use this option. First, click the “Add a Custom Question” button to open the “Add Custom Question” dialog box.
6.10 Option 3: Add Your Custom Questions
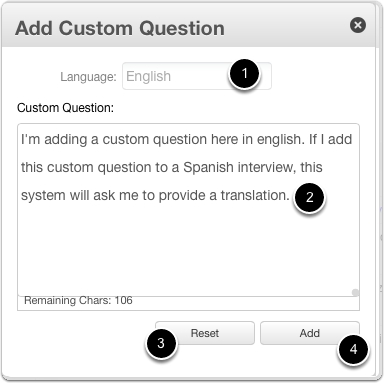
The “Add Custom Question” window opens.
1. Choose the language for your question. (The default language is English.)
2. Enter the text for your question. Questions must be 255 characters or less.
3. Click “Reset” to remove your choices and start over.
4. Click “Add” to add the custom question to your question database.
6.11 Option 3: Add Your Custom Questions
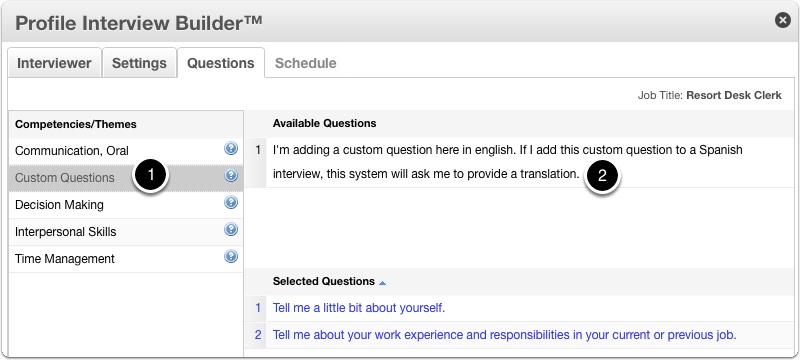
1. Now when you select “Custom Questions,”
2. your custom question appears in the custom question database.
Note: Custom questions are job-title specific. For example, if you create a custom question for the position of “Resort Desk Clerk” that custom question is categorized specifically for “Resort Desk Clerk” – it is not automatically available for any other job. As your database of custom questions grows, this becomes critical for organization and ease of use.
6.12 Option 3: Add Your Custom Questions
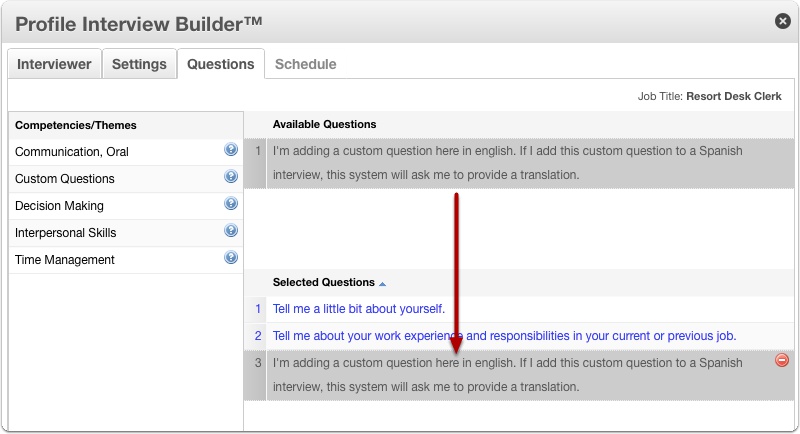
To add your custom question to the interview, just click on the question to drag and drop it into the Selected Questions list.
6.13 Option 3: Add Your Custom Questions
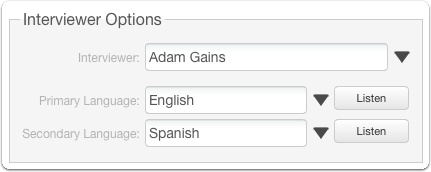
This is a great time to explain how previously added custom questions in English can be added to a two-language interview in English and Spanish. Let’s assume we want to build another interview for the same job title, but this time we want to respond to the questions in English and Spanish.
6.14 Option 3: Add Your Translations to Custom Questions
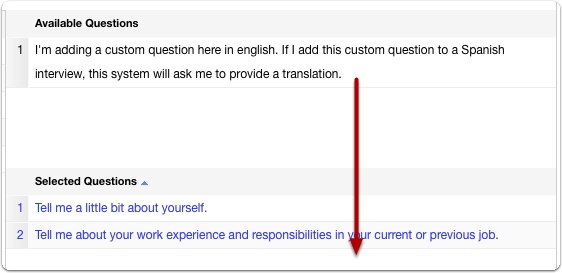
After choosing our interviewer and language settings, we arrive again at the “Questions” tab. We select “Custom Questions,” and we can see the custom question we added for our “Resort Desk Clerk” interview. First, let’s drag it into our two language interview.
6.15 Option 3: Add Your Custom Questions
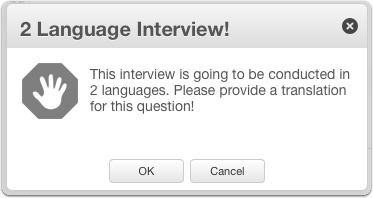
The system lets you know that the interview will conduct in 2 languages and requires a translation be provided for this interview question.
6.16 Option 3: Add Your Custom Questions
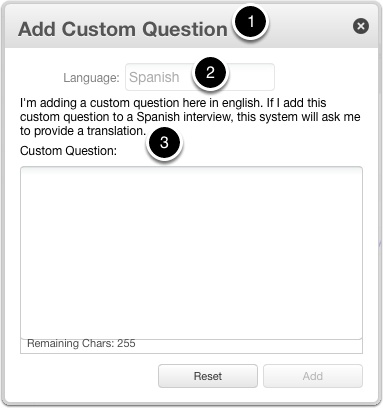
1 – The “Add Custom Question” window opens.
2 – Notice the language selector is set to Spanish, which is the secondary language chosen for this interview.
3 – The text of the original question is presented here where you can select and copy it to your computers’ clipboard.
6.17 Option 3: Add Your Custom Questions
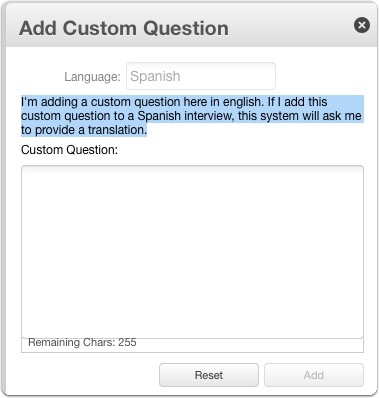
Go ahead and select the text and copy it to the clipboard.
6.18 Option 3: Add Your Custom Questions
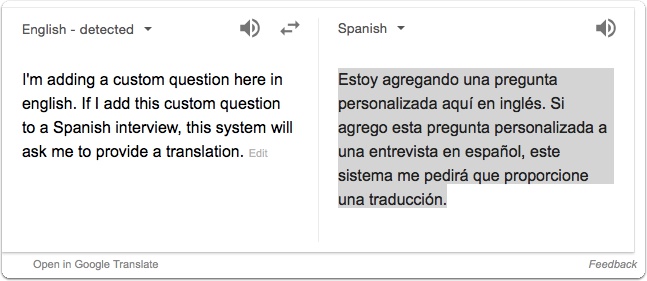
I used Google Translate to create the Spanish translation of this question in this example.
6.19 Option 3: Add Your Custom Questions
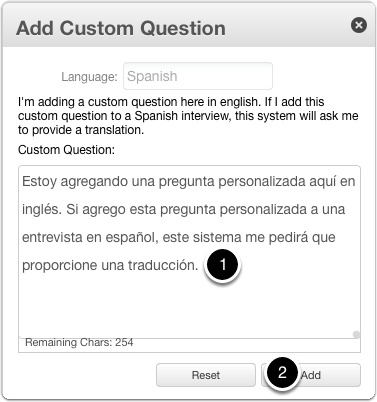
1 – Once the translation is complete. Copy the translated text and paste it into the Custom Question text window.
6.20 Option 3: Add Your Custom Questions
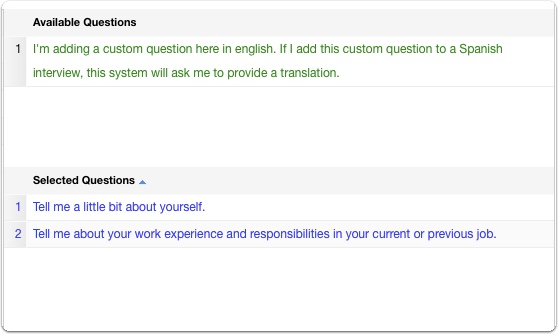
The question and its’ translation are added to your custom question database. Notice the text of the question is green. This indicates the question is available in English and Spanish. This question is now available for English and Spanish interviews with no additional steps required.
6.21 Option 3: Add Your Own Custom Questions

If you’re adding a new custom question to a two-language interview, the process is also simple and straightforward.
1 – First Enter your custom question in English in the “Custom Question” field.
6.22 Option 3: Add Your Custom Questions
The system saves the English version of your question.
6.23 Option 3: Add Your Custom Questions
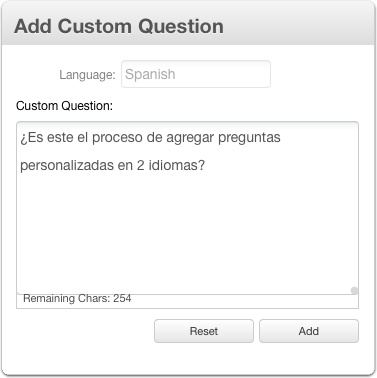
Then the “Add Custom Question” window immediately opens. Like before, type or paste the Spanish version of this question in the “Custom Question” field.
6.24 Option 3: Add Your Custom Questions
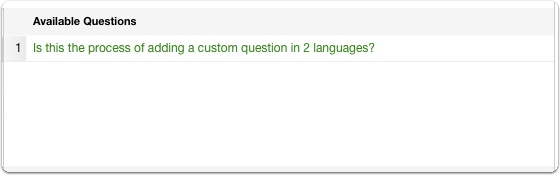
The question displays in the database with green text – which again indicates that this question is ready and available to be added to English and Spanish interviews.
7. Removing questions from your interview.
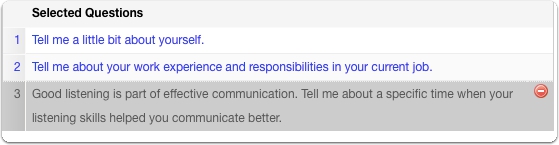
To remove a question from your interview, select it and click the red delete icon. The question will be immediately removed.
8. FYI – You cannot delete question #1 and #2.
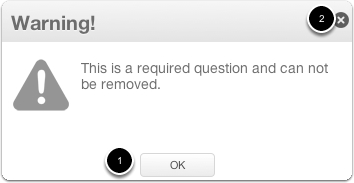
As previously stated, Question #1 and Question #2 cannot be edited, re-ordered, replaced or deleted from an interview. Any attempt to remove these questions will result in the dialogue box above displaying.
1. click the “OK” button or
2. click the “X” in the upper right corner of the dialogue box.
8.1 Can not reorder question #1 and #2.
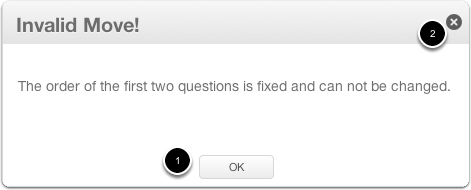
As previously stated, Question #1 and Question #2 cannot be edited, re-ordered, replaced or deleted from an interview. Any attempt to re-order these questions will result in the dialogue box above displaying.
1. click the “OK” button or
2. click the “X” in the upper right corner of the dialogue box.
9. Duplicate questions.
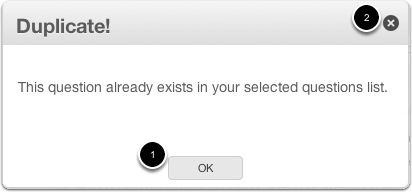
Interview Builder will not allow you add duplicate questions. Adding duplicate questions to an interview will result in the dialogue box above displaying.
1. Click “OK” or
2. Click the “X” to close the window and resume building your interview.
Note: When using the Auto-Fill function, it strongly recommended that you check your interview for duplicate questions.
10. Question limit reached.
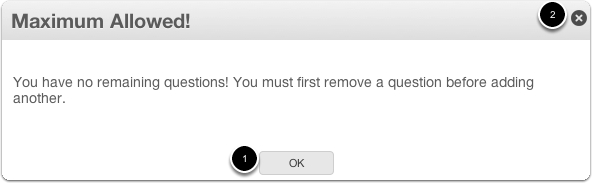
When you reach the maximum number of interview questions, no more question can be added to the interview. Any attempt to do so will result in the above dialogue box displaying.
1. Click “OK” or
2. Click the “X” to close the window and resume building your interview.
Follow the steps for removing questions as previously described, to make room for different questions.
11. Make sure you choose enough questions!
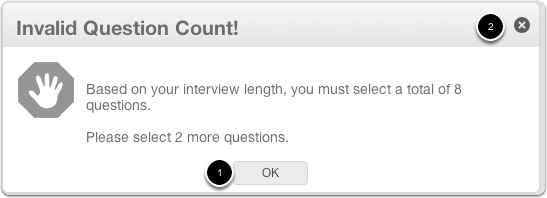
Regardless of which option you use to choose your questions, make sure you select enough questions to complete the interview. Failure to do so will result in a warning similar to the one illustrated above. If this warning appears,
1. click “OK” or
2. click the “X” and continue to select questions until the Remaining Questions indicator is at “0”.
12. Done selecting questions? Click “Next.”
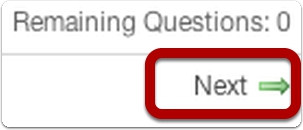
When you’re satisfied with your list of screening interview questions and the “Remaining Questions” indicator is at “0”, click “Next” in the lower right corner.
13. Review your choices.

At this point, you’re ready to have the Profile Interview Builder™ create your interview, and prepare the system to video-record your responses to the selected questions. At this time we highly recommend that you select each tab, review your choices, and make any adjustments as necessary. YOU WILL NOT BE ABLE TO MAKE CHANGES AFTER THE INTERVIEW IS SCHEDULED.
Note: You can always build another interview – you just won’t be able to make changes to this one.
14. Create Your Screening Interview.
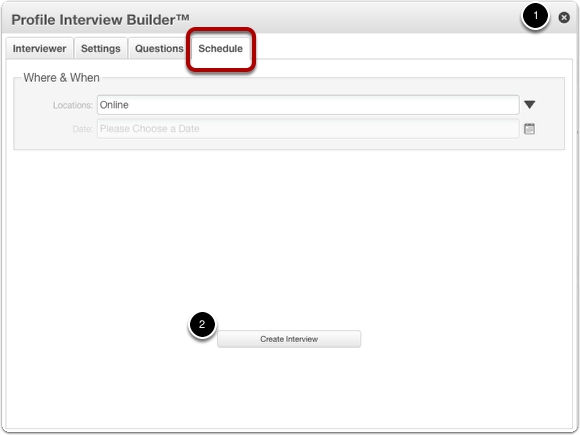
Now that our choices are complete, it’s time to schedule our interview. Click “Next” in the lower right corner and let’s check our calendar!
The photo above illustrates the “Schedule” tab in the Profile Interview Builder™. Your display should be similar. Currently, all of the interviews must be taken online, so you’re done!
1. Click the “Create Interview” button compile your interview. The system compiles your interview, exits the interview builder application, and redirects you to your main profile page with the “My Interviews” tab. If not, select “My Interviews” tab.
15. Preparing to take the interview.
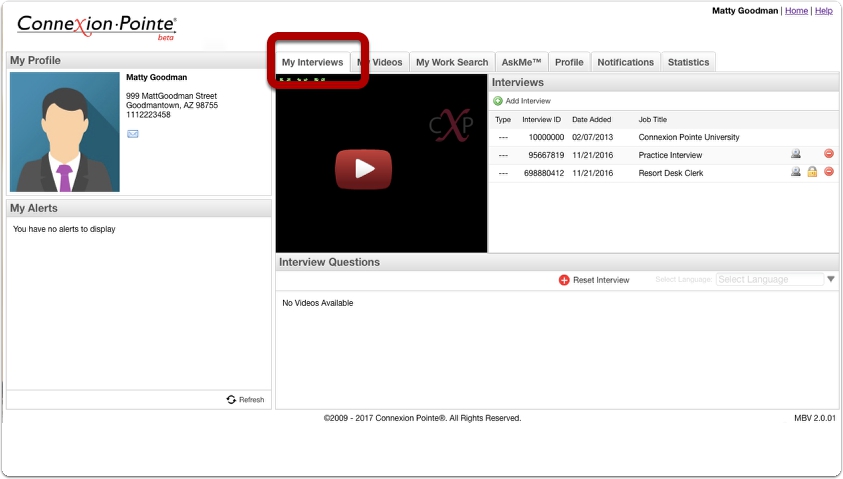
Once the system compiles your interview, Profile Interview Builder™ will close, and your display should be very similar to the photo above. The “My Interviews” tab should be selected. If it is not, select it now.
16. Your interview is ready to record.
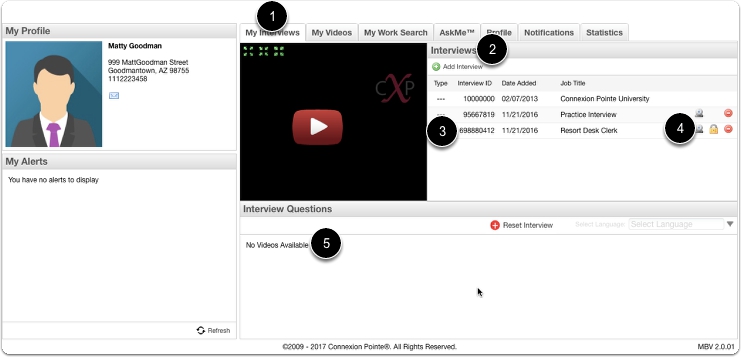
1. Let’s be sure that all is well and our interview is ready to take. Make sure the “My Interviews” tab is selected.
2. Locate the “Interviews” box.
3. You should see the Interview ID number for our interview, and the name of the job title we selected.
4. There should be three icons, a webcam, and a padlock and a delete button next to our job title. Select our interview and click it. After the interview loads,
5. locate the “Interview Questions” box. Our job title should also appear here, and there should be a note that says “No Videos Available.” (There are no videos available because we did not take the interview yet ).
17. Record your interview.
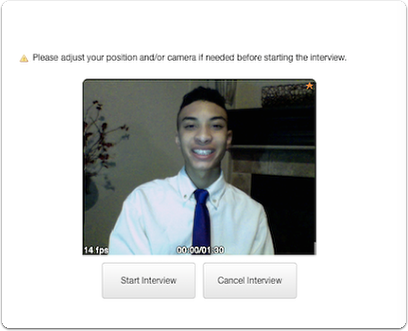
The steps for recording your interview, viewing your performance and retaking your responses are identical to those described for the practice interview. There’s no time like the present to take an interview, so throw on some appropriate professional clothing (at least from the waist up) and go for it!
18. When you finish your interview, you can easily review your responses and make changes just like you learned to do with the practice interview. Here’s a quick refresher on that process:
18.1a. Viewing your performance and revising your responses is easy:
The questions you just answered should appear in the “Interview Questions” pane. If they do not automatically load, Refresh the page by clicking this icon:
and then click the interview with the corresponding job title.
1 – Notice the camera icons in the “Interview Questions” window have a small “+” and are slightly different from the camera icons in the “Interviews” pane. This is the button you use to indicate you’d like to revise your response to this question:
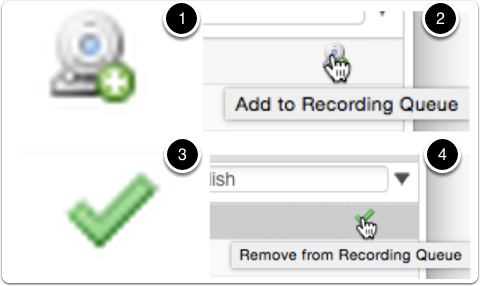
2 – Hover your mouse over the camera icon to the right of the first question. The tooltip “Add to Recording Queue” is displayed.
3 – Click the icon and notice it changes to a green checkmark. This indicates you would like to add this question to the queue to be re-recorded. You can add as many questions from your practice interview to this queue as you like.
4 – If you change your mind, questions can be removed from the queue at any time. Hover your mouse over the green checkmark. The tooltip “Remove from Recording Queue” is displayed. If you click it, the camera icon will return. Choose the questions you’d like to revise and make sure the green checkmark indicates them.
18.2 Revise responses.

After you’ve selected the questions for re-recording, all of the questions displaying a green checkmark will be added to the queue, and you’ll be able to revise them. (For example, in the photo above there four questions selected, so there will be four questions asked in the revision interview.) The process for starting the interview and responding to the questions is the same as previously described.
To revise any of your interview questions in this example, click the camera icon next to the job title of the interview.
19. “Reset Interview” function.
Now is a great time to remind you about the “Reset Interview” button.
19.1 – It removes the responses for the questions and restores the selected interview so that it can be retaken.
19.2 – The “Reset Interview” button is only available while the interview can be revised. When you view your public profile to copy the interview link, no more revisions are allowed, and the “Reset Interview” button will be no longer available.
Note: Use this button if you’d like to delete all of your responses and retake the interview. A poor internet connection could result in the system missing some of your video responses. A partial interview cannot be shared; it must be retaken.
19.3 Confirm interview reset.
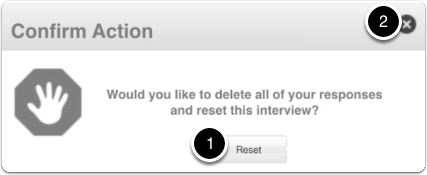
When you click the “Reset Interview” button, this confirmation dialog box opens.
19.3a – Clicking the “Reset” button deletes the responses for the questions and restores the selected interview so that it can be retaken.
19.3b – If you click the “X” in the top right corner, the dialog box closes, and nothing else happens.
19.4 Restart the Interview.
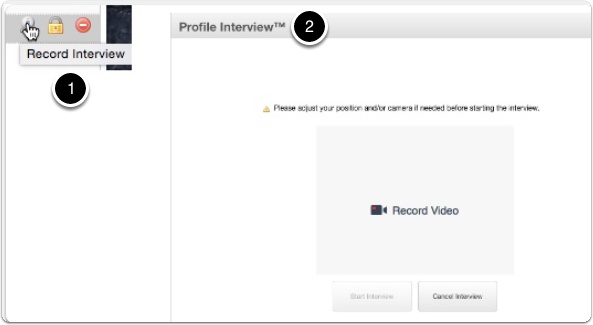
19.4a – After executing the “Reset Interview” function, you can click the “Record Interview” button,
19.4b – you’ll be able to retake the interview as if it was the first time.
20. Now take it to the next level.

Question:
Now that my interview is done, what’s next?
Answer:
By creating your own interview (and making it available for sharing with Pointe Savant® users), you’ve already put some real distance between you and possibly hundreds of candidates for this position you’re after. You can share your profile now – with your contact information, photo, cover letter, and resume. But don’t stop there. We recommend extending your Pointe Profile® interview by adding more AWESOME video to your playlists! I’ll show you how…
Extending Your Pointe Profile®
Choose One: Rock Star or Rock Bottom
At the very least, anyone can set up a Pointe Profile® account containing a cover letter, resume, and a photo. Doing so enables you to respond to interview requests by Connexion Pointe® Business users. That’s great if you’re only willing to do the bare minimum and then sit around hoping that a great company (spending time, money and effort looking for someone who “stands out…”) finds you.
1. Do more than the bare minimum.

With just a little more effort you can watch the free Connexion Pointe® University videos and improve your overall interviewing skills. Afterward, you can choose one or more positions and record a targeted video interview for each one, (which is also free by the way) then submit your interview link to organizations to get the jump on folks who do the bare minimum.
1.1 Increase your value to recruiters and hiring managers.

Is there a hiring manager who wouldn’t appreciate you making their life easier by presenting an organized package that they could evaluate in minutes? You also reduce the risk of having an adverse in-person experience with an interviewer who didn’t bother reading your resume or isn’t in the mood to talk to a stranger. Or maybe the interviewer is inexperienced and doesn’t ask you any questions that highlight what you have to offer. What if the interviewer is having a bad day or has you down as the first or last interview. Even worse just before or after lunch. Or after a long holiday weekend.
We’re all human. It happens to the best of us.
The truth is, hiring managers want to know as much as they can about you BEFORE they engage so why not make it easy for them to do their legwork before you meet for the first time? It also couldn’t hurt to save that dry cleaning money and a trip across town (or across the country) just to go through the motions with someone you don’t “fit” with.
1.2 Engagement Level

Simply put, Pointe Profile™ is the most powerful tool on the planet for introducing yourself to organizations. As the saying goes, you’ll never get a second chance to make a first impression, so remember this: the more effort you invest in yourself, the better your first impressions will be. Excellent first impressions happen when your Pointe Profile® recipients come away with more answers than questions.
Just how many questions get answered depends on you. At Connexion Pointe®, we refer to this as the “engagement level” you have with your professional self-promotion.
1.3 Pointe Profile® Video Playlists.
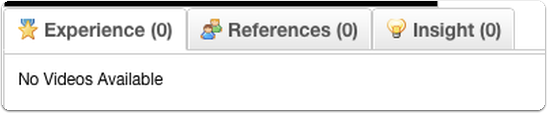
The Pointe Profile® video playlists are for Rock Stars. Rock Stars go the extra mile because there’s no traffic on the extra mile. They know what their strengths are, what problems they solve and how to present themselves in a brief, compelling manner.
Would you like to present yourself as a Rock Star? You can – just add some supporting content to your Pointe Profile®.
1.4 Add Some Supporting Experience Content to Your Pointe Profile®.

Experience is where you can present previous work experience in video format. If you’ve never created a video like this before, there’s an article on our blog that can guide you. First, think of a few questions you’d like to answer about your experience. For each question, choose one of the methods of “speaking behaviorally,” like the S.T.A.R. or the P.A.R. method to plan your answer. Use this answer as a guide to creating a brief multimedia presentation using any of the inexpensive presentation tools available online, on Windows®, Macs® or Tablet devices. Narrated slideshows created in PowerPoint® (Windows), Keynote® (Mac) or Prezi (online) can include video, images, graphics, or text, and then be exported from those programs as video files and presented here. You don’t have to be fancy or famous – just factual. Choose your tools, then tell your story your way!
1.5 Get Some Live References to Your Pointe Profile®.

The Referrals playlist is where you can present video testimonials of coworkers, bosses, networking contacts and clients past or present. Recommendation letters are great, but since 82% of Americans use their phone to take pictures, why not use your smart phone’s video camera to help your career? Getting a video testimonial straight from a reputable co-worker’s mouth is a lot more compelling than any letter! If you’ve never recorded a testimonial before, there’s an in-depth article on our blog that can guide you.
1.6 Add Some Insight to Your Pointe Profile®.

Insight is a place for you to present unique or unrelated professional characteristics in video format on a simple playlist. For example, you might be an accountant by day and an experienced helicopter pilot on the weekends. You might be a project manager at Company X and a fantastic photographer in your spare time. You might even be a Two-Time-Grammy-Award-Winning musician that invented an innovative online video interviewing solution. Insight offers a window into your other great talents while keeping it professional. If you’ve never created an insight video before, there’s an article on our blog that can guide you.
I hope you take advantage of this opportunity to truly define your professional offering and be prepared to share it in your resume or at first contact!
Upload Supporting Videos to Your Pointe Profile®
If and when you choose to present yourself as a Rock Star, you can enhance your Pointe Profile® by adding videos detailing your other experience and qualifications. Uploading videos to the extended playlists is easy!
1. Uploading a video.
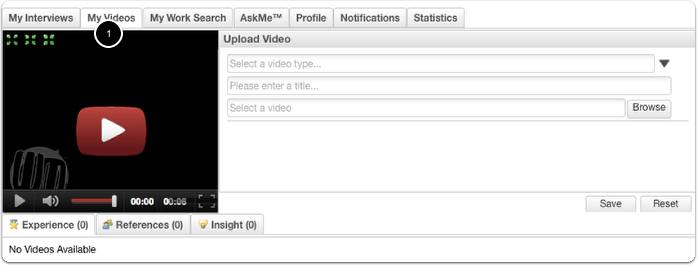
1. Start by clicking the “My Videos” tab.
1.1 Browse to find a video file.

Click “Browse” to find a video on your hard drive.
1.2 Navigate to the file.
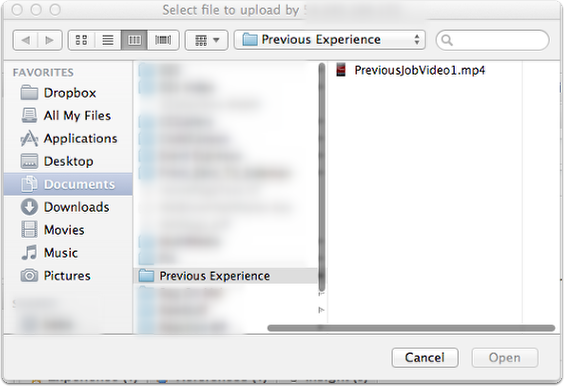
Navigate to the video file you’d like to upload.
1.3 Select the file.
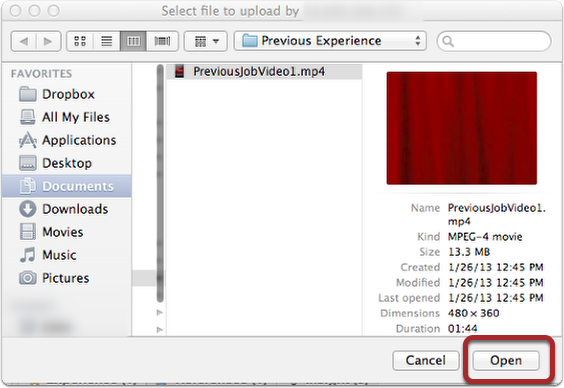
Select the file by clicking on it. Click “Open.”
1.4 File selected.
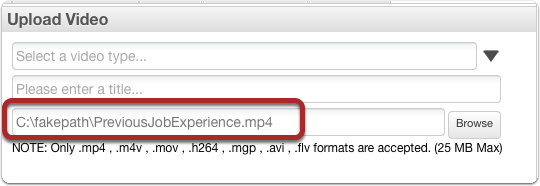
Profile acknowledges your choice in the “Upload Video” pane. Don’t click “Save” yet!
1.5 Upload error.
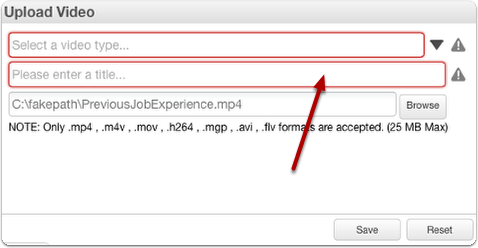
If you click “Save” without choosing a “video type,” or giving your video a title, the system reminds you by highlighting those fields.
1.6 Choose a “Type” for your video.
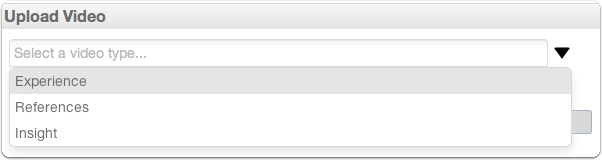
Choosing a type for your video is merely choosing which list the video will appear in your Pointe Profile®. There are three video playlists available: Experience, References, and Insight.
For this example, we’ll choose the “Experience” playlist.
1.7 Enter a title for your video.
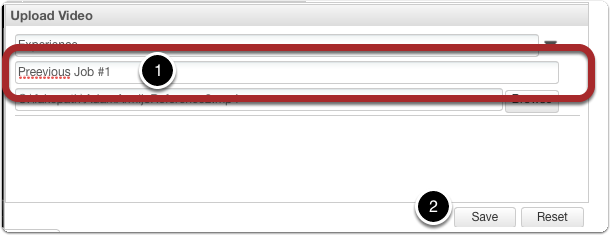
1. Give the video a title.
1.8 Upload your video.
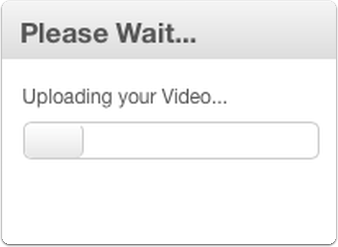
A progress bar appears illustrating the progress of your upload.
1.9 Upload is successful!

When your video successfully uploads, it appears on the list we chose. In the photo above, our video is now on the “Experience” video list.
1.10 Allow video processing time.
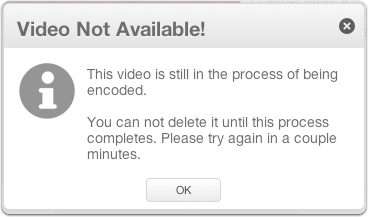
After your video uploads, it undergoes a conversion process to make it deliverable on as many devices as possible. Attempting to view the video during this process will result in the error illustrated above.
2. Manage the Experience List.

Deleting a video from a list is easy. Notice there are two icons next to the video title – a pencil and a red circle. Click the red circle to delete the video.
2.1 Confirm delete.
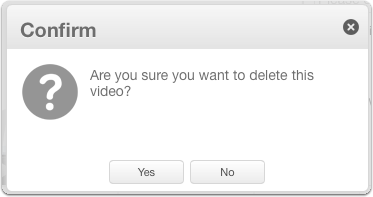
The “Confirm” dialog box appears. Click “Yes” to proceed and click “No” (or click the “X” in the top right corner) to cancel.
3. Edit your video title.

Notice that the word “Preeveeous” in our video title is a misspelling. Click the pencil icon to edit the title.
3.1 Edit your experience video title.

The field becomes available for text entry.
3.2 Enter new title and click “Update.”

3.3 Edited video title.

4. Edit complete!
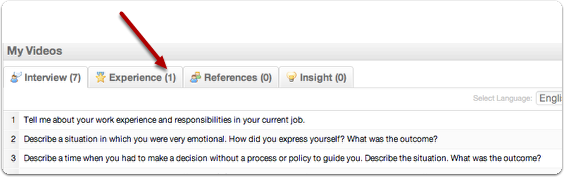
Now when someone views the video interview in your Pointe Profile®, they’ll have an additional video available!
5. Add References and Insight videos.

Feel free to add as many videos as you like to the other lists, but keep in mind that too many videos may overwhelm your recipient. It’s your story – tell it your way! If you’re not sure what to include in your videos, take a look at some of the excellent blog posts at connexionpointe.com for some fantastic ideas.
View and share your Pointe Profile®
Now that you’ve built an excellent screening interview and supported that interview with more awesome screening information in an easy-to-digest-and-highly-desirable-video-format, it’s time to start sharing your profile. This is where your Pointe Profile® excels and is worth its weight in gold.
1. Sharing your Pointe Profile® is easy!
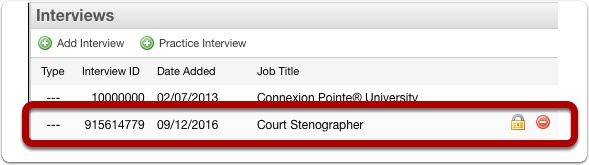
Let’s assume you’re a talented Court Stenographer and someone on your network has referred you to the decision maker regarding an open position. First, log in and locate your interview on the Pointe Profile® dashboard.
1.1 Sharing your Pointe Profile® is easy!

Locate the interview you have prepared for the position. Click the padlock icon to make the interview eligible to be shared.
1.2 Sharing your Pointe Profile® is easy!

If the interview is complete, the padlock will become a small blue earth, and another icon will appear. Click the “View Public Profile” icon.
1.3 Interview loads.

1.4 Sharing your Pointe Profile® is easy!

Now click the “View Public Profile” again.
1.5 Connexion Point™ Profile

2. Viewing Your Pointe Profile®
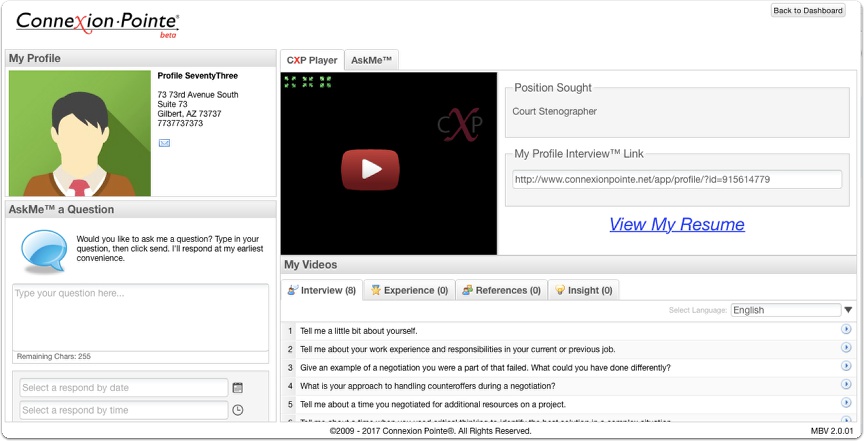
The “View Public Profile” window opens. This is where you can get an idea of how your information will appear to your recipient. For a quick overview, check out the video.
2.1 View Public Profile Window.
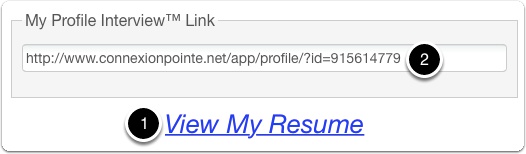
1 – To view your PDF resume, click the View My Resume link.
2 – When you’re ready to share your Pointe Profile® with the hiring manager for the position, you can copy the Profile Interview Link and paste it into your email.
Note: It’s also a great idea to include this link in your resume and cover letter!
2.2 Viewing Your Pointe Profile®
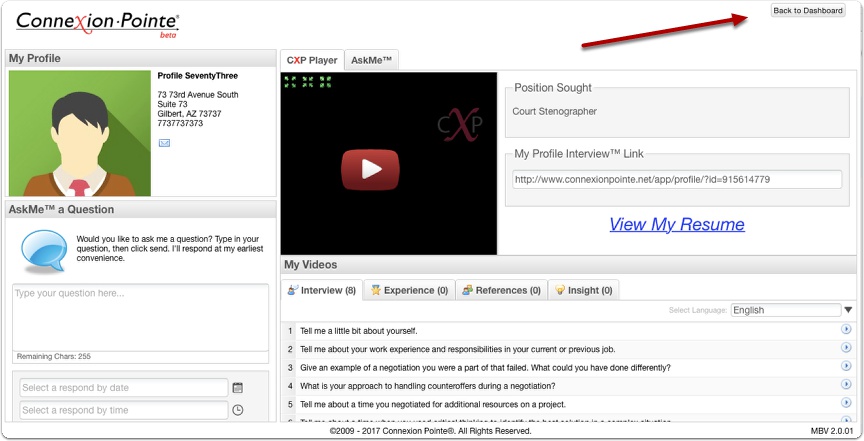
After reviewing your Point Profile® content, you can click the “Back to Dashboard” button to return to your dashboard to edit content or log out.
Note: When you return to the Pointe Profile® dashboard, you will no longer be able to revise your responses to this particular interview.
3. Make Interview Private.

If and when you decide to update this interview, you can ensure that it won’t be shared by clicking the blue earth icon and making the interview private again.
3.1 Make Interview Private.
![]()
The blue earth icon becomes a padlock, indicating the interview cannot be shared and will not be eligible for BYOI submission on screening events.
4. Useful Info: The Hidden Job Market Defined

In the first two paragraphs of her article 6 Ways To Crack The ‘Hidden’ Job Market, Forbes Contributor Nancy Collamer wrote “…the hidden job market – those millions of openings that never get formally posted…” accounts for “…up to 80% of new hires, according to some estimates.”
4.1 The Hidden Job Market: Books

While articles are informative, helpful and convenient, you should note that many experts have written entire books that aim to define the term “Hidden Job Market” and guide job seekers to new opportunities. One example “Unlock the Hidden Job Market: 6 Steps to a Successful Job Search When Times Are Tough“, authors Duncan Mathison and Martha I. Finney write that “More than 70% of today’s job opportunities come through the “hidden job market”: they’re never advertised, assigned to search firms or internal recruiters, or displayed at job fairs. What’s more, as employers cut recruiting costs, the proportion of “hidden” job opportunities is actually growing.”
Note: A cursory Google search reveals there are hundreds of books available on this topic. This is not meant to be an endorsement of the authors or this particular book – it’s cited only as an example of the vast information available on this topic.
4.2 The Hidden Job Market: Research & Analysis

Connexion Pointe® is a big fan of the work Katherine Hansen Ph.D. has shared on this topic. She did research and analysis that verified the existence of an “Unpublicized” job market and authored an excellent comprehensive article on tapping into the unpublicized job market.
4.3 The Hidden Job Market: CareerXRoads

Unpublicized jobs get filled in a variety of ways, such as internal referrals. In the 2015 Annual Source of Hire study conducted by CareerXRoads claimed that 22.2% of new hires applied for their position as a result of a referral.
4.4 The Hidden Job Market: Lou Adler
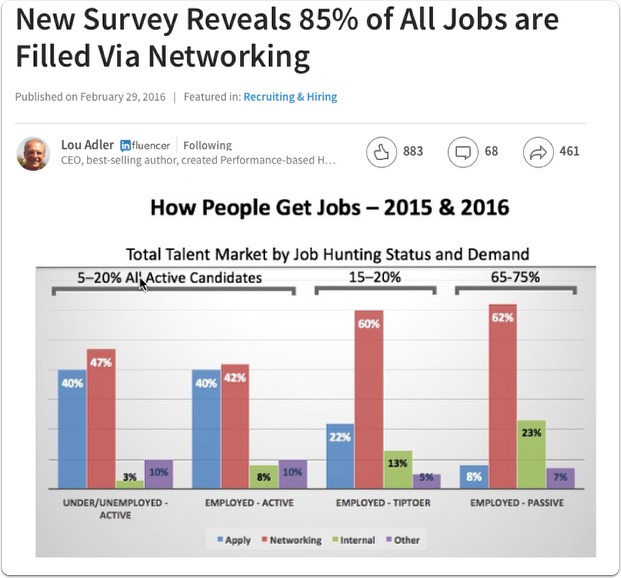
In a LinkedIn article dated February 29, 2016, Lou Adler posted a survey that indicated 85% of all jobs openings resolve through networking.
4.5 The Hidden Job Market: The Connexion Pointe® Conclusion

Please note that none of the experts, articles, books or surveys mentioned here have endorsed Connexion Pointe® or any of our other products and services.
The information and links are provided on an editorial basis supporting two Connexion Pointe® conclusions most experts seem to agree on:
1 – Regardless of its varying size and scope, the “Hidden (or “Unpublicized” if you prefer) Job Market” is real.
2 – Networking and referrals are the keys to tapping into it and extracting the maximum available opportunities.
Your Pointe Profile® can give you a crucial advantage when someone on your network connects you to an opportunity:
Most of the relevant screening work to be done on you is already complete! The interview and screening information in your Pointe Profile® is easily verifiable and immediately available at first contact.
5. An excellent tool for sharing
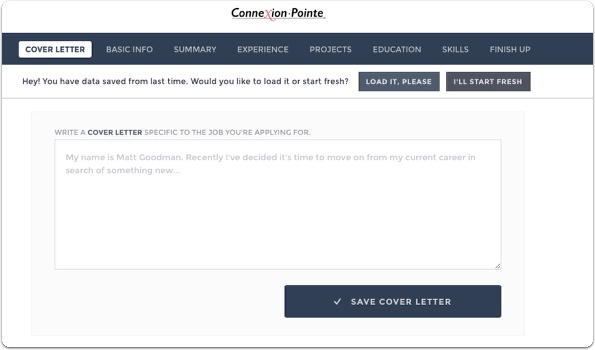
Our Cover Letter and Resume template to create beautiful PDF resumes that include dedicated space for this link! This means you can place your impressive resume and cover letter in your recipient’s hands first and provide a convenient link for their further due diligence!
Using the Cover Letter and Resume Template
Question: After I’ve recorded a great interview and added some excellent supporting videos in the expended playlists, how do I share it with potential employers?
Answer: By adding a link to the information in your resume and cover letter.
Question: Where would I include such a link?
Answer: We’re happy to provide a free, easy-to-use wizard for creating your cover letter and resume. Follow this link:
https://www.connexionpointe.com/generate/#/
Just follow the steps to create a great looking PDF resume and cover letter that includes space for your Pointe Profile® link.
1. Cover Letter

Our template saves your information in your browser. If you’ve used this model before,
1. Click the “Load it Please” button to recall your information.
2. Click the “I’ll Start Fresh” button to start with a blank template.
1.1 Cover Letter

For this example, we’ll click the “I’ll Start Fresh” button to start with a blank template.
1.2 Cover Letter

With so many resources available online, we recommend checking out some sites that can help you with the overall verbiage for your particular position.
1. Whatever that verbiage is, we think it’s a great idea to let your recipients know that you’ve covered a significant amount of their due diligence work for them as a courtesy, and provided a clear pathway for them to verify your information quickly.
1.3 Cover Letter

After entering your text, click the “Save Cover Letter” button.
1.4 Cover Letter
Use the menu at the top of the page to navigate to the next section – the “Basic Info.”
2. Basic Info
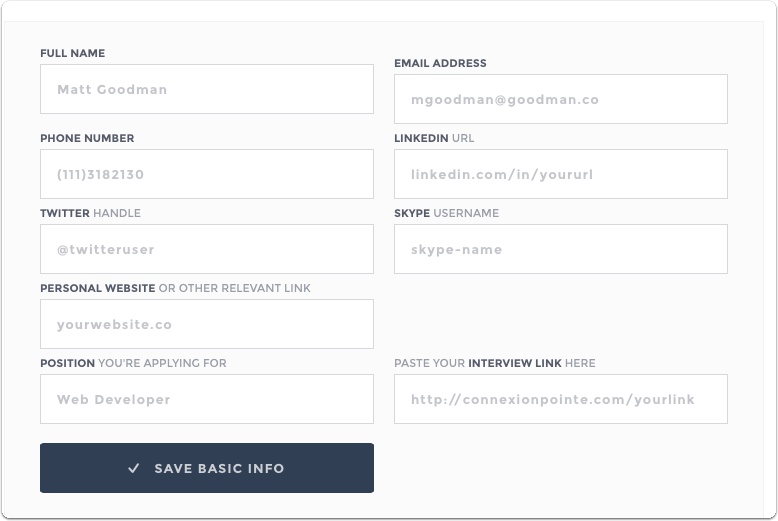
When the page opens, you’ll see some example text in the available fields. To replace, just click in the area and start typing or paste your copied text into the field. Click the “Save Basic Info” button.
2.1 Basic Info
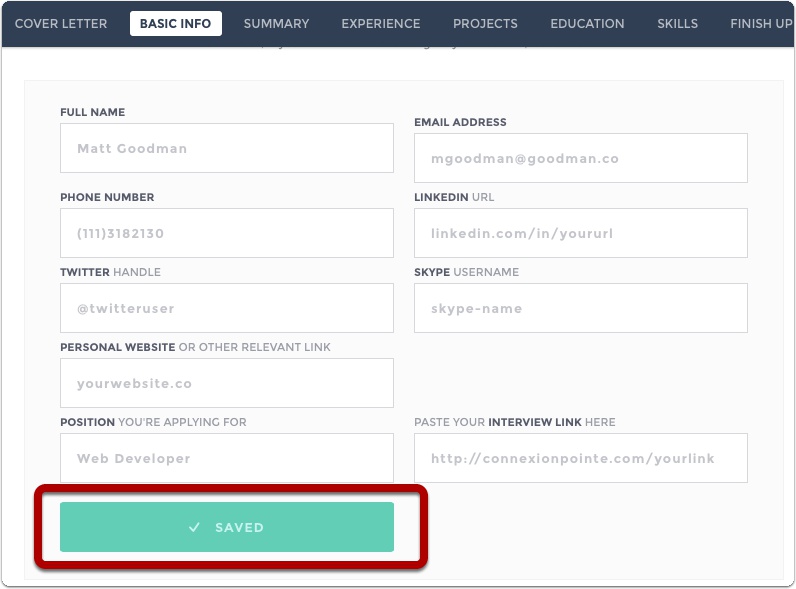
The “Save Basic Info” button changes to confirm your data saved.
2.2 Basic Info

1. Navigate to the next section at the top of the page
2. by clicking the “Summary” button.
3. Summary
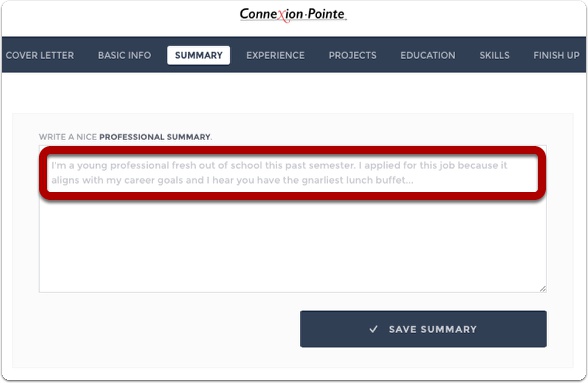
Again, when the page opens, you’ll see some example text in the available fields. To replace, just click in the field and start typing or paste your copied text into the field. Click the “Save Basic Info” button.
3.1 Summary

The “Save Summary” button changes to confirm your data saved.
3.2 Summary
1. Navigate to the next section at the top of the page
2. by clicking the “Experience” button.
4. Experience
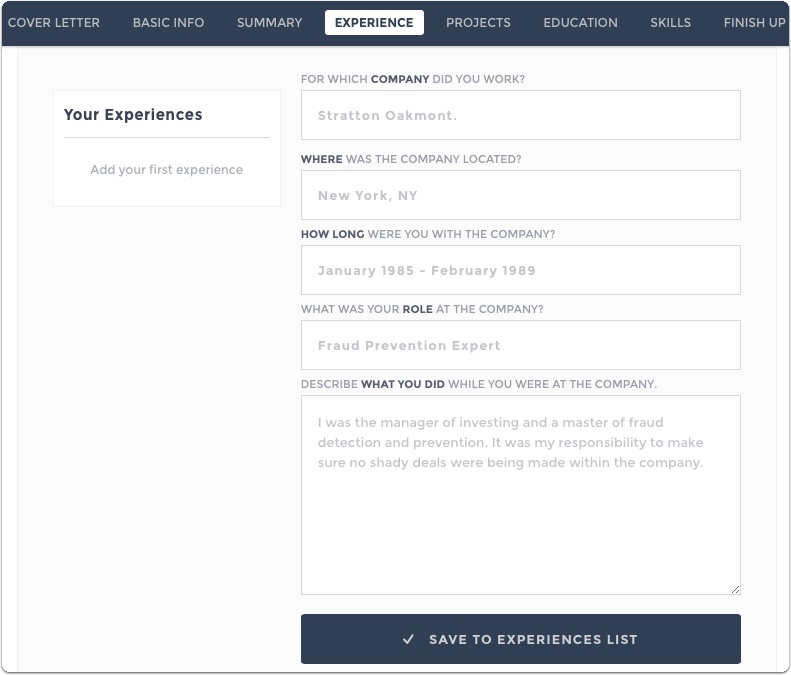
Once again, when the page opens, you’ll see some example text in the available fields. To replace, click in the field and start typing or paste your copied text.
4.1 Edit Experience Header
You can edit the contents in the “Experience” header by clicking on it.
4.2 Edit Experience Header
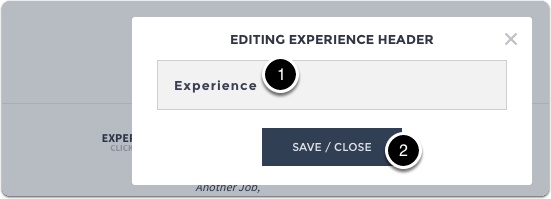
The “Editing Experience Header” box opens.
1. Type your new header in the field
2. and click the “Save/Close” button.
4.3 Experience
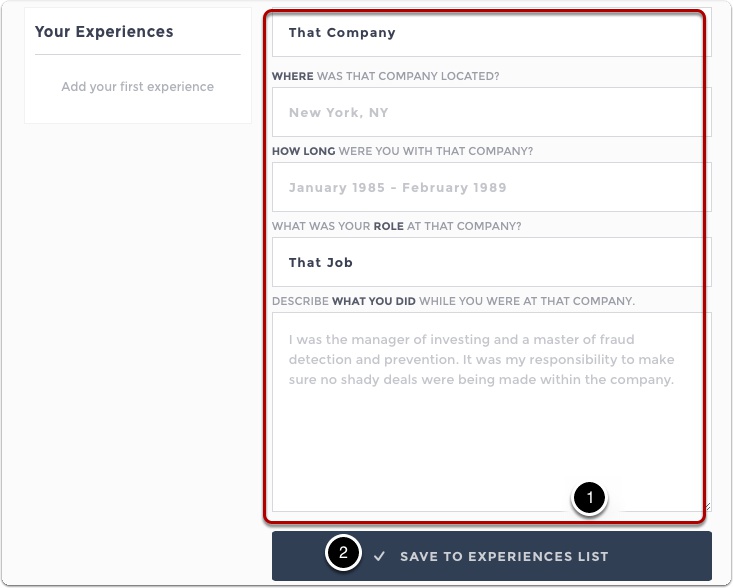
This page is slightly different from the others. Notice that it says “Add your first experience.”
1. Once you enter your information,
2. Click the “Save to Experiences List” button.
4.4 Experience

1. The information displays in your Experience List.
2. The fields clear and you can add your second item. Once you enter your information,
3. Click the “Save to Experiences List” button.
4.5 Experience
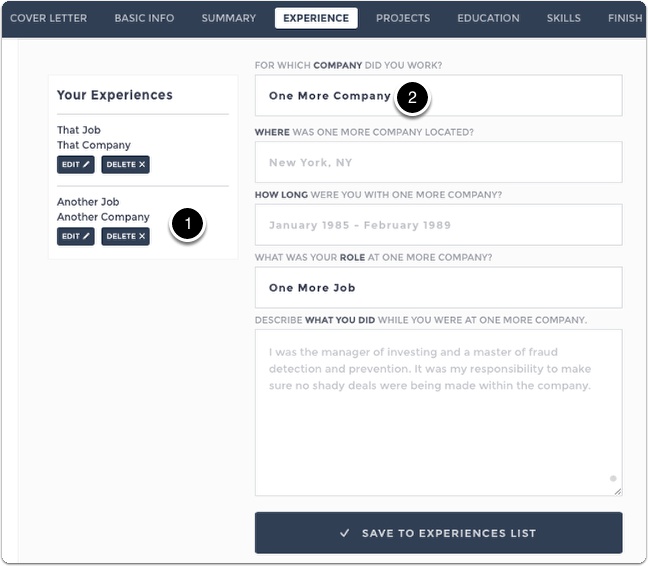
1. Again, the information is added to your Experience List.
2. The fields clear and you can enter your third item if desired. Enter your information,
4.6 Experience
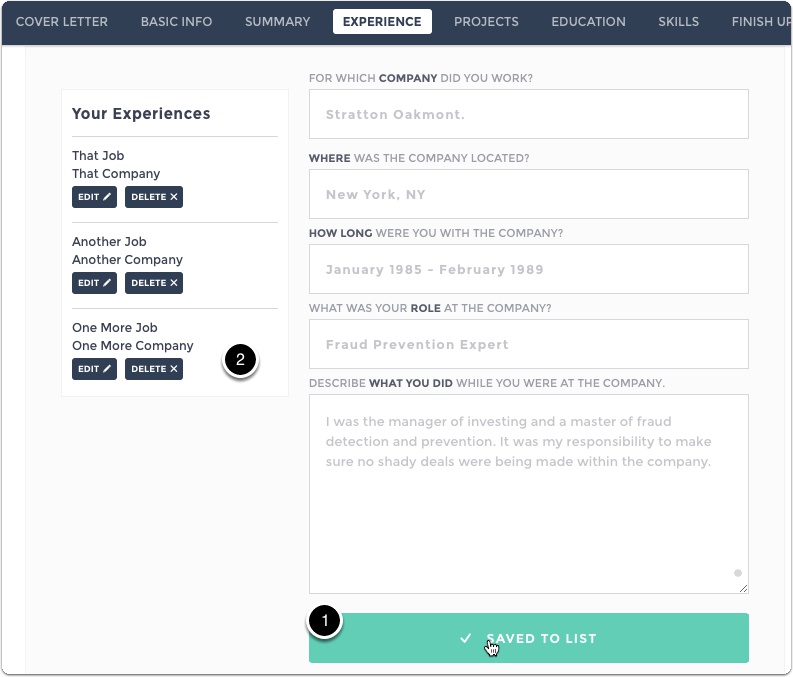
1. Click the “Save to Experiences List” button.
2. Your third item saves to the Experience list.
4.7 Experiences
1. Navigate to the next section at the top of the page
2. by clicking the “Projects” button.
5. Projects
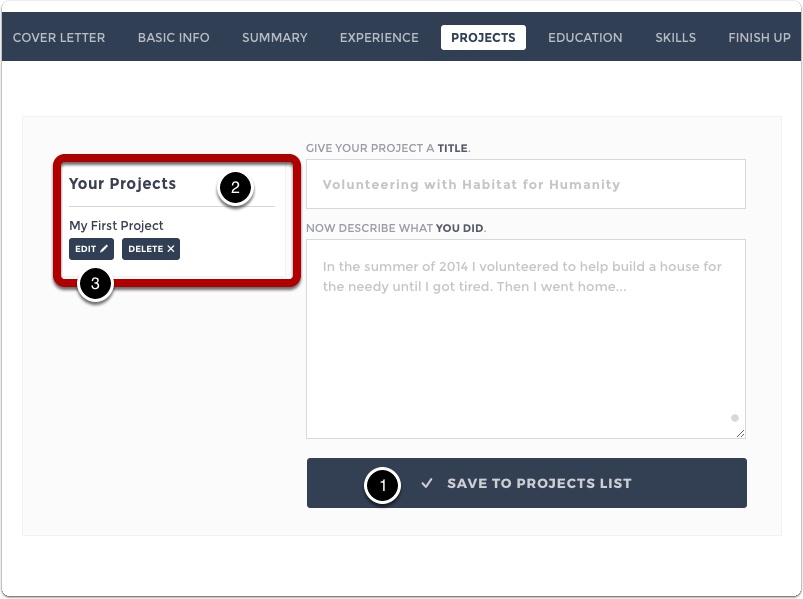
The projects window opens. Like the previous sections, click in the desired field to replace the example text and
1. click the “Save to Projects List” button.”
2. Your project appears in the list.
3. Use the”Edit” button to change the information, and use the “Delete” button to remove the project from your document.
5.1 Projects
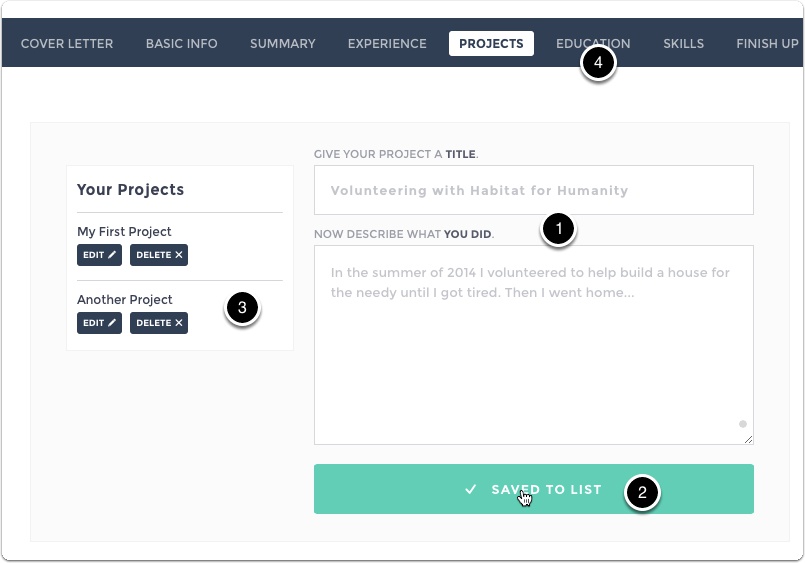
The Projects section is a list that functions exactly like the Experience list. To enter another project,
1. Add your text to the fields
2. and click the “Save” button to add your item to the list. Repeat as necessary.
3. The new project displays in the list.
4. Navigate to the next section at the top of the page by clicking the “Education” button
6. Qualifications

The “Education” section opens – it too is a list that functions exactly like the Experience and Projects list.
1. Add your text to the fields
2. and click the “Save to Qualifications List” button to add your item to the list. Repeat as necessary.
3. Navigate to the next section at the top of the page by clicking the “Skills” button.
7. Skills
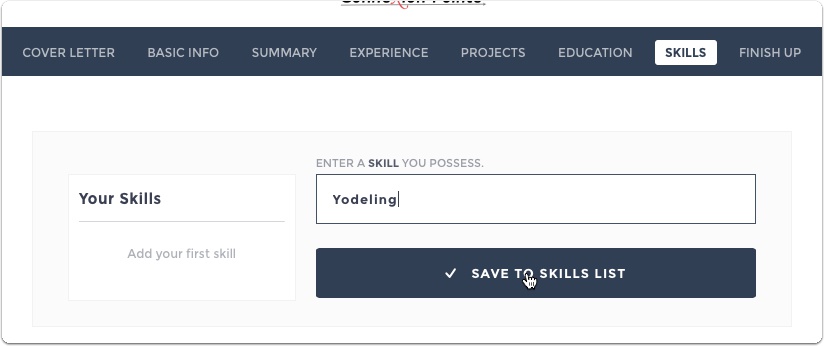
The “Skills” section is a list that functions exactly like the Experience, Projects, and Education lists.
1. Add your text to the fields
2. and click the “Save to Skills List” button to add your item to the list. Repeat as necessary.
7.1 Skills
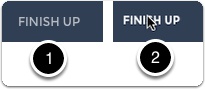
1. Navigate to the next section at the top of the page
2. by clicking the “Skills” button.
8. Appearance Options
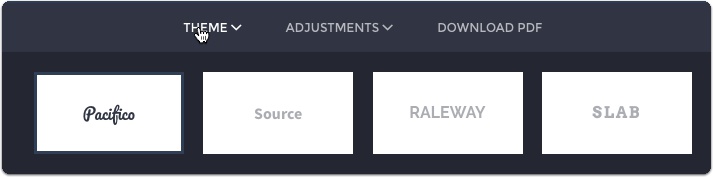
There are four themes available. Try them all to see which one you like the most!
8.1 Appearance Options
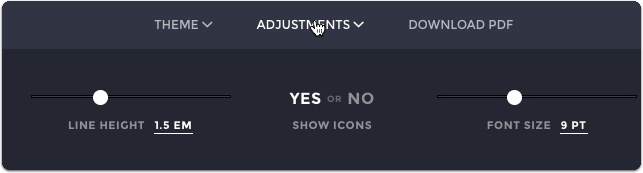
There are some other appearance options available here. Try them all to see what works for you.
9. Download Your Resume

When you’re ready to download your finished document, click the “Download Resume” button.
9.1 Download Your Resume
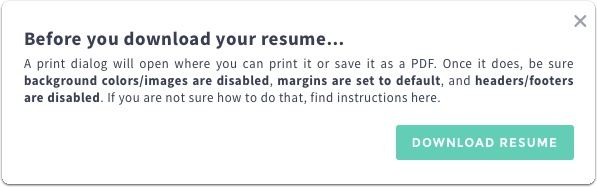
This dialog box opens. Follow the instructions here for the best results. If you’re not sure, there are video instructions to help you. I’ll show you where to find them.
9.2 Download Your Resume
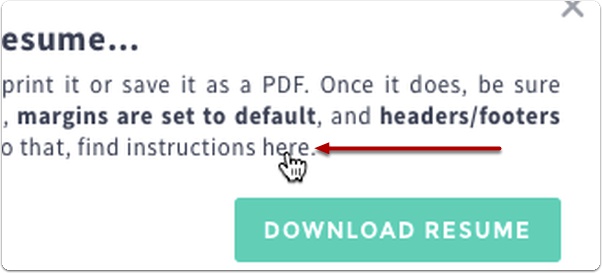
The word “here” is a button that will open a video player.
9.3 Download Your Resume
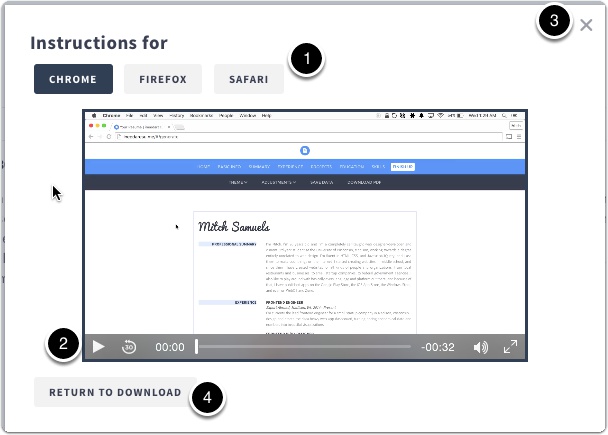
There are separate videos for Chrome, Firefox, and Safari. Internet Explorer (or any other browser not listed) is not supported.
1. Choose your browser.
2. Click play to view the video.
3. Afterward, close the box by clicking the “X” in the top right corner or
4. Click the “Return To Download” button.
9.4 Download Your Resume
1. To adjust the volume click the sound icon
2. To view the video full-screen, click the area illustrated.
9.5 Download Your Resume
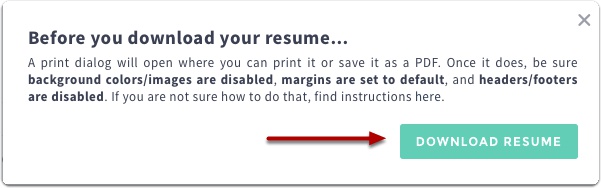
Clicking the “Return To Download” button (shown in step 9.3) will bring you back here. Click the “Download Resume” button to download or print your document.
9.6 Download Your Resume
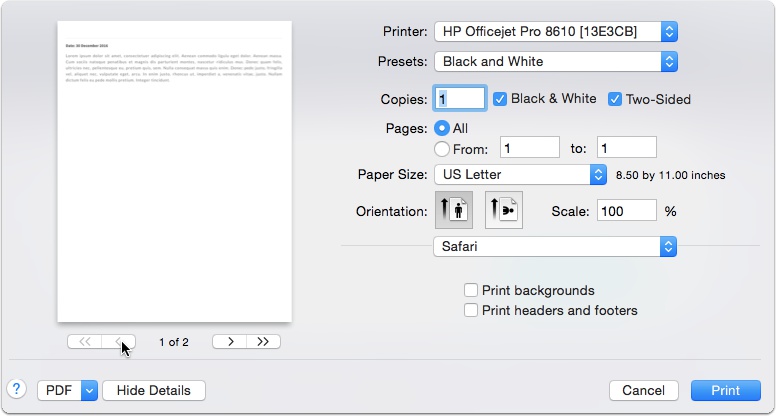
The print dialog box opens (Shown here on Mac). To print a hard copy click the “Print” button.
9.7 Download Your Resume
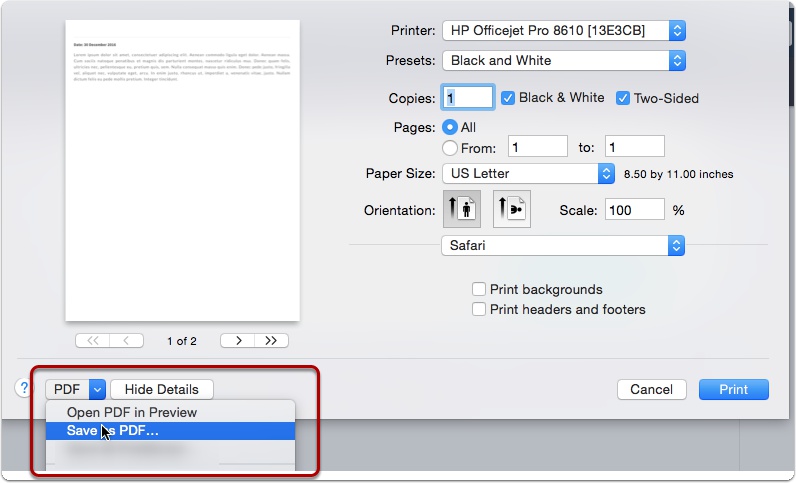
Creating a PDF is a PRINT function.
Macs “print” documents to PDF format natively. To save your document as a PDF, click the drop-down menu in the lower left corner and select “Save as PDF.”
Windows computers don’t create PDF documents natively, so users will need to install a PDF printer to save the document as a PDF. We recommend trying a free PDF printer online called “doPDF.” It’s available at
There are excellent instructions for installation and use – and did I mention that it’s free?
9.8 Download Your Resume
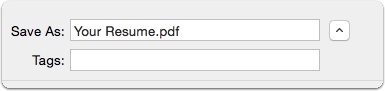
9.9 Download Your Resume
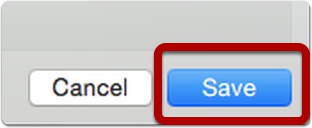
Click “Save.” After creating your PDF resume document, you can upload it to your Pointe Profile® account by following the steps in the “Account Set Up” section of this guide.
Taking Pointe Savant® Interviews
The Connexion Pointe® platform consists of 2 applications. Our Pointe Profile® application is for candidates, and the Pointe Savant® application is for organizations. Just as candidates can create screening interviews and share them with Pointe Savant® users via a link, organizations can generate screening interviews and share a link inviting Pointe Profile® users to respond. When an organization shares an interview link, the activity is called a “screening event.” Organizations can offer candidates a choice of how to participate in their screening events:
1 – Organizations can require candidates to answer the specific interview questions they’ve assembled. This is called “taking the Pointe Savant® interview.”
-OR-
2 – Organizations can choose to allow candidates to submit their own Pointe Profile® interviews (if the interview meets certain criteria about the position sought). This is called “Bring Your Own Interview” (or B.Y.O.I.).
Taking Pointe® Savant interviews and B.Y.O.I. is easy! This tutorial will walk you through each scenario.
1. Varying Degrees of Acceptable Pointe Profile® Interviews
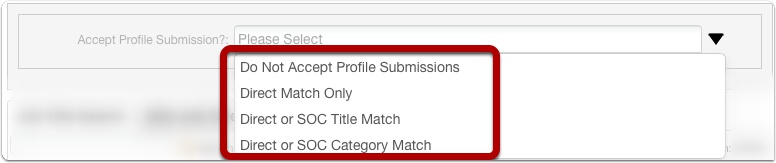
Let’s assume a company called Connexion Pointe® is looking to hire a web developer. The hiring manager (some guy named Mel) creates an interview in our Pointe Savant® application. Mel creates his interview in Pointe Savant® in the same manner that interviews are set up in the Pointe Profile® application – even using the same database. While building the interview, Mel will decide whether candidates will be required to take his interview or if candidates will be allowed to submit their own Pointe Profile® interview instead. He makes this decision by selecting one of the options above.
1.1 Varying Degrees of Accepting Pointe Profile® Interviews
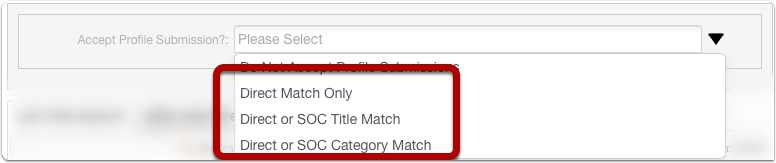
If Mel chooses to accept Pointe Profile® interviews, he’ll select one of the options circled above. We’ll take a look at the settings available to organizations accepting Pointe Profile® Interviews in the next tutorial.
2. Varying Degrees of Accepting Pointe Profile® Interviews – Do Not Accept Profile Submissions
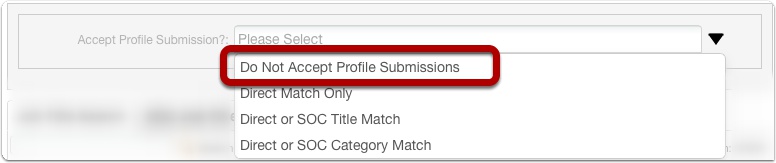
If Mel chooses NOT to accept Pointe Profile® interviews, He’ll select the setting circled in the above photo.
2.1 Varying Degrees of Accepting Pointe Profile® Interviews – Do Not Accept Profile Submissions

For this example, Let’s assume Mel is not accepting Pointe Profile® interviews for his screening event. This means all candidates must respond to the interview questions that Mel selected or created.
3. The Savant Interview Link
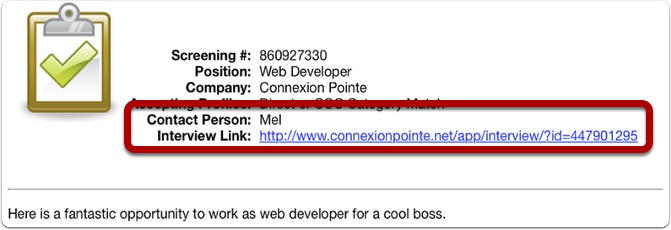
Like the Pointe Profile® application, Pointe Savant® creates a link to the interview Mel just created. Next, Mel posts a job opening in all of his favorite job boards and even emails some preferred candidates directly. Mel provides the Pointe Savant® Interview link in his post and communications. Interested candidates can click the link to respond.
4. The Pointe Savant® Gateway
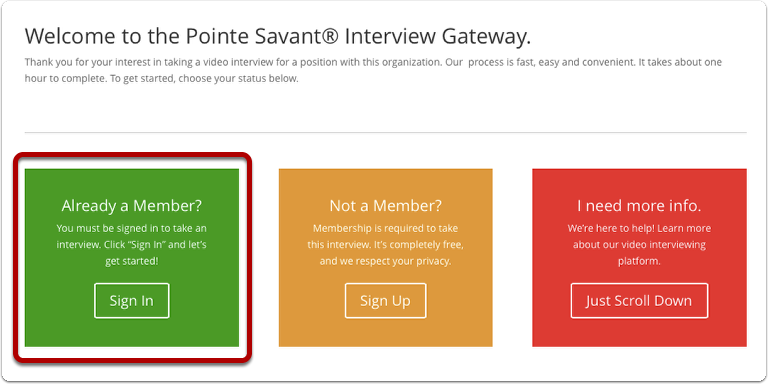
All Pointe Savant® interview links lead to the Pointe Savant® Gateway. Only Pointe Profile® users can participate in screening events created by Pointe Savant® users. Since you’re already a member, click the “Sign In” button in the green square on the right.
5. Log In | Connexion Pointe

The login page appears.
1. Enter your username.
2. Enter your password.
6. Connexion Pointe® Interview

The system logs you in and finds your screening event.
7. Optional – Upload a Photo and Resume
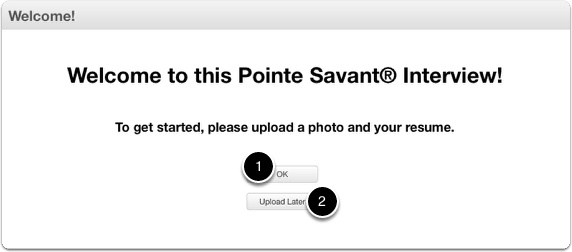
Reading these instructions is optional if you’ve already covered this material while setting up your profile account. Skip to the next section “Savant Interview Starting Page” if you don’t need a refresher.
If you have a Pointe Profile® user account but haven’t added a photo and resume to your account, you’ll be prompted to add one here. The instructions are identical to those previously mentioned, but I’ll add them here as well for your convenience.
1. Your resume must be in PDF format and no larger than 5mb. Your photo must be in JPG or JPEG format, 180 pixels X 180 pixels and no larger than 500kb. If you have these files ready, click “OK.”
2. If you do not have them ready, click the “Upload Later” button to exit the screening event.
7.1 Upload Your Resume.
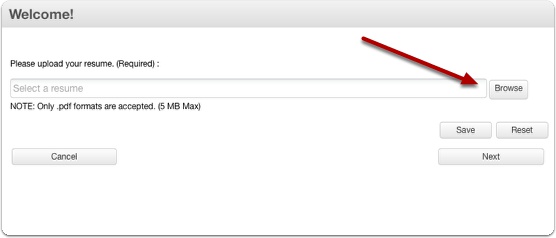
The system will prompt you to upload your resume first. Your resume must be in PDF format and can be no larger than 5mb. To locate your resume click the “Browse” button.
7.2 Navigate to the PDF file.
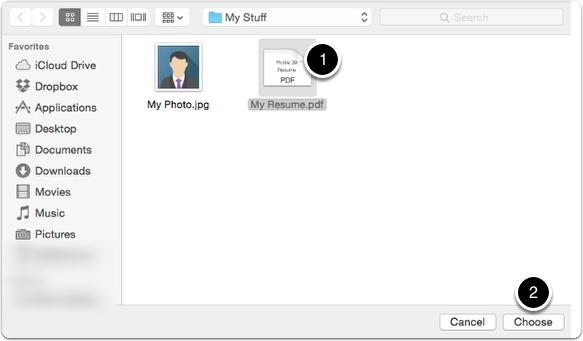
1. Navigate to the correct file, select it
7.3 Use the Correct File Type!
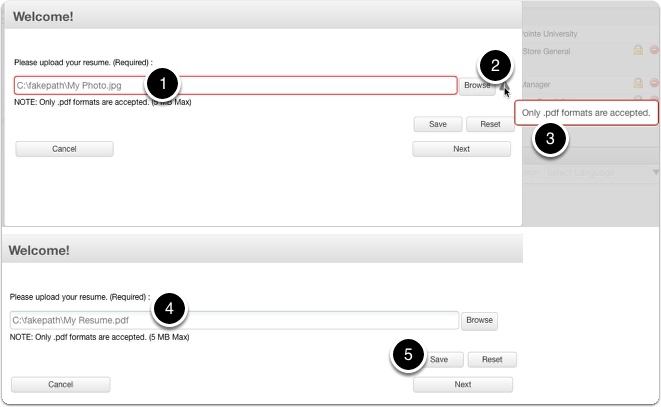
1. The file you select will appear here. If the file type is incorrect, the field will show a red outline.
2. To review the problem with your file, just hover your mouse over the exclamation mark, and the problem will be displayed.
3. To choose another file click the “Reset” button, then click “Browse” to start over.
4. When the correct file is selected,
5. click “Save” to upload the file.
7.4 Uploading Progress Bar.
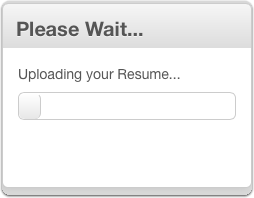
The system will show a progress bar while your file uploads.
7.5 Resume Uploaded.
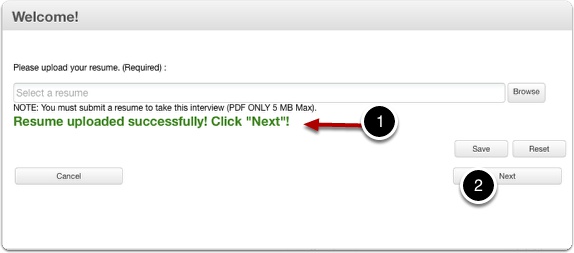
1. When your file is successfully uploaded, the system will let you know.
2. Click “Next” to upload your photo.
7.6 Upload Photo.

1. Uploading your photo is exactly like uploading your resume. To select a photo from your hard drive, start by clicking the “Browse” button.
7.7 Navigate to the JPG or JPEG file.
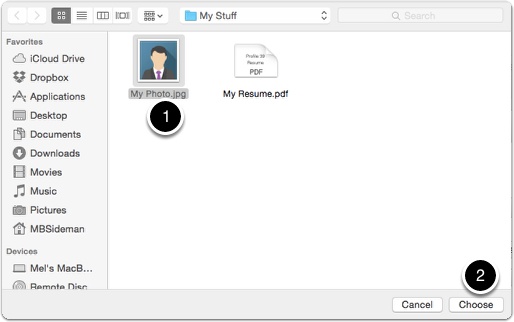
1. Navigate to the correct file and select it
7.8 Click Save.
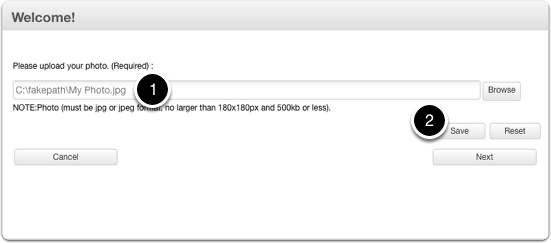
1. The file you selected will appear here.
2. Click “Save” to upload the file.
7.9 Photo Uploading Progress Bar

The system will show a progress bar while your file uploads.
7.10 Photo Uploaded.
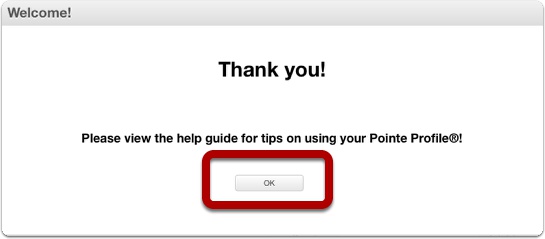
When your file uploads, the system will let you know. Click “OK” to close the window.
7.11 Loading the interview start page.
The Savant Interview Starting Page loads.
7.12 Postponing a Savant Interview
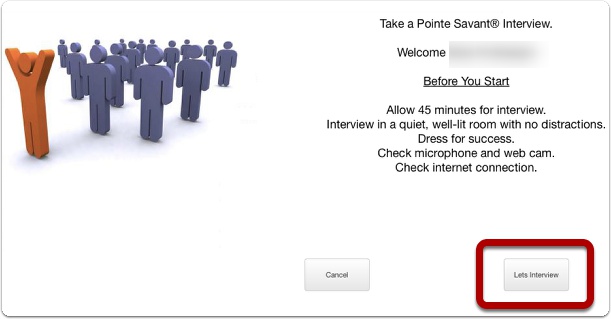
When your interview loads, the page should look like this.
Click “Let’s Interview” to get started.
8. Allow Access to Your Camera and Microphone
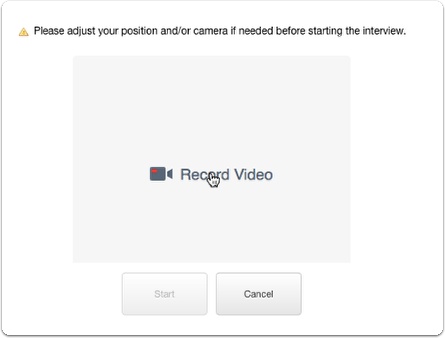
This part of the process is similar to the practice interview and recording your own interviews. Click “Record Video” to grant access to your camera and microphone.
8.1 Grant Permission to Access

The Google Chrome browser may request access to your microphone and webcam too. While you were checking your gear, these permissions were granted separately, but here they can be given in a single easy step. When the permission request appears in the top left corner, It will ask you to grant permission for your camera and microphone.
Click the “Allow” button to grant access.
8.2 Troubleshoot
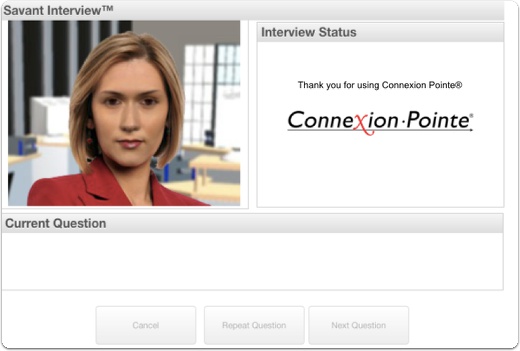
The interviewer should greet you and thank you for using Connexion Pointe®.
If the character does not speak and appears to be waiting for something for more than 30 seconds or so, you must reload the page.
8.3 Reload the page.
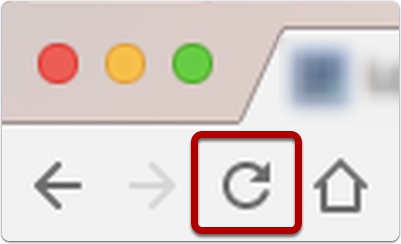
In the top left corner of the Google Chrome browser, you should see the four buttons in the photo above. Click the icon indicated to reload the interview page.
8.4 Loading the interview start page.

The Savant Interview Starting Page loads.
8.5 Pointe Savant® Interview Welcome Page
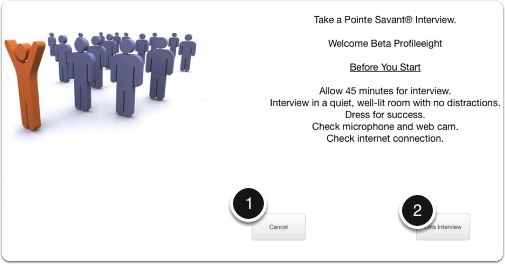
Again, when your interview loads, the page should look like this.
1. If you’d like to postpone the interview, click “Cancel” and go to the next step.
2. If you’d like to proceed with the interview, click “Let’s Interview” and go to step 10.
9. Postpone the Interview
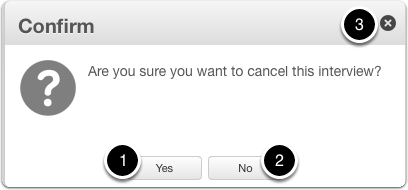
If you’re not sure you’re ready to take the interview, you can postpone by clicking the “Cancel” button.
1. Confirm your choice to cancel by clicking “Yes”.
2. To close the confirmation box and proceed with the interview, click “No” or
3. click the “X” in the top right corner of the box.
9.1 Postpone the Savant Interview

If you choose to cancel, you’ll be brought to this page for 15 seconds while the system removes you from the screening event.
9.2 Postpone the Interview
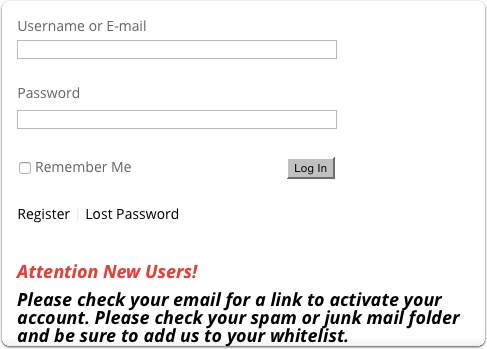
Then you’ll be logged and redirected to the login page. As long as the screening event is active, you can use the Savant interview link to reaccess the interview.
10. Taking the Savant Interview
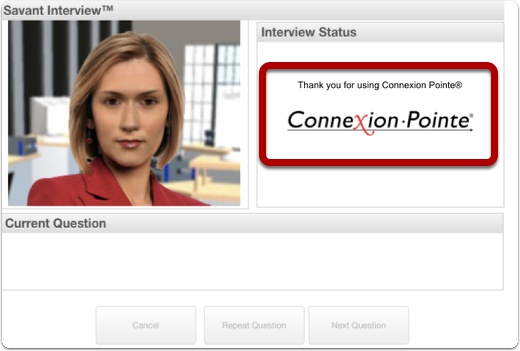
The interviewer greets and thanks you for using Connexion Pointe®.
10.1 The First Question
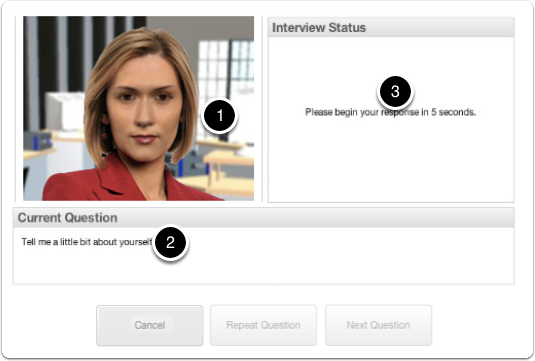
1. The interviewer asks you the first question, which
2. also appears as text in the “Current Question” pane.
3. A 5-second countdown begins, giving you a little time to collect your thoughts. This process repeats for every interview question.
Notice the three buttons at the bottom are unavailable while the question presents.
10.2 Interview Controls – Repeating a Question

If for some reason you don’t understand the first question or if you make a mistake you can
1. click the “Repeat Question” button
2. The system deletes the recording stops and the file, and the interviewer repeats the question.
**NOTE: The “Repeat Question” function can only be used TWICE during an interview. After two uses, the “Repeat Question” button is unavailable for the remainder of the interview.
11. Canceling a Savant Interview
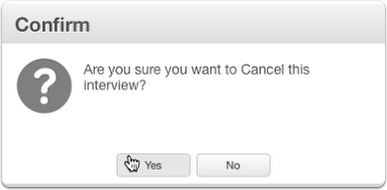
It’s important to note that using the “Cancel” button in the Profile Interview™ application is different from using the “Cancel” button while taking a Pointe Savant® Interview. In the Profile application, you cannot be disqualified from taking an interview that you created yourself. However, when you’re taking a Pointe Savant® Interview, you can be excluded from taking an interview altogether if you use the cancel button more than once or if you click it during or after the third question is asked.
You may POSTPONE a Savant interview ONCE by clicking the “Cancel” button before you respond to the 2nd question.
If you click “Cancel” during or after the 3rd question is asked, you are permanently disqualified from taking the interview.
WARNING! Disqualifications are irreversible! Connexion Pointe® can not reinstate candidates after disqualification from screening events!
To view the cancel interview process see the next step. To skip it and continue with the interview got to step #14.
11.1 Postponing vs. Cancelling an Interview
Let’s see what these scenarios look like:
If you click “Cancel” before the 3rd question while taking a Savant Interview, and then clicks the “Yes” button when the dialog box above appears, the system recognizes this as a “postpone this interview request” and responds with the “Notice” dialogue box above. Click “OK,” and you’ll be logged out.
11.2 Re-Starting a Postponed Interview
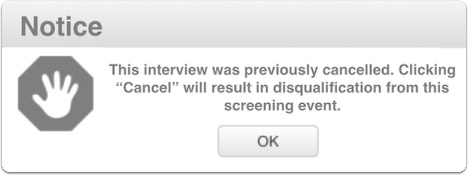
You can still re-start the interview ONCE by clicking the interview link and signing in. When you log back in to take the same Pointe Savant® Interview, the dialog box above appears – click “OK” and the interview will start.
11.3 Disqualification from a Screening Event
If you click “Cancel” again, you are permanently disqualified from taking the interview. You can not restart the interview, and any attempts to do so will land you on the page pictured above. The page appears for 2 seconds, and then you are automatically logged out of the system.
Remember: Disqualifications are irreversible!
11.4 Postponing vs. Cancelling a Savant Interview
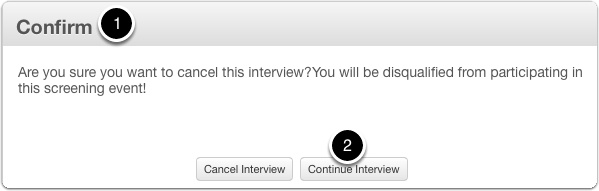
1. On the other hand, if you click “Cancel” after the 3rd question while taking a Savant Interview, the dialog box above appears.
2. If you’d like to continue with the interview, click “Continue Interview.”
11.5 Postponing vs. Cancelling a Savant Interview
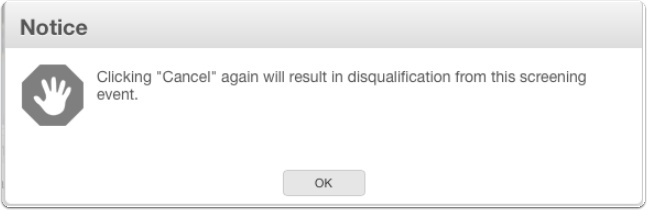
The system gives you a warning that if you click “Cancel” again that you’ll be disqualified, click “OK” and the interview continues.
NOTE: The video recording continues while this is going on and no additional time is granted to respond to the question. It’s always best to be sure you’re prepared to take the interview before you start. Disqualifications are irreversible.
11.6 Connexion Point™ Interview
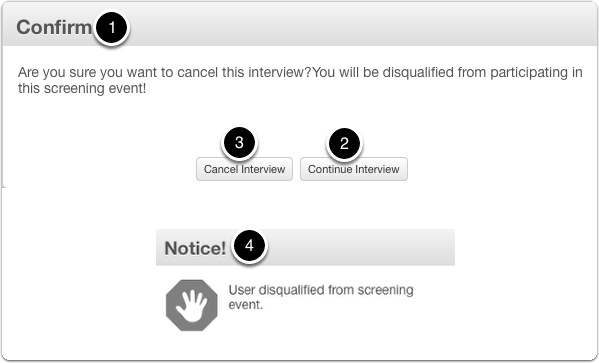
1. If you click “Cancel Interview,” the system recognizes this as a “Cancel this Interview” request, and the confirmation box above appears.
2. To continue with the interview click “Continue Interview.”
3. If you’d like to cancel the interview, click “Cancel Interview.”
4. This results in being permanently disqualified from the screening event.
Disqualifications cannot be reversed!!!
11.7 Disqualification from a Screening Event

If you try to re-start an interview after disqualification, you will be denied access to the interview, logged out of the system and redirected to the login page.
12. Time Indicator (Green)
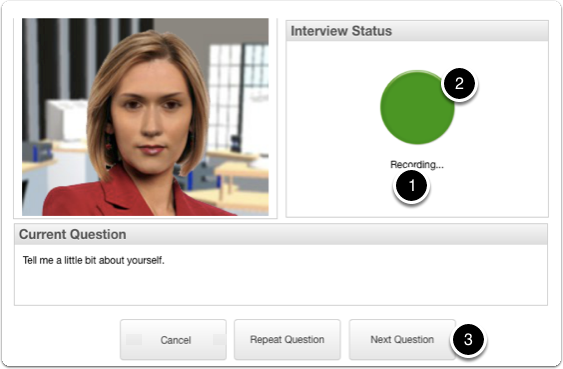
After the 5 second countdown,
1. the recording begins. You’ll have approximately two minutes to answer each question.
2. For the first 40 seconds of your response, a green indicator displays in the “Interview Status” pane. If you finish responding before the allotted time expires, you can advance to the next question by clicking the
12.1 Minimum Responses
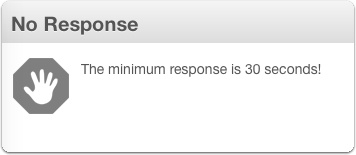
Note: The minimum response for interview questions is 30 seconds if you click the “Next Question” button before 30 seconds has elapsed, the warning dialog above will appear. The recording does not stop while this warning is on the screen! If you make a mistake, you can use the “Repeat Question” twice during an interview.
12.2 Time Indicator (Yellow)
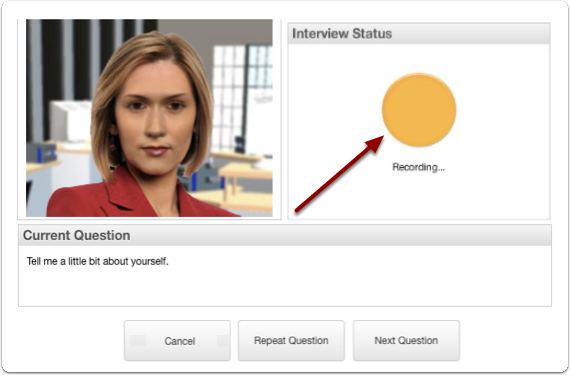
As you respond to the question, the green indicator changes to yellow, indicating you are more than 40 seconds into your response.
12.3 Time Indicator (Red)
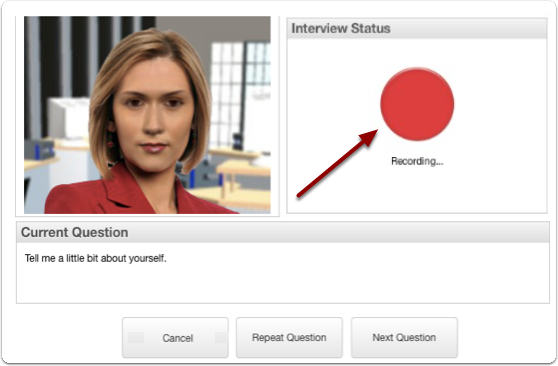
As you continue responding to the question, the yellow indicator changes to red, indicating you have 40 about seconds remaining to complete your response. These indicators display for every interview question.
13. Verifying Responses
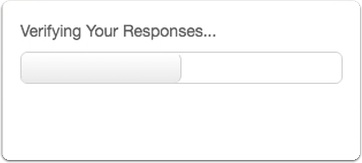
After you respond to the final question, the system will check to verify that all of your responses were captured. If you experience network problems or lose your internet connection while performing the interview, some of your answers may not be properly recorded.
13.1 Errors during recording.

If one or more of your responses is not successfully recorded, the system will let you know with a dialog box similar to the photo above. To re-record and missing responses, check your internet connection and click “OK” to try again. The system will only ask you the missing questions in this scenario, and the process will continue until there are responses to all of the questions.
13.2 Interview Conclusion

Once all of the questions have been answered,
1. the interviewer announces the conclusion of the interview and thanks you for your time.
14. Google Chrome – Incognito Mode
Google Chrome users that are more concerned with privacy on the internet will be familiar with the photo above. It’s a Google Chrome browser window, running in Incognito mode. Users of Google Chrome can use Incognito Mode with Pointe Profile®. The steps are virtually the same, but there are some differences worth noting!
14.1 Google Chrome – Incognito Mode
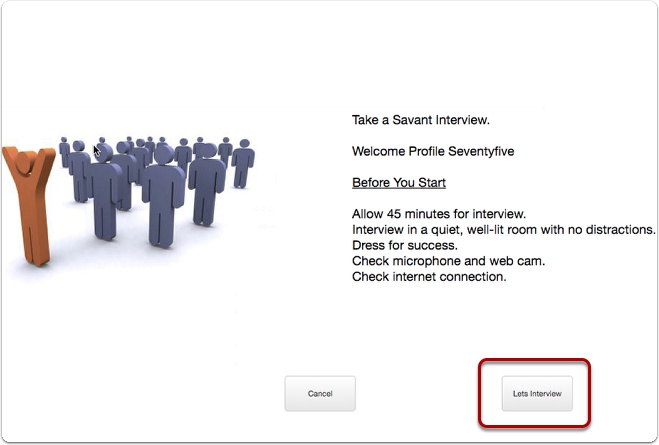
Taking a Pointe Savant® interview begins here at the “Take a Savant Interview” page by clicking the “Let’s Interview” button.
14.2 Google Chrome – Incognito Mode
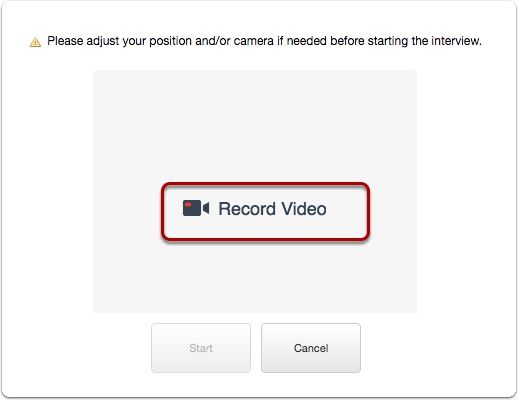
The Savant Interview window opens. If a suitable webcam is detected, the “Record Video” button appears.
Note: This is also identical to the Pointe Profile® interview process.
14.3 Google Chrome – Incognito Mode
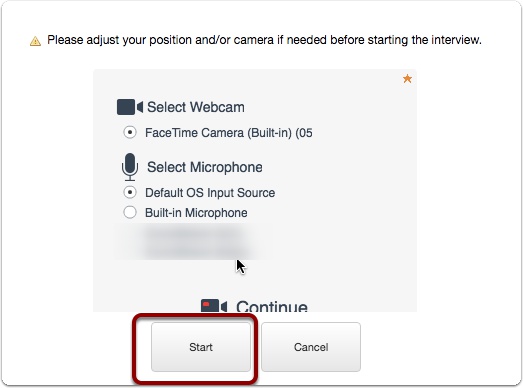
Google Chrome offers the option of selecting from a list of installed resources. The default settings should be OK. We recommend disconnecting any microphones or web cameras not in use. After you make your selection, click “Start.”
14.4 Google Chrome – Incognito Mode
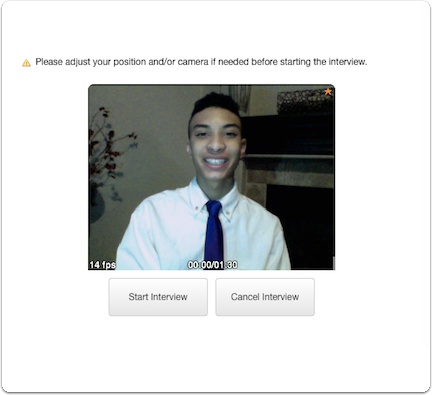
After selecting your resources box, your screen should be similar to the photo above. Adjust your camera angle as necessary. Notice the ideal position is identical to sitting across the desk from an actual interviewer.
NOTE: you will not be able to see your face while you interview! Be sure to maintain your position until the interview concludes!
When you’re ready, click start interview.
15. Done!

Congratulations! You just took your first Savant Interview! The organization will be able to view your contact information, interview responses, review your resume, ask follow up questions using Pointe AskMe™, and send a notification to your Pointe Profile® account when the screening event concludes. The organization has to pay a nominal fee of $5. Now let’s take a look at how to submit your own Pointe Profile® interview for screening events.
Varying Degrees of Acceptability
As I said before, organizations can choose to allow candidates to submit their own Pointe Profile® interviews for screening events created in the Pointe Savant® application (if the Pointe Profile® interview meets specific criteria). Organizations may not opt to do this all the time, but when they do it represents an opportunity to stand out like never before! Following is a brief explanation of the settings available to organizations interested in accepting Pointe Profile® interviews. You don’t need to know this information as a candidate, but you may find it helpful in planning your Pointe Profile® content.
1. Accept Pointe Profile® Interview Settings
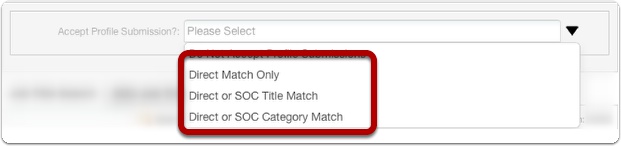
Now let’s assume that Mel IS accepting Pointe Profile® interviews for his screening event. While creating his interview, Mel selects one of the options pictured above. These options specify the criteria Pointe Profile® interviews must meet to be accepted, and they deserve a brief explanation. First, each setting refers to the position sought (job title).
1.1 Accept Pointe Profile® Interview Settings

Next, please note that all of the job titles in the Pointe Profile® and Pointe Savant® applications are based on the United States Department of Labor Standard Occupational Classification (SOC).
1.2 Accepting Pointe Profile® Submission Settings – Direct or SOC Title Match

This setting is a just little more forgiving. If you have a Pointe Profile® interview for “Web Developer” it will be accepted, and with this setting, the system will also accept interviews for “closely similar positions.”
1.3 Accepting Pointe Profile® Submission Settings – Direct Match Only

In our example, Mel created a screening event to hire a “Web Developer.” If a candidate wants to submit a Pointe Profile® interview, the interview must be for “Web Developer.” Pointe Profile® interviews for other job titles, no matter how similar will not be accepted.
1.4 Accepting Pointe Profile® Submission Settings – Direct or SOC Title Match
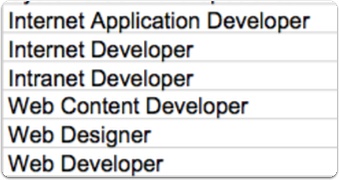
By “closely similar positions,” I’m referring to job titles that the SOC lists in the same group – like Internet Application Developer, Internet Developer, Intranet Developer, Web Content Developer, and Web Designer. This setting is great if Mel is hiring a “Web Developer” but is open to looking at candidates with similar skills that may not be specifically looking for a job with that specific job title. If you’re a candidate with a Pointe Profile® interview prepared for “Internet Application Developer” your interview would be accepted for this position.
1.5 Accepting Pointe Profile® Submission Settings – Direct or SOC Category Match

This setting casts the most extensive net for candidates. If you have a Pointe Profile® interview for “Web Developer” it will be accepted, but with this setting, the system will also allow interviews that are generally in the same category but less similar than the selected title.
1.6 Accepting Pointe Profile® Submission Settings – Direct or SOC Category Match
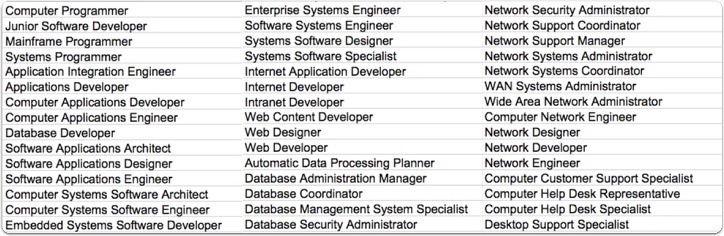
With this setting, the system would accept interviews created for all of these positions. This setting is fantastic if Mel is looking for a “Web Developer” but is open to training the right individual who happens to be on a similar career path. If you’re a candidate with a Pointe Profile® interview prepared for any of the positions listed here, your interview would be accepted for this position.
2. Why would hiring managers allow different interviews?

At this point, you might be wondering why Hiring managers would accept different interviews for the same position.
Wouldn’t this mean different questions from a variety of candidates? How can a hiring manager pull it all together?
2.1 Why would hiring managers accept different interviews?
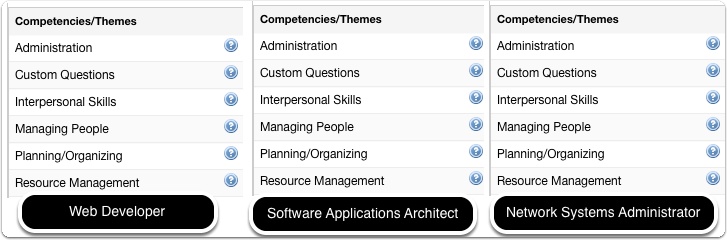
Great Question! I’ll use our “Web Developer” title to answer it. Many organizations have experienced the “Hiring based on skills and Firing on Fit” phenomenon. The Connexion Pointe® platform offers a response to this problem with a powerful tool to match positions with recommended “competencies” (a.k.a.”soft skills”).The photo above has a list of competencies (aka “soft skills”) recommended for success in each position. Even though many of the technical aspects of performing each job title in this example may vary, the vast majority of recommended soft skills for each position are remarkably similar.
2.2 Why would hiring managers accept different interviews?
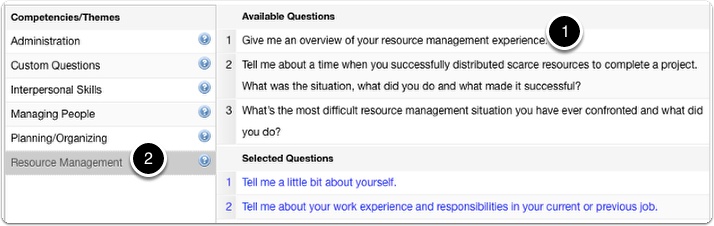
Connexion Pointe® puts the same interview building tool into the hands of candidates and organizations – making the process of creating an interview with Pointe Profile® or Pointe Savant® virtually identical.
1. If a candidate or an organization creates an interview for a particular position, their chosen questions may be different but
2. they’ll still focus on the same soft skills overall.
We’ve made it easy for candidates like yourself to take full advantage of this powerful tool. Check out the next tutorial to learn more.
Submitting Pointe Profile® Interviews
Now let’s take a look at the B.Y.O.I. submission process for screening events. The process starts out exactly like the process of taking a Pointe Savant® interview, so I’ll review steps here.
1. A quick note about eligible interviews.
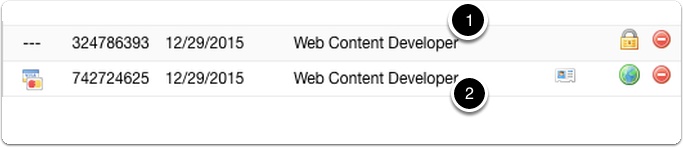
A Pointe Profile® interview becomes eligible when it’s complete and ready to be shared. Practice interviews, partial interviews, and interviews marked private can not be shared.
1. Notice this interview is displaying a padlock and a delete button on the right and next to the job title. The padlock indicates that this interview is private and is NOT eligible to be shared. It will not appear on the “Bring Your Own Interview” selection page.
2. Notice this interview displays three icons: A “Rolodex card” icon, the “blue earth” icon and a delete button. The “Rolodex card” icon and “blue earth” icon indicate that this interview is not private and is eligible to be shared. This interview will appear on the “Bring Your Own Interview” selection page where appropriate.
1.1 A Quick Note About Eligible Interviews
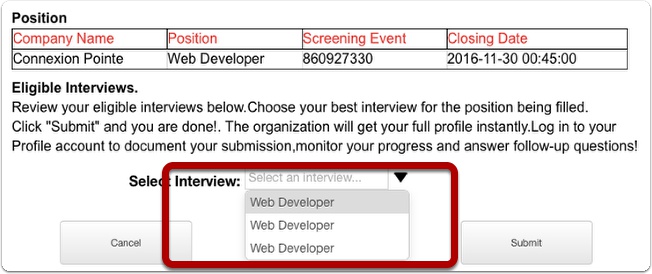
This is the Bring Your Own Interview selection page. The dropdown menu on the Bring Your Own Interview selection page does not show the interview number or the creation date of your interviews. Because of this, it’s a good practice to delete unused interviews make interviews with same name private by clicking the blue earth icon next to the interview title. The blue earth icon will become a padlock – an indication that the interview is private and not ineligible to be shared. Private interviews will not appear in the the list of eligible interviews on the Bring Your Own Interview selection page. In this tutorial you’ll learn how it works, and what you need to know before you submit your Pointe Profile® interview on a screening event.
1.2 A Quick Note About Eligible Interviews

If you would like to take full advantage of your Pointe Profile® submission, make sure your videos are uploaded to your playlists BEFORE you make the interview shareable.
Note: Adding videos to these playlists is NOT required share your Pointe Profile® interview. To learn more about these videos refer to the section on <Expanding Your Profile>.
2. Added Incentive
When you submit your Pointe Profile® interview, the organization can review your contact information, resume, your custom interview, Experience playlist, References playlist, Insight playlist, ask you follow up questions using Pointe AskMe™, and send a notification to your Pointe Profile® account when the screening event concludes. Organizations are financially and logistically encouraged to allow Pointe Profile® interview submissions for their screening events. They get more screening information, the process is faster, and there’s NO INTERVIEW FEE FOR ACCEPTING POINTE PROFILE® INTERVIEW SUBMISSIONS!
Interviews must be eligible to be shared, so I’ll start there.
3. It begins with the savant interview link.
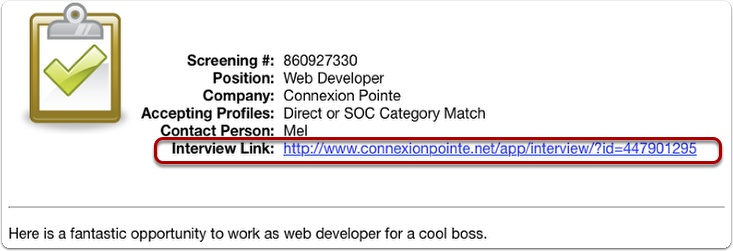
As I said before in a previous tutorial, the Pointe Profile®, and Pointe Savant® applications create a link to the interviews. A Pointe Savant® interview is also known as a “screening event.” This screening event was created by Mel, who is the hiring manager in our example. When Mel posts a job opening on all of his favorite job boards, or emails preferred candidates directly, he provides the Savant Interview link to his prospects. Interested candidates can click the link to respond.
4. Which leads everyone to the Savant Gateway.
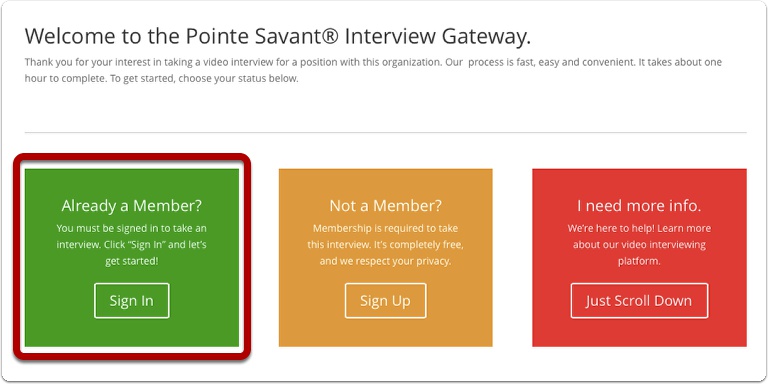
All Pointe Savant® interview links lead to the Pointe Savant® Gateway, so when interested candidates click the link, they are redirected here. Everyone who wants to participate in screening events must become a member! Since you’re already a member, you would click the “Sign In” button in the green square on the right.
4.1 Where you log in

The login page appears.
1. Enter your username.
2. Enter your password.
4.2 To access the Pointe Savant® Screening Event.
The system logs you in and finds your screening event.
5. Choose your ideal path.
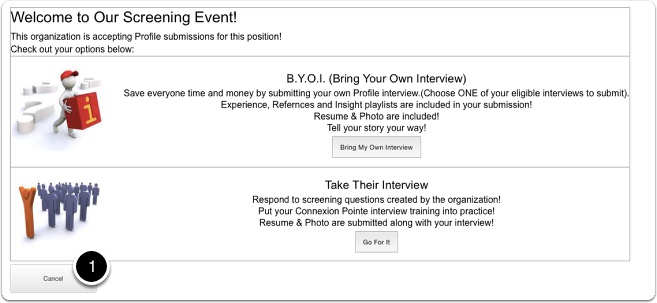
When your screening event loads, the welcome page should look like this.
1. If you’d like to postpone the screening event, click “Cancel.” The system will log you out, and you can try the screening event later if it is still open.
6. Option 1: Take the Pointe Savant® Interview.

If you have second thoughts about submitting the interview you created, and believe your chances of success would be greater by answering the questions that Mel selected for this screening event, click the “Go For It” button. You’ll immediately be taken to the Pointe Savant® interview and the process of “Taking the Savant Interview” begins.
6.1 Option 1: Take the Pointe Savant® Interview.
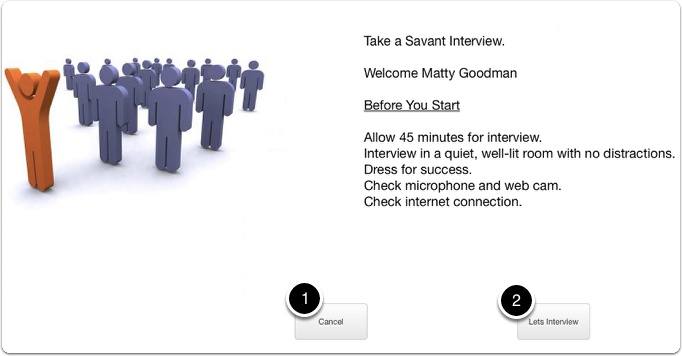
To exit this interview click “Cancel.” To start the interview, click “Let’s Interview.” This was covered in a previous tutorial so I won’t review it here.
Note: If you do not have an interview eligible to be submitted for a particular screening event, you’ll automatically be brought to this page to take the Savant interview. Please see the first section of this tutorial for more details.
6.2 Information exchanged when taking the Pointe Savant® interview.
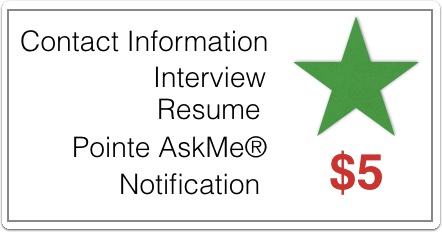
After the Pointe Savant® Interview concludes, the organization will be able to view your contact information, interview responses, review your resume, ask follow up questions using Pointe AskMe®, and send a notification to your Pointe Profile® account when the screening event concludes. The organization has to pay a nominal fee of $5. Now let’s take a look at how to submit your own Pointe Profile® interview for screening events.
7. Option 2 – BYOI (Bring Your Own Interview)

If you’ve taken the time to create an excellent interview and then enhanced that interview by providing additional video screening content and video testimonials, you can genuinely present your unique talent and qualifications by submitting your Pointe Profile® interview! To submit your interview, click the “Bring My Own Interview” button.
7.1 BYOI: Bring Your Own Interview
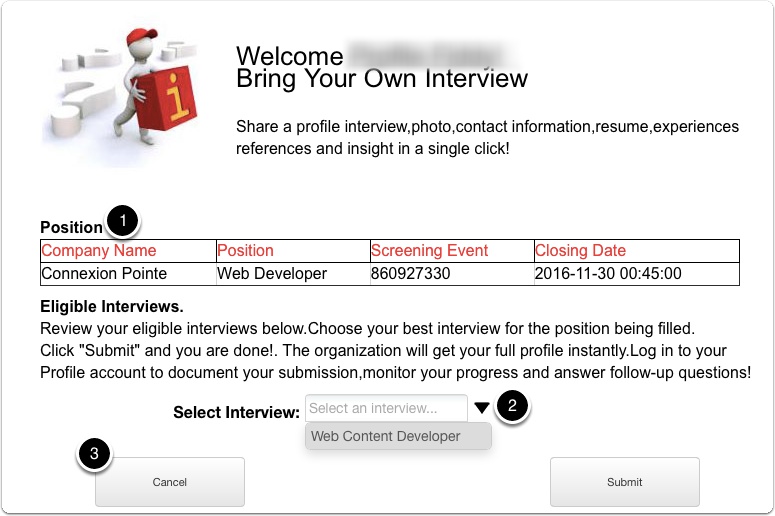
The Bring Your Own Interview Page opens. This is where you can select the interview you’d like to submit.
1. This is the name of the company, and the position they’re screening to fill. You’ll also see the closing date for the screening event here. If you change your mind, for now, you can make a note of it so you can submit at a later time.
2. Click the upside-down triangle to see a drop-down list of interviews in your Pointe Profile® account that are eligible to be submitted for this screening event. Note: Only eligible interviews that appear in this list.
3. If you change your mind about submitting a Pointe Profile® interview, click “Cancel” to return to the previous page.
7.2 BYOI: Bring Your Own Interview
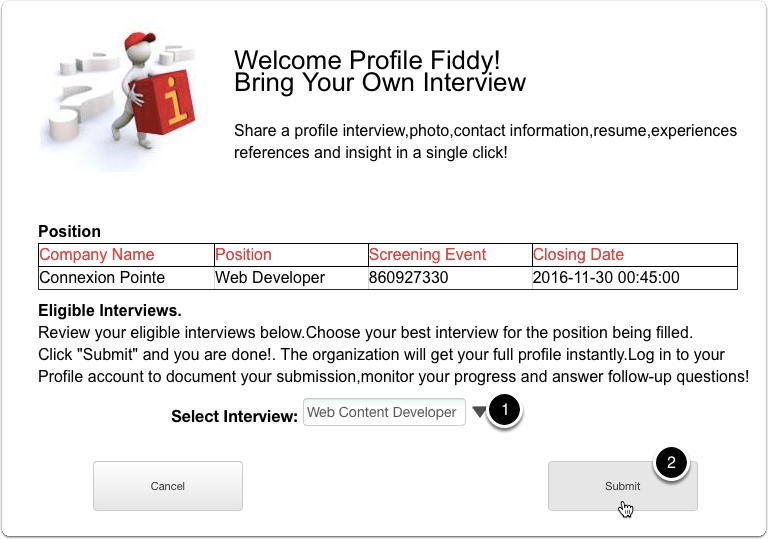
We have an eligible interview already prepared for Web Content Developer so let’s submit this interview now.
1. Select the “Web Content Developer Interview” in the “Select Interview” field.
7.3 BYOI: Bring Your Own Interview
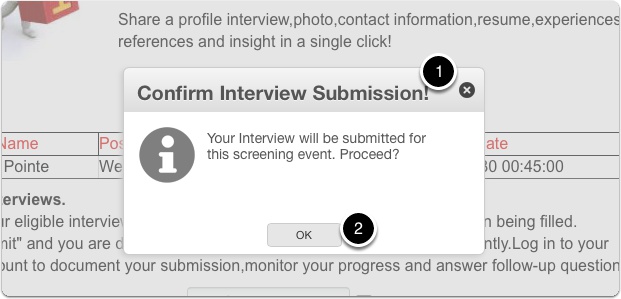
The “Confirm Interview Submission” confirmation box opens.
1. To stop the submission, close the confirmation box by clicking the “X” in the top right corner.
2. To proceed with the submission, click “OK.”
7.4 BYOI: Bring Your Own Interview – Thank You Page

The “Thank you for your submission!” page appears. Congratulations, You just made your first Pointe Profile® interview submission!
7.5 BYOI: Bring Your Own Interview – Thank You Page
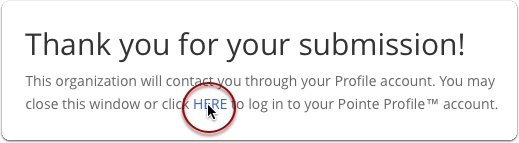
You can close the window here or click the link circled above to log in to your Pointe Profile® account.
7.6 BYOI: Bring Your Own Interview – Logged Out

This will bring you back to the login page.
Did you know, that if your Pointe Profile® is complete, you can submit it to companies that don’t have Pointe Savant® accounts? At Connexion Pointe® we call this an “Open Submission.” Making an “Open Submission is easy – I’ll show you how to do it now.
8. What’s Next? Following up, of course.

Your Pointe Profile® gives recruiters actionable information at first contact. Another great feature is that Pointe AskMe™ provides an immediate channel for recruiters to follow up with you with more questions. Let’s take a look at how Pointe AskMe™ works now.
Pointe AskMe™
Overview: Pointe AskMe™ is our response to slow and inefficient follow-up screening. Pointe AskMe™ is a text-based communication system built-in to all of our applications. It enables quick, easy and inexpensive follow-up communication between recruiters and candidates. Recruiters type their questions or comments, select a response date and click send. An alert appears in the candidate’s Pointe Profile® account, where the candidate can immediately respond within the allotted time. Candidates can display previous Pointe AskMe™ questions in their Pointe Profile®, saving more time and effort. Pointe AskMe™ adds value by offering recruiters searchable text-based information in addition to video interviews. The system also tracks the candidate’s response time (which is viewable on the “Statistics” tab) as an incentive to respond quickly to recruiter inquiries.
1. The Pointe AskMe™ display.
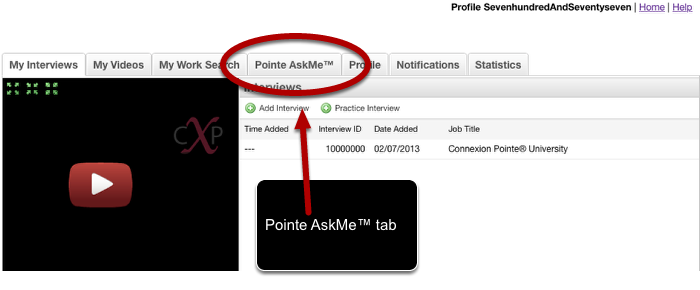
Think of Pointe AskMe™ like a “frequently asked questions” section of your Pointe Profile®. You can respond to a particular question or questions and then post your response to avoid answering the same question repeatedly. Recruiters can view your previous AskMe responses by clicking the AskMe tab on your profile.
1.1 The Pointe AskMe™ tab display.
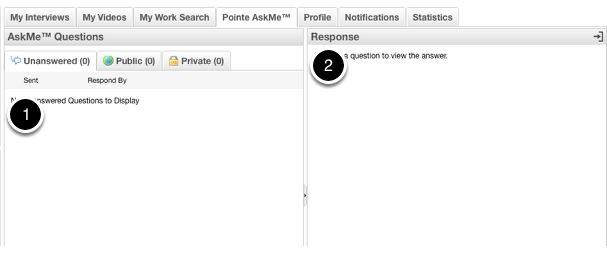
If you have not responded to any Pointe AskMe™ questions, the tab display will be similar to the photo above.
1. The questions and the date they were initiated will appear here.
2. Your response to the questions will appear here.
Remember – Pointe AskMe™ questions are initiated by recruiters that want to follow up with you – let’s take a look at how the process works.
1.2 The Pointe AskMe™ question window.
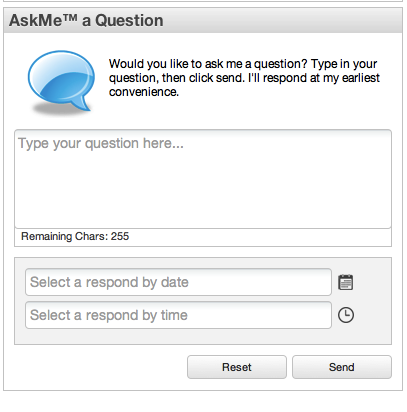
After reviewing your Pointe Profile®, an organization can ask you follow up questions via the “AskMe™ a Question” dialog box. You can create your own Pointe AskMe™ questions to speed things along in the screening process.
1.3 No blank spaces!

The “AskMe a Question” dialog box must be completely filled in!
1.4 Enter a question in the question dialog box.

1. The recruiter enters a question in the space provided.
2. Note the remaining character count in the area below. Questions cannot exceed the character limit.
1.5 Choose a date.

1. The recruiter chooses a deadline for the candidate’s response by clicking the calendar icon.
2. A calendar appears to aid in the selection.
1.6 Dates cannot be entered manually.
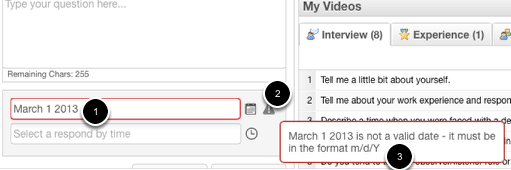
1. Dates cannot be entered manually – the process described in the previous step must be followed. If a date is manually entered,
2. a small warning icon appears next to the calendar icon and
3. a dialog box appears indicating the error.
1.7 Choose a time.
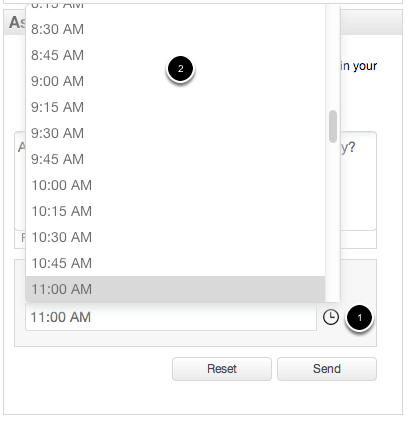
1.The recruiter selects a time for the deadline by clicking the clock icon.
2. A drop-down menu appears and a time can be chosen.
Note: Times cannot be entered manually. This is the process that must be followed. All times presented are UTC.
1.8 Ready to send.
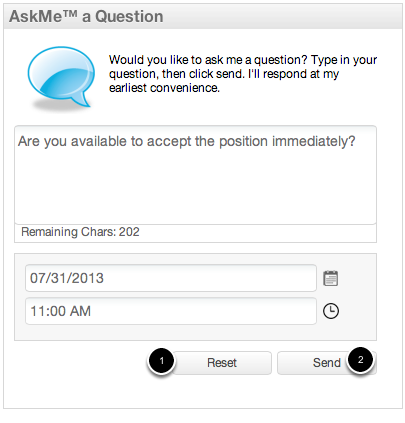
When all of the fileds are completed, the Pointe AskMe™ question is ready to send.
1. If the recruiter would like to start over or make changes, they can click “Reset.”
2. If the recruiter is satisfied with their Pointe AskMe™ question, they’ll click “Send.”
1.9 Click refresh in the My Alerts pane.
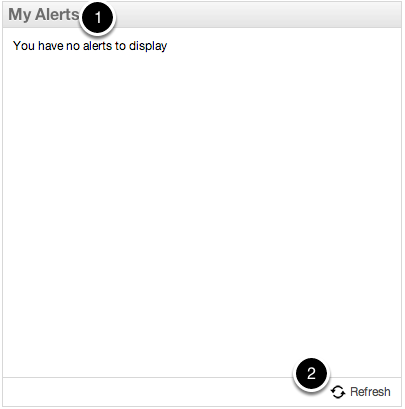
1. On the Pointe Profile® dashboard is the “My Alerts” pane.
2. You can ensure they are updated by clicking the “Refresh” button.
1.10 The question arrives.
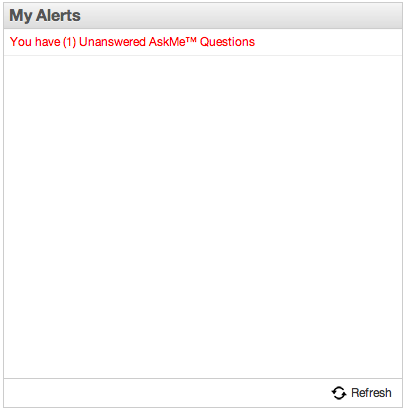
When a recruiter sends a Pointe AskMe™ question, you’ll be notified of it here. Just click on the alert to view it.
1.11 AskMe tab is automatically selected.

The Pointe AskMe™ tab is automatically selected, where you can view the question and respond.
1.12 Unanswered Pointe AskMe™ questions.
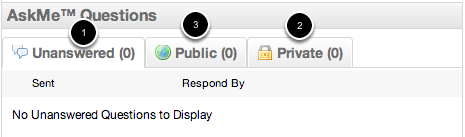
There are three sub-tabs under the Pointe AskMe™ tab.
1. When a question arrives, it’s placed under the “Unanswered” tab.
2. When the question is answered, it is moved to the “Private” tab, where the candidate can delete it, leave it indefinitely or choose to make it public.
3. When you choose to make the question, and it’s response public, it is moved to the “Public” tab and is displayed whenever your profile is shared.
Let’s look at this process step by step.
1.13 Click to display question.
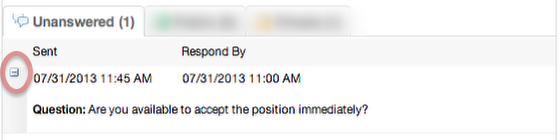
The question arrives and is placed on the “Unanswered” tab. The time sent and response deadlines are visible. Click the question.
1.14 The Response pane.
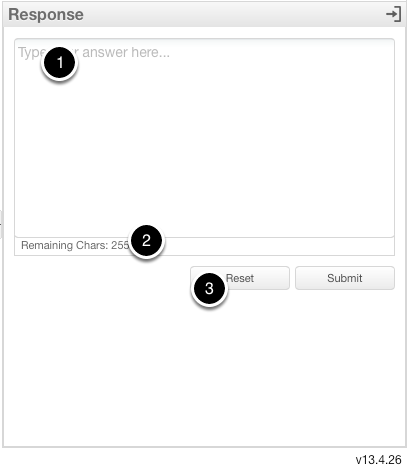
1. The “Response” pane appears, where you can enter a response to the question.
2. Your response has to be less than 255 characters.
3. If you want to make changes or start over, a “Reset” button is available.
1.15 Your response.
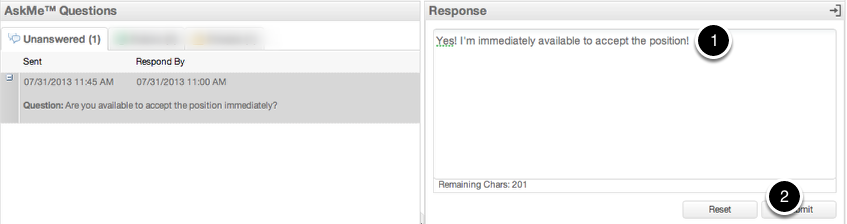
1. Type your response and
1.16 The Private tab.

The question and the response are moved to the “Private” tab, where it can be deleted, stored indefinitely, or made public by clicking the blue earth icon.
1.17 The “Public” tab.

When you elect to make the question and its response public, they are moved to the public tab and included whenever you share your profile.
1.18 Making a question private again.

A candidate may choose to make a public question private again by clicking the padlock icon. The question is immediately restored back to the “Private” tab. Questions on the private tab are not included when you share your profile.